How to Fix Peeling Wall Paint in Damp Rooms: Step-by-Step DIY Guide
Sweeping behind the parlour sofa only to find a pile of crisp, curled paint flakes on the floortiles—or watching a freshly painted bedroom wall puff up into ugly, hollow blisters after two weeks of heavy rain—is one of the most maddening sights for any homeowner. Across Nigeria, blistering emulsion paint and crumbling lower walls are an everyday battle in bungalows, ground-floor flats, and poorly ventilated bathrooms. Many people call a neighbourhood painter to scrape the loose flakes and roll a fresh coat of paint straight over the patch, only to watch the new paint bubble and peel right back off within a month.
When paint lifts away from a cement-rendered wall, the paint itself is rarely to blame. Instead, moisture trapped inside the sandcrete blockwork or condensing on the surface pushes outward against the paint film until the bond snaps. Mastering how to fix peeling wall paint the right way means stopping that hidden moisture first, neutralizing any chalky white wall salts, sealing the raw plaster with the right primer, and skimming the surface flush before your roller ever touches a tin of emulsion.
Drawing from hands-on masonry and painting experience across Nigerian homes, this guide walks you through every step required to restore damaged walls so your repair stays smooth and dry through both the rainy season and Harmattan.
Step 1: Diagnose Why You Need to Fix Peeling Wall Paint
Before you touch a scraper, look closely at where the paint is failing on the wall. The height and texture of the blister tell you exactly where the water is coming from.
| Wall Location | Surface Appearance | Root Cause | Required Fix |
|---|---|---|---|
| Bottom 1 to 3 feet | White powdery crystals and crumbling render | Rising ground damp | Seal exterior base and prime with alkali sealer |
| Middle or upper wall | Soft wet blisters in one concentrated patch | Leaking pipe or roof | Fix plumbing or roof leak before scraping |
| Bathroom or kitchen | Peeling sheets with dark grey or black dots | Trapped steam and mold | Kill spores with vinegar and use satin paint |
| Across dry flat walls | Dry brittle flakes revealing dusty filler | Unprimed wall putty | Scrape to bare plaster and apply binder primer |
Understanding these four patterns prevents wasted money on paint when planning how to fix peeling wall paint:
- Rising damp along the floor skirting: Ground-floor walls built without a thick polythene damp-proof course (DPC) suck groundwater up through the sandcrete blocks like a sponge. As that water evaporates into your room, it leaves behind white, salty crystals called efflorescence that push paint off the wall.
- Hidden plumbing or external rain leaks: A blister appearing halfway up an interior wall usually points to a weeping PVC pipe buried inside the blockwork, a cracked exterior wall render, or rainwater splashing up from a broken roof gutter outside.
- High indoor humidity: Bathrooms with small louvre windows and kitchens without extractor fans trap warm steam against cool plaster, softening cheap emulsion paint until it peels in rubbery sheets.
- Painting over dusty POP or wall putty: When painters sand wall screeding compound and roll topcoat paint straight over the dust without applying a penetrating primer, the paint never bonds to the wall at all.
Important Safety Warnings Before You Scrape
Scraping old paint and dry plaster throws fine dust and sharp flakes into the air. Keep these precautions in mind before starting your repair:
- Wear a dust mask and safety glasses: Flaking paint and salty plaster dust irritate your eyes and lungs immediately, especially when scraping overhead near the ceiling.
- Switch off wall sockets near damp patches: Wet plaster conducts electricity; if paint is bubbling right around a light switch or power socket, turn off that room’s circuit breaker at the distribution board before touching the wall with a metal scraper.
- Never sand moldy paint dry: If your peeling wall has black or green mildew spots, dry sanding launches millions of live spores into the room; clean the area first using the safe vinegar treatment in our guide on How to Remove Mold from Bathroom Walls Safely.
- Protect your floor tiles: Spread old bedsheets, empty cement sacks, or nylon tarps along the floor so wet filler and primer splatters do not stain your tile grout.
Tools and Materials Needed for How to Fix Peeling Wall Paint
You can find every tool and compound needed for how to fix peeling wall paint at any local paint depot or building materials market in Nigeria:
- Metal putty knives: One narrow 3-inch (75 mm) scraper for prying off loose blisters and one wide 6-inch (150 mm) taping knife for smooth skimming.
- Stiff wire brush and a dry 3-inch paintbrush: For scrubbing away crusty white salt deposits and sweeping dust out of scraped edges.
- Sandpaper sheets: Coarse 80-grit paper for knocking down hard paint ridges, plus fine 180-grit and 220-grit paper wrapped around a flat wooden sanding block.
- White vinegar and clean water: For neutralizing alkaline salt crusts or bathroom mildew on damp plaster.
- Alkali-resistant wall primer or penetrating sealer: Solvent-based alkali-resistant primer, white cement primer, or a 1:3 mixture of PVA bonding glue (Topbond) and water for dry interior walls.
- Acrylic wall filler or waterproof cement putty: Ready-mixed exterior/interior acrylic wall putty (avoid pure Gypsum POP on damp lower walls, as raw POP absorbs moisture and rots).
- Matching topcoat paint and a medium-nap roller: High-quality acrylic emulsion, matte, or washable satin paint matched to your existing wall colour.
Step 2: Stop the Moisture Source and Dry the Wall
No primer or filler on earth will stick to a wall that is actively wet from the inside. Before you begin the physical scraping steps for how to fix peeling wall paint, check the back of the affected wall:
- Inspect the outside wall: Walk outside your house and look at the exterior plaster directly behind the indoor blister. If rainwater from the roof splashes mud onto the lower wall, clear the drainage channel and seal any exterior masonry cracks using the steps in our guide on How to Fix Cracks in Plaster Walls Permanently.
- Check adjacent bathrooms and pipes: If the peeling wall backs onto a shower or washbasin, check whether water is seeping through unsealed tile joints or a dripping fixture—if you spot a leaky tap, fix it first with our tutorial on How to Fix a Leaking Tap.
- Neutralize white chalky salt (efflorescence): If you see fuzzy white powder under the peeling paint, scrub it off dry with a stiff wire brush, wipe the bare plaster with a cloth dampened in equal parts white vinegar and water to neutralize the alkaline salts, and let it dry.
- Dry the wall completely: Open all windows and run a standing fan or ceiling fan pointed at the bare patch for 24 to 48 hours until the cement feels bone-dry and warm to the touch.
Step 3: Scrape Away All Loose and Bubbling Paint
The biggest mistake beginners make when figuring out how to fix peeling wall paint is being too gentle with the scraper. If you leave half-loose paint edges clinging to the wall, those edges will curl upward as soon as wet primer touches them.
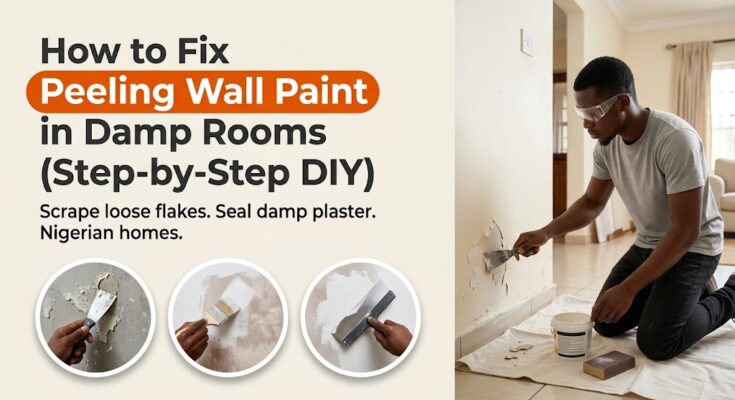
- Slide your 3-inch scraper under the blister: Hold the metal putty knife at a low 30-degree angle and push it under the cracked or bubbled paint, working outward from the centre of the damaged patch.
- Keep scraping until you hit stubborn, solid paint: Flake off every piece that lifts easily; stop only when the blade hits paint that is bonded tightly to the cement render.
- Tap the plaster for hollow spots: Tap across the exposed grey plaster with your knuckles; if a section sounds hollow like a drum or crumbles into sand, chip away the loose shell and follow our masonry tutorial on How to Patch a Hole in a Wall with Cement or Plaster.
- Feather-sand the sharp paint cliff: Wrap 80-grit sandpaper around a flat wooden block and scrub firmly along the jagged border where the old paint meets the bare wall until the sharp step tapers into a smooth slope.
- Sweep away all dust: Brush the entire patch and surrounding wall thoroughly with a dry paintbrush, then wipe once with a barely damp cloth so zero chalky dust remains.
Step 4: How to Fix Peeling Wall Paint by Priming Bare Plaster
Never apply wall filler or fresh paint directly onto bare, scraped plaster. Exposed cement render and old chalky undercoats are porous and dusty; they suck the liquid moisture out of wet filler instantly, causing your new patch to crack and peel off again.
Apply the right primer for your wall’s condition:
- For walls that suffered from dampness or salt crusts: Brush on one generous coat of solvent-based alkali-resistant wall primer (or a waterproofing damp-seal primer available at paint depots for roughly ₦4,500 to ₦9,000 per 4-litre tin). For broader background on how alkali-resistant primers and moisture barriers protect masonry surfaces, see Wikipedia’s overview of Primer (paint).
- For dry walls where paint peeled over dusty screeding: Brush a sealing coat of acrylic wall primer—or 1 part PVA bonding glue mixed with 3 parts clean water—over the bare patch and overlap it 2 inches onto the surrounding sanded paint edges.
- Let the primer cure: Allow the primed wall to dry for 2 to 4 hours until it feels tack-free and firm.
Step 5: Skim-Coat the Recessed Patch Flush
Even after sanding the edges, the scraped area will sit slightly lower than the rest of your painted wall—especially if the old wall had three or four thick layers of paint built up over the years. Painting straight over that sunken crater leaves an ugly shadow on the wall whenever the parlour lights are turned on.
Follow these skimming steps when learning how to fix peeling wall paint so the repaired spot becomes completely invisible:
- Scoop acrylic wall filler onto your 6-inch knife: Use a ready-mixed acrylic wall putty or waterproof skimming paste rather than raw chalky POP if the room is humid.
- Spread a thin coat across the shallow recess: Hold the wide blade at a 30-degree angle and pull the paste smoothly across the scraped patch, pressing firmly at the outer borders so the filler feathers cleanly over the old paint line.
- Keep layers thin: If the scraped recess is deeper than 2 millimetres, apply two thin coats rather than one thick blob, letting the first coat dry for 2 hours before applying the second.
- Block-sand with 220-grit sandpaper: Once the filler dries bright white (after 3 to 4 hours), wrap 220-grit sandpaper around your wooden block and sand lightly in circular motions. Run your palm across the border with your eyes closed—you should feel zero ridge between the patch and the old wall.
- Spot-prime the sanded filler: Wipe away the sanding dust and brush a thin coat of primer (or your wall paint diluted with 20% water) strictly over the bare filler patch so it does not cause a dull, chalky “flashing” mark under your final paint.
Step 6: Apply Two Coats of Breathable or Moisture-Resistant Paint
Once your spot-primer is dry, you are ready to complete your project on how to fix peeling wall paint and restore the room’s colour:
- Stir your paint thoroughly: Use a clean wooden stick to stir the emulsion or satin paint from the bottom of the bucket so the pigment and acrylic binder mix evenly.
- Cut in and feather with a brush or mini-roller: Roll a thin, even first coat over the repaired patch, rolling lightly outward past the edges of the repair to blend the texture with the existing wall.
- Wait 2 to 4 hours before the second coat: Never rush the second coat while the first layer is still cold and damp to the touch.
- Choose the right finish for the room: In dry living rooms and bedrooms, a quality matte or silk acrylic emulsion breathes well. In steamy bathrooms, kitchens, or laundry corners, upgrade to a washable acrylic satin or kitchen-and-bathroom paint that repels surface condensation.
Common Mistakes to Avoid When Fixing Peeling Paint
Avoid these costly shortcuts when tackling how to fix peeling wall paint:
- Painting over damp plaster during heavy rains: Trapping moisture behind fresh paint guarantees new water blisters within two weeks; always wait until the wall is 100% dry.
- Using oil-based gloss paint to “trap” rising damp: Many landlords coat the bottom 3 feet of a damp parlour wall with thick oil gloss paint, thinking it will hold the water back; instead, groundwater pressure fills the gloss film like a water balloon until it bursts and rips the plaster off with it.
- Skipping the skimming step: Painting directly over scraped paint craters leaves permanent ragged outlines across your wall.
- Sanding with bare fingers instead of a block: Your fingertips press down into the softer filler and leave wavy hollows, whereas a flat wooden block rides level across the surrounding wall.
Frequently Asked Questions (FAQs)
Why does my wall paint keep peeling near the floor in Nigeria?
Paint peeling along the bottom 1 to 2 feet of a wall is caused by rising damp (capillary action), where groundwater soaks upward through porous sandcrete blocks and foundation mortar when a building lacks an intact damp-proof membrane. Along with scraping and using an alkali-resistant sealer indoors, check that rainwater is draining away from the outside foundation wall and that exterior plaster stops just above the damp ground level.
Can I just paint straight over peeling paint after scraping it?
When you know how to fix peeling wall paint properly, you should never roll topcoat paint straight onto bare scraped plaster. Always sand the rough edges, apply a primer to seal the dusty render, and skim-coat the sunken patch with acrylic wall filler first so the repair sits flush and stays bonded.
How do I stop bathroom wall paint from bubbling because of shower steam?
First, make sure you open the bathroom window and leave the door slightly ajar for 20 minutes after every hot bath or bucket shower so steam escapes. When repainting, scrape off the flaking emulsion, clean the bare wall with white vinegar to kill any hidden mildew spores, prime with an alkali-resistant sealer, and finish with two coats of moisture-resistant acrylic satin paint.
Final Thoughts
Taking the time to track down the moisture source, scrape back to sound plaster, seal with an alkali-resistant primer, and feather-skim the recess proves just how straightforward it is to master how to fix peeling wall paint. Instead of hiding blistered walls behind curtains or furniture, your rooms will stay crisp, smooth, and flake-free for years.