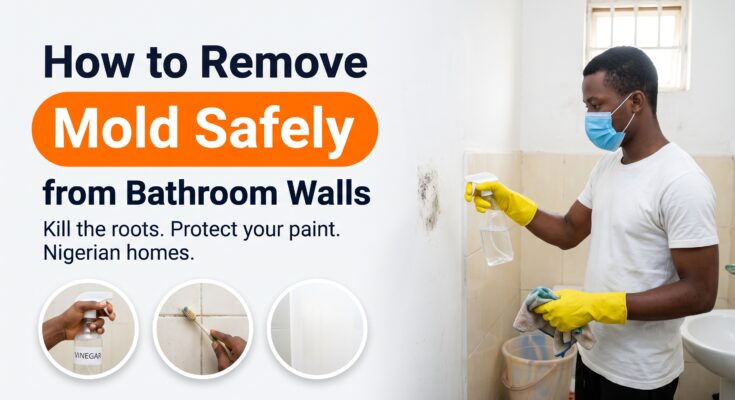
It usually starts as a few harmless-looking grey or black pepper spots on the ceiling above the shower, or a dark shadow creeping along the tile grout near the floor. Left alone for a few weeks, those tiny dots merge into a fuzzy black patch that leaves the entire room smelling damp and musty. Figuring out how to remove mold from bathroom walls safely before those spores spread into the plaster will save you from peeling paint and recurring respiratory irritation.
Across Nigeria, bathroom dampness is a year-round problem that gets much worse during the heavy rainy season. When warm steam from a bucket bath or hot shower stays trapped inside a bathroom with tiny louvre windows and poor airflow, the damp walls turn into an ideal breeding ground for mold.
Most people panic when they see black mold and immediately reach for the strongest bleach they can find. They scrub the painted wall, the black stains magically disappear, and they think the job is done. But a few weeks later, the mold comes back even darker and thicker.
Why? Because on porous surfaces like painted plaster, bleach does not kill the root of the mold. It only bleaches the surface color white, while the water content in the bleach actually feeds the hidden roots!
In this step-by-step DIY guide, we are going to look at the chemistry of household mold. You will learn the crucial difference between treating non-porous ceramic tiles and porous painted walls, how to kill the root system safely using ordinary household white vinegar, and what you must do to stop those dark spots from ever returning.
Important Health and Safety Warnings
Before you start spraying chemicals in a small, enclosed bathroom, you must protect your lungs and skin. Mold spores are microscopic and become airborne the second you start scrubbing.
- Never mix household bleach with vinegar or ammonia: This is the most dangerous mistake DIYers make. Mixing bleach with acidic liquids (like vinegar or toilet bowl descalers) creates toxic chlorine gas. If you switch from bleach to vinegar, wash the wall thoroughly with plain water and wait 24 hours in between.
- Wear a mask and gloves: Always wear an N95 or standard medical face mask and rubber gloves. Inhaling concentrated mold spores can cause severe respiratory irritation, coughing, and allergic reactions.
- Keep the door and windows open: Create cross-ventilation before you begin. If your bathroom has an extractor fan, turn it on and leave it running.
- Do not dry-brush live mold: Never take a dry broom or duster to a patch of dry, fuzzy mold. You will simply launch millions of spores into the air, where they will land on your towels, toothbrush, and other rooms. Always dampen mold with a cleaning solution before wiping it.
Method 1: The White Vinegar Solution (Best for Painted Walls & Ceilings)
If the mold is growing on your plastered bathroom walls, concrete ceiling, or drywall, do not use bleach. Porous materials allow mold roots (mycelium) to grow deep beneath the surface of the paint. Bleach molecules are too large to penetrate the paint; they stay on the surface, wipe away the colour, and leave the water behind to feed the roots.
Distilled white vinegar is a mild acid that kills about 82% of mold species. More importantly, it penetrates porous surfaces to attack the root system, meaning the mold actually dies instead of just turning invisible.
What You Will Need
- Undiluted white vinegar (available in the baking or condiment aisle of any supermarket)
- An empty, clean spray bottle
- Baking soda (optional, for scrubbing power)
- Soft sponge or microfiber cloth
- Clean water and a towel
Step-by-Step Instructions
- Fill the spray bottle: Pour plain, undiluted white household vinegar directly into your spray bottle. Do not dilute it with water—you need the full acidic strength to penetrate the paint.
- Soak the moldy patch: Spray the vinegar generously over the mold spots and the surrounding clear area (mold spores often spread an inch or two beyond what you can see).
- Let it dwell for 1 hour: Walk away. Vinegar needs time to break down the mold’s cellular structure. You will notice a strong salad-dressing smell, but this will dissipate completely once the wall dries.
- Wipe away the dead mold: After an hour, dampen a microfiber cloth or soft sponge with warm water and wipe the wall clean. Do not scrub aggressively with a hard brush, or you will strip the softened paint right off the plaster.
- For stubborn stains, use a baking soda paste: If a dark shadow remains after wiping, mix a little baking soda with water to form a paste. Rub it lightly over the stain and wipe it away. Baking soda is a natural, non-toxic abrasive that also absorbs leftover moisture and odours.
- Dry the wall: Use a clean towel to pat the wall completely dry. Mold hates a dry environment.
Method 2: The Bleach Approach (Strictly for Ceramic Tiles and Grout)
While bleach fails on painted plaster, it is highly effective on non-porous surfaces like glazed ceramic wall tiles, glass shower doors, and fibreglass bathtubs. Because mold cannot grow roots into glass or baked ceramic, the bleach successfully destroys the surface spores and lifts deep stains out of the cement grout lines.
(Note: If your bathroom floor tiles have widespread black grout, we cover a deeper restoration process in our guide on How to Clean and Seal Floor Tiles.)
What You Will Need
- Household bleach (like Jik or Hypo)
- Cold water (hot water deactivates the active ingredients in bleach)
- Spray bottle or bucket
- Stiff nylon brush or an old toothbrush (never use a wire sponge on glazed tiles)
Step-by-Step Instructions
- Mix your solution: In a well-ventilated bathroom, mix 1 part household bleach to 10 parts cold water in a bucket or spray bottle.
- Apply to the tiles and grout: Spray or sponge the bleach solution directly onto the moldy tiles and dark grout joints.
- Wait 10 to 15 minutes: Let the bleach sit on the surface. You will watch the black stains slowly fade to light brown and then disappear.
- Scrub the grout lines: Take your stiff nylon brush or old toothbrush and scrub strictly along the cement grout lines.
- Rinse thoroughly: This is crucial. Wash the wall down with a showerhead or a sponge soaked in plain, clean water to remove all bleach residue. If left on the wall, bleach can degrade the cement grout over time.
Method 3: Hydrogen Peroxide (The Odourless Alternative)
If you hate the eye-watering smell of bleach and despise the sour scent of vinegar, 3% hydrogen peroxide is a fantastic, odourless alternative. It is highly effective at lifting mold stains, it fizzes to pull dirt out of porous surfaces, and it breaks down into harmless water and oxygen, leaving no toxic residue.
- Pour 3% hydrogen peroxide (available cheaply at any local pharmacy) into a dark spray bottle. (Peroxide loses its strength quickly when exposed to sunlight, so keep it in an opaque bottle).
- Spray the moldy wall or tiles until saturated.
- Wait 10 to 15 minutes while it bubbles and fizzes.
- Scrub lightly with a sponge or brush.
- Wipe clean with a damp cloth.
How to Stop Bathroom Mold from Coming Back
Removing the mold is only fighting the symptom. If you do not fix the moisture problem, the black spots will return within a month. Mold only needs three things to thrive: oxygen, food (dust, soap scum, or the paper backing on drywall), and moisture. You can only control the moisture.
1. Fix Hidden Plumbing Leaks
Check the area directly behind your showerhead and under your washbasin. A slow, hidden drip inside the wall keeps the plaster permanently wet. If you have a dripping fixture contributing to the humidity, fix it immediately using our guides on How to Fix a Leaking Tap or How to Unclog a Bathroom Sink Standing water is mold’s best friend.
2. Improve Daily Ventilation
The steam from a hot shower condenses on the cold walls and ceiling, leaving them dripping wet.
- Open the window: Always open the bathroom window by at least a few inches during and after bathing.
- Leave the door ajar: When you finish in the bathroom, leave the door open to allow dry air from the hallway to circulate.
- Install an extractor fan: If your bathroom has no windows, installing a ceiling or wall extractor fan that vents to the outside is the only permanent solution for managing steam.
3. Squeegee the Walls
It takes less than 30 seconds to run a cheap rubber window squeegee (or a dry towel) down the tiled walls and glass doors after you bathe. Sending that excess water down the drain instead of letting it evaporate into the air drastically lowers the room’s humidity.
4. Paint with Mold-Resistant Paint
If you have scrubbed your bathroom ceiling three times this year and the mold keeps returning, it is time to upgrade your paint. Standard emulsion paint absorbs moisture. After killing the current mold with vinegar and letting the wall dry completely, coat the ceiling with an oil-based primer (which seals out moisture) and finish with a high-quality acrylic gloss or semi-gloss paint specifically labelled for kitchens and bathrooms. Water will bead up on gloss paint instead of soaking in.
When to Stop and Call a Professional
While surface mold in a bathroom is a standard DIY cleanup job, there are times when you should put the spray bottle down:
- The mold covers a massive area: If the black mold covers an area larger than 1 square metre (roughly 3 feet by 3 feet), the spore count is too high for simple DIY removal.
- The wall feels soft or crumbling: If you press on the plastered wall or drywall and it flexes, crumbles, or feels spongy, the mold has eaten through the structural integrity of the material. The wall board must be cut out and replaced.
- It is inside the air conditioning vent: If mold is growing thickly on the louvres of your central AC or split-unit blower, spraying the outside will not help. The internal coils need professional chemical cleaning.
Frequently Asked Questions (FAQs)
Will painting over black bathroom mold kill it?
No. Never paint directly over live mold. The mold will continue to grow beneath the fresh coat of paint, eventually causing the new paint to bubble, peel, and flake off. You must kill the root system with white vinegar, clean the stain, dry the wall, and apply a stain-blocking primer before applying fresh paint.
Can I mix vinegar and baking soda together in a spray bottle?
While mixing vinegar and baking soda creates a fun, fizzy volcano effect, the chemical reaction actually neutralizes both ingredients, leaving you with mostly saltwater. It is better to spray the vinegar first to kill the mold, wait an hour, and then use a separate baking soda paste to scrub away the leftover stain.
Why is the mold in my bathroom pink or orange instead of black?
Pink or orange slime commonly found around shower drains, the bottom of shower curtains, and grout lines is actually not mold at all—it is an airborne bacterium called Serratia marcescens. It feeds on the fatty deposits found in bar soap and shampoo. You can clean it away easily with a bleach solution or standard bathroom detergent.
Final Thoughts
Learning how to remove mold from bathroom walls safely comes down to using the right tool for the surface. Ditch the bleach when dealing with painted walls and ceilings—white vinegar is your best weapon for killing the root system permanently.
Once your walls are spotless, make it a daily habit to crack the window, leave the door ajar after showering, and wipe down standing water. Keep the humidity out, and you will never have to scrub black spots off your ceiling again.