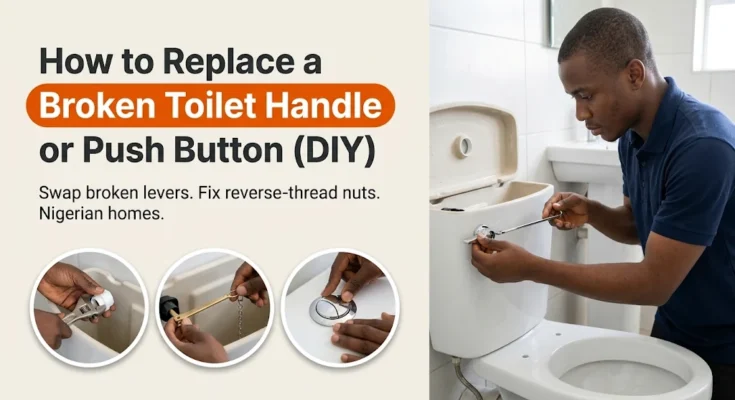
There is a unique kind of panic that hits when you finish using the bathroom, press down on the silver flush handle, and feel it snap off loosely in your hand while the toilet bowl refuses to drain. Across Nigerian homes, plastic toilet levers and dual-flush push buttons take a beating every day from heavy-handed guests and children.
After a year or two, the cheap plastic nut holding the handle snaps, the internal metal arm rusts through from hard borehole water, or the plastic push-button springs collapse. Knowing how to replace a toilet flush handle or push button yourself takes less than ten minutes and costs a fraction of a plumber’s call-out fee.
Many people leave their toilet broken for weeks, choosing to lift the heavy ceramic cistern lid and pull the wet chain by hand—or worse, keeping a plastic bucket of water in the bathroom for manual flushing. When you learn how to replace a toilet flush handle, you do not need to cut pipes or turn off the main house water to fix the problem. The entire mechanism sits above the water line and can be swapped out using just your bare hands and an adjustable spanner.
Once you understand how to replace a toilet flush handle (including the secret “reverse thread” trick that catches most beginners) or snap a new push button into a modern cistern lid, you can restore full flushing power to your bathroom before the next guest arrives.
Step 1: Diagnose How to Replace a Toilet Flush Handle
Before you head to the plumbing materials shop, lift the heavy ceramic lid off the top of your toilet cistern and look inside. Checking the internal mechanism is the first step in how to replace a toilet flush handle so you buy the exact replacement kit required.
| What You Experience | What It Looks Like Inside | The Real Problem | Required DIY Fix |
| Handle pushes down but no flush | Chain is detached or broken | Flapper chain snapped | Reconnect or buy a new steel clip |
| Handle wiggles loosely | Plastic nut is cracked | Loose locking nut | Tighten or replace handle assembly |
| Handle points straight down | Internal metal arm is snapped | Broken trip lever | Method 1: Replace full handle assembly |
| Push button sinks and sticks | Plastic springs are broken | Failed dual-flush button | Method 2: Pop out and replace button |
Checking these internal parts first saves you time when figuring out how to replace a toilet flush handle:
- The handle is fine, but the chain snapped: If the long metal or plastic arm inside the tank is still lifting up and down when you press the handle outside, but the rubber flapper at the bottom isn’t lifting, the thin chain has simply snapped or unhooked. You don’t even need a full tutorial on how to replace a toilet flush handle for this—just reconnect the chain with a stainless steel clip for ₦500.
- The handle spins in a full circle: The small square plastic block holding the handle tight against the ceramic wall has stripped out. Knowing how to replace a toilet flush handle completely is the only permanent cure here.
- The water won’t stop running: If the handle works but water keeps trickling into the bowl long after the flush, the problem is your fill valve or flapper. Combine your knowledge of how to replace a toilet flush handle with our tutorial on How to Stop a Running Toilet: Fix It Yourself.
Important Safety Warnings Before You Start
Working inside a ceramic toilet cistern involves fragile porcelain and standing water. Keep these precautions in mind before starting how to replace a toilet flush handle:
- Lift the lid straight up with both hands: Ceramic toilet lids are heavy, slippery, and brittle. If you drop the lid on your floor tiles while preparing for how to replace a toilet flush handle, it will shatter into razor-sharp pieces—and you cannot buy a replacement lid on its own without buying a whole new toilet. Place it flat on a bath mat or thick towel.
- Turn off the angle valve (optional but safe): While learning how to replace a toilet flush handle doesn’t require draining the tank, it is always safest to turn the small silver isolation valve behind the toilet clockwise to shut the water off just in case you bump the internal fill valve.
- Do not over-tighten plastic nuts: Ceramic cracks easily under excessive wrench pressure. Never use heavy metal grips to crank a plastic nut tightly against the porcelain tank.
Tools Needed for How to Replace a Toilet Flush Handle
You can buy a universal toilet lever kit or a replacement dual-flush button for ₦1,500 to ₦3,500 at any Nigerian plumbing shop when gathering supplies for how to replace a toilet flush handle:
- Replacement Handle Kit: Includes the exterior chrome handle, the threaded square mounting block, a plastic reverse-thread locking nut, and the long internal trip lever arm.
- OR Replacement Push Button: Take your broken button to the market to match the exact hole diameter (usually 38 mm, 48 mm, or 58 mm).
- Adjustable spanner (wrench) or pliers: Essential in how to replace a toilet flush handle when loosening an old, mineral-crusted locking nut.
- Old toothbrush and a clean cloth: To scrub hard borehole water stains off the ceramic mounting hole before sliding the new handle in.
Method 1: How to Replace a Toilet Flush Handle (Side or Front Lever)
Standard side-mount or front-mount levers are the easiest bathroom parts to swap. The golden rule in how to replace a toilet flush handle is remembering that the locking nut inside the tank is reverse-threaded!
1. Disconnect the Old Handle
- Unhook the flapper chain: Reach inside the tank and unclip the thin metal or plastic chain from the end of the long trip lever arm. Let the chain rest on top of the rubber flapper while you work through how to replace a toilet flush handle.
- Unscrew the locking nut (TURN RIGHT TO LOOSEN): Look at the plastic or brass nut holding the handle tight against the inside wall of the tank. Because pressing the lever pushes downward, this nut is reverse-threaded so it doesn’t unscrew itself every time you flush. To loosen it when practicing how to replace a toilet flush handle, grip the nut with your spanner and turn it clockwise (to the right).
- Pull the old handle out: Once the nut comes off the threads, slide the broken internal arm and exterior handle straight out through the front or side hole of the ceramic tank.
- Clean the porcelain mounting hole: Wipe the empty square hole with a damp cloth and an old toothbrush to remove brown borehole scale and mildew so your new washer sits flat.
2. Install the New Flush Handle
- Insert the new lever assembly: Slide the new long internal arm through the ceramic hole from the outside. Make sure the square plastic block seats squarely into the square cutout of the porcelain—a key detail in how to replace a toilet flush handle so the lever cannot spin.
- Slide on the new locking nut: Slip the new plastic locking nut over the internal arm inside the cistern and push it up against the mounting threads.
- Tighten the nut (TURN LEFT TO TIGHTEN): Remember the reverse thread! Turn the plastic nut counter-clockwise (to the left) by hand until it sits snug against the ceramic wall. Give it a gentle quarter-turn with your spanner, but do not over-tighten it.
- Align the internal arm: For a deeper look at how trip levers interact with flush valves inside gravity-fed cisterns, see Wikipedia’s guide on Flush toilet. When completing how to replace a toilet flush handle, confirm that the arm lifts freely without scraping against the front wall of the tank or hitting the floating ball valve.
3. Reconnect the Chain and Test the Flush
- Clip the chain to the new arm: Pull the flapper chain up and hook its clip into one of the small holes along the end of the new lever arm.
- Set the exact chain slack: The most important adjustment in how to replace a toilet flush handle is leaving 1 to 2 centimetres (about ½ inch) of slack in the chain when the handle is at rest. If the chain is pulled tight, the rubber flapper will stay slightly lifted and leak water into the bowl nonstop. If the chain is too loose, pressing the handle won’t lift the flapper high enough for a full flush.
- Test the flush three times: Turn the water supply back on and press the handle down. Once the bowl flushes cleanly and the flapper drops back down to seal tightly, set the ceramic lid gently back on top of the cistern.
Method 2: How to Replace a Toilet Push Button (Top Lid)
Many modern close-coupled toilets in Nigerian flats use a chrome dual-flush push button set directly into the centre of the ceramic lid instead of a side lever. Even if you searched for how to replace a toilet flush handle, fixing a stuck top push button takes less than two minutes using these steps:
1. Remove the Broken Push Button
- Unscrew the chrome button collar: While the lid is sitting on the toilet, press one half of the dual-flush button down with your thumb. Grip the outer chrome ring with your fingers and twist it counter-clockwise until the button assembly unscrews from the central flush valve below.
- Lift the unit out of the lid: Pull the broken button straight up through the round hole in the ceramic lid, or lift the lid carefully with both hands to unscrew a plastic locking nut underneath if your model uses a threaded collar.
2. Adjust the Rods and Install the New Button
- Match the actuator rod length: Look at the two long plastic legs extending from the bottom of your new button and compare them side-by-side with your old broken unit. If the new rods are too long, screw them higher into the button base or snip a few millimetres off the bottom with a sharp utility knife so they do not hold the flush valve open.
- Thread the new button into the lid: Drop the new button assembly through the top hole in the ceramic lid, making sure the two plastic rods line up squarely over the blue (half-flush) and white (full-flush) pads on the internal flush valve.
- Tighten by hand and test: Twist the chrome outer collar clockwise until it sits flat and snug against the porcelain lid. Press both buttons to verify a crisp, springy return. (And if you notice any drips around the water supply pipe behind the bowl while testing, check our guides on How to Fix a Leaking Tap and How to Fix a Leaking PVC Pipe Joint Without a Plumber.)
Common Mistakes to Avoid When Fixing a Flush Handle
Avoid these three costly mistakes when working through how to replace a toilet flush handle:
- Turning the locking nut the wrong way: Forgetting the reverse-thread rule means you will crank your spanner counter-clockwise thinking you are loosening the nut, when you are actually tightening it hard enough to crack the ceramic tank. Always turn clockwise (right) to loosen a toilet handle nut!
- Leaving zero slack in the flapper chain: Pulling the chain tight without 1 cm of slack prevents the rubber flapper from sealing over the drain seat, wasting hundreds of litres of pumped borehole water from your overhead tank every day.
- Buying a thin iron arm for hard borehole water: In Nigerian homes with mineral-heavy or salty borehole water, cheap painted steel lever arms rust and snap within six months. Always choose a solid brass or heavy-duty ABS plastic arm when shopping for how to replace a toilet flush handle.
Frequently Asked Questions (FAQs)
Why does my new toilet handle stick down after I press it?
When learning how to replace a toilet flush handle, a handle that stays stuck in the down position means either the reverse-thread locking nut is tightened too hard against the porcelain wall (pinching the pivot shaft), or the long internal arm is rubbing against the front wall of the tank. Loosen the locking nut by a quarter-turn and bend or adjust the internal arm slightly inward so it drops freely by gravity.
Can I glue a snapped plastic toilet handle back together with superglue?
No. Every time someone flushes the toilet, the lever pivot endures strong downward leverage against water pressure on the flapper. Superglue or epoxy will snap again within a day or two. Because universal replacement levers cost only ₦1,500 to ₦2,500 and take ten minutes to fit, following the proper steps for how to replace a toilet flush handle is far cheaper and more reliable than gluing broken plastic.
How do I know if I need a front-mount, side-mount, or angled toilet handle?
Stand in front of your closed toilet and look at where the handle sits on the cistern. If the handle sits flat on the front face, buy a front-mount lever; if it sits on the left or right curved corner or side wall, buy a side-mount (or universal multi-angle) lever. Taking your old broken arm to the plumbing shop guarantees an exact match.
Final Thoughts
Taking ten minutes to unhook the flapper chain, loosen the reverse-threaded nut clockwise, and slide a rust-proof lever into your cistern proves just how easy it is to master how to replace a toilet flush handle. Instead of lifting a heavy porcelain lid by hand or keeping a flushing bucket in the corner, your bathroom will work smoothly and reliably with a single press.