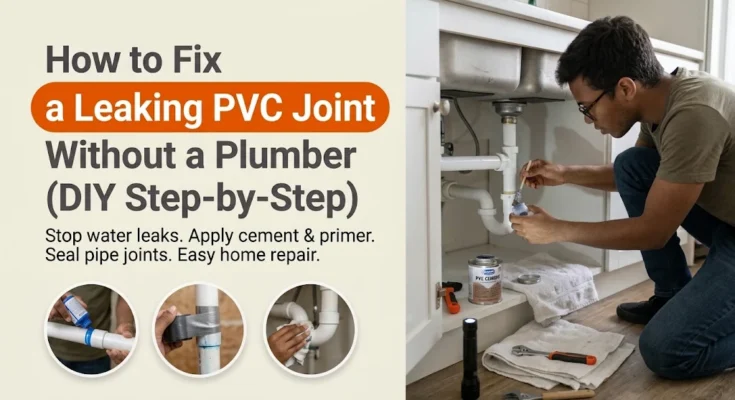
Finding a pool of water under the kitchen sink or watching a steady drip soak the wall behind your bathroom washbasin can instantly ruin your morning. Across Nigerian homes, white or grey PVC plastic pipes handle the majority of household drainage and water supply lines. While PVC is durable, plastic plumbing joints frequently spring leaks over time—especially when water pressure surges, pipes are bumped by stored buckets, or the original tiler rushed the solvent welding job and failed to coat the entire pipe socket with cement.
When a PVC joint starts weeping water, many homeowners panic and call an emergency plumber, paying hefty service fees for what is essentially a twenty-minute fix. You do not need to replace your entire drainage network or cut open concrete walls for a minor joint leak. Knowing how to fix a leaking pvc pipe joint yourself lets you cut out the damaged section and permanently weld a fresh coupling in place using inexpensive supplies found at any local building materials market.
Mastering how to fix a leaking pvc pipe joint is one of the most practical home maintenance skills you can acquire. Drawing from practical plumbing experience across Nigerian residential properties, this guide walks you through the exact steps required to diagnose plastic pipe leaks, prepare the surfaces, apply primer and solvent cement correctly, and test your repair without a single drop escaping.
Why PVC Pipe Joints Leak in Nigerian Homes
Before grabbing a hacksaw or running out to buy cement, take a close look at where the water is coming from. Understanding why the joint failed helps you choose the right repair method when learning how to fix a leaking pvc pipe joint:
- Incomplete solvent welding during installation: PVC pipes do not “glue” together like paper or wood. Solvent cement is actually a chemical welding agent that melts the outer layer of the pipe and the inner wall of the fitting, fusing them into a single continuous piece of plastic. If the installer skipped the primer or missed a section of the socket, microscopic gaps remain where water eventually forces its way through.
- Shifting pipes and physical strain: Drainpipes connected to heavy kitchen sinks or washing machine hoses vibrate constantly. If the vertical stack is not securely strapped to the wall with pipe clips, that constant shaking stresses the glued elbows and T-joints until the joint cracks.
- Water hammer and pressure surges: In supply lines or overhead tank risers, sudden valve closures create shockwaves known as water hammer. Unanchored PVC elbows take the brunt of this force, leading to hairline cracks around the fitting rim.
- Brittle plastic from sun exposure: PVC pipes left exposed on open-air balconies or exterior walls degrade over years under intense tropical sunlight, turning brittle and cracking easily if kicked.
Important Safety and Workspace Precautions
Working with PVC cement and drain lines involves chemical solvents and occasionally sewage water. Keep these precautions in mind before starting:
- Work in a well-ventilated area: PVC primer and solvent cement release strong, volatile chemical fumes. Open nearby windows, turn on extractor fans, or work on an open veranda.
- Wear rubber gloves and safety glasses: Solvent cement burns if it splashes into your eyes, and grey drainage lines often carry unpleasant greywater. Always wear protective eyewear and gloves.
- Shut off the water supply or stop using the drain: If you are repairing a pressurized supply line, close the main isolating valve or overhead tank tap immediately. If it is a drainage pipe, avoid using that sink or shower until the repair has fully cured.
- Keep flames away: PVC cement and purple primer are highly flammable. Never smoke or light matches near an open can of solvent glue.
Tools and Materials Needed
You can pick up all the necessary plumbing supplies at any local hardware store, plumbing depot, or building materials market (such as Alaba, Kure, or Building Materials Market) in Nigeria:
- Hacksaw or PVC cable saw: For cutting cleanly through the damaged pipe section.
- Medium-grit sandpaper (80-grit or 120-grit) or a utility knife: For deburring rough plastic edges and cleaning old pipe surfaces.
- PVC Primer (Purple or Clear): A chemical cleaner that cleans grease and softens the outer plastic skin so the cement can bond properly.
- PVC Solvent Cement (Plastic Pipe Glue): A standard tin of heavy-duty PVC cement (such as Polypipe, Era, or Tiger brand).
- Replacement PVC fitting: Either a standard coupling (socket) or a slip coupling, matched exactly to your pipe diameter (commonly ½-inch, ¾-inch, 1-inch, or 2-inch for drains).
- Clean, lint-free cotton rags: For wiping away water, dust, and excess cleaner.
- Measuring tape and a permanent marker: To measure your cut lines.
Step 1: Diagnose and Isolate the Leaking Joint
Never attempt to patch a weeping PVC joint by smearing wet cement or epoxy putty over the outside of a pressurized pipe while water is actively leaking through. Water prevents exterior sealants from sticking, and internal pressure will blow the patch right off.
- Dry the pipe completely: Wipe down the wet area with a dry rag so you can inspect the exact source of the leak. Look for a hairline crack along the side of an elbow fitting, a wet bead where a pipe enters a T-joint, or a loose threaded connector.
- Determine if it’s pressurized or non-pressurized:
- Drainage and waste lines (larger grey or white pipes under sinks and washbasins) operate under gravity flow; you only need to stop using the fixture while you work.
- Supply lines (thicker white or blue pipes carrying water from tanks or pumps) operate under pressure; you must shut off the water supply upstream and drain the lines completely before cutting.
- Plan your cut: If a fitting is leaking, you cannot simply pull it apart because PVC welds are permanent. When figuring out how to fix a leaking pvc pipe joint, you will need to cut the pipe directly behind the leaking fitting using a hacksaw, remove the damaged piece, and bridge the gap with a new coupling.
Step 2: Cut Out the Damaged Joint Cleanly
Cutting plastic pipe accurately ensures your replacement fittings slide together snugly without laying wide gaps that glue cannot fill.
- Mark your cut lines: Using a permanent marker, measure about 2 inches away from the leaking fitting on both connecting pipes and draw a straight ring around the circumference.
- Cut straight across the pipe: Hold your hacksaw steady and cut squarely through the pipe along your marked line. Take your time so the blade does not wander or cut at an awkward diagonal angle.
- Remove the damaged section: Pull out the leaking elbow or T-joint along with the short pipe stumps attached to it.
- Clean the remaining pipe ends: Use a dry rag to wipe away any residual wastewater or dirt from inside and outside the cut pipe ends sticking out of the wall or floor.
Verification: The cut pipe ends should be clean, square, and free of dirt or jagged plastic shreds.
Step 3: Dry-Fit Your Replacement Parts
Before opening any cans of chemical glue, always perform a “dry fit” to make sure your replacement pipe sections and couplings line up perfectly.
- Deburr the cut edges: Take a piece of 80-grit sandpaper or a utility knife and scrape away any plastic burrs or rough shreds hanging off the outside and inside edges of your freshly cut pipes. A smooth, bevelled edge prevents the pipe from scraping away the fresh cement as you push it into the new fitting.
- Test-fit the coupling: Slide your new coupling or replacement fitting over the pipe ends without any glue. The pipe should slide smoothly into the socket until it hits the internal stop ridge, with a snug fit that has very little side-to-side wobble.
- Measure gap adjustments: If you cut out a 3-inch section of pipe, you will need a replacement pipe segment of the exact same length plus a coupling to bridge the gap. If you are working on rigid, fixed walls where the pipes cannot be pulled apart easily, buy a slip coupling (a coupling without internal stop ridges that slides freely back and forth along the pipe).
Verification: The dry-fitted coupling should slide completely into position with proper alignment before any cement is applied.
Step 4: Prime the PVC Surfaces (Crucial Step)
Skipping PVC primer is the number one reason DIY plumbing repairs fail weeks down the line. Primer chemically softens the dense surface of the PVC so the solvent cement can weld the plastic molecules together.
- Apply purple or clear primer: Dip the applicator brush into the primer tin and scrub it vigorously around the outside of the pipe ends (roughly the length of the fitting socket) and inside the sockets of your new fittings.
- Scrub away factory stamps and grease: On new PVC pipes, factory printing ink and manufacturing oils block glue adhesion; scrub those areas firmly with primer until the glossy shine disappears and the plastic turns dull.
- Let it dry briefly: Allow the primer to dry for about 30 to 60 seconds. It prepares the pores of the plastic to accept the welding cement.
Verification: The treated plastic surfaces should look dull and matte with zero glossy shine remaining.
Step 5: Apply Solvent Cement and Weld the Joint
Solvent cement sets extremely fast—often within 30 to 60 seconds in warm tropical weather. Work quickly and methodically once you open the glue tin.
- Brush an even coat of cement on the pipe: Take the applicator brush attached to your PVC cement tin and paint a generous, even layer around the outside of the pipe end, moving lengthways from the end.
- Brush a thinner coat inside the fitting socket: Paint a lighter layer of cement inside the socket of the coupling or elbow. Avoid applying a thick blob of glue, as excess cement will run down inside the pipe and harden into a dam that blocks water flow.
- Push together and twist one-quarter turn: Immediately push the pipe straight into the fitting socket while it is wet. As you push, give the fitting a one-quarter turn to spread the solvent evenly across the entire joint and eliminate any dry air pockets.
- Hold steady for 30 seconds: Push firmly and hold the joint in place for 30 seconds so the chemical suction does not push the pipe back out of the socket.
- Wipe away excess glue ring: You should see a neat, continuous ring of squeezed-out cement form all the way around the mouth of the fitting. Wipe away any messy drips with a clean cloth.
Verification: A clean, uniform ring of squeezed-out cement should be visible around the entire circumference of the fitting mouth.
Step 6: Allow Curing Time and Test for Leaks
Patience is required before you turn the water back on or let wastewater rush through your fresh repair.
- Respect the cure time: In hot weather across Nigeria, PVC cement sets touch-dry in minutes, but full chemical curing takes time. Wait at least 30 minutes before running low-pressure water through a drain line, and wait 2 to 4 hours (or overnight for high-pressure supply lines) before restoring full municipal or pump water pressure.
- Slowly open the water supply: If you repaired a supply line, open the isolating valve very slowly so a sudden surge of pressurized water does not stress the fresh weld.
- Inspect the joint: Run a dry tissue or your bare fingers completely around the circumference of the newly cemented joints. If the paper stays bone-dry, your repair is a success!
Verification: The tissue paper remains completely dry after wiping around the fully cured joint under running water.
Common Mistakes to Avoid When Fixing PVC Joints
Avoid these frequent DIY traps when learning how to fix a leaking pvc pipe joint:
- Using ordinary super glue or contact cement (Evo-Stik): Super glue and rubber adhesives cannot withstand continuous water contact or pipe pressure; they dissolve and fail within days. Always use dedicated PVC solvent cement.
- Skipping the primer: Gluing shiny, unprimed PVC pipes together creates a weak surface bond that pops apart under the slightest water pressure.
- Applying glue to wet pipes: Solvent cement cannot weld plastic if water is actively pooling inside the joint; always dry the pipe thoroughly with a rag before gluing.
- Rushing the pressure test: Turning on a high-pressure water pump two minutes after gluing blows the wet joint apart instantly.
Frequently Asked Questions (FAQs)
Can I fix a leaking PVC joint without cutting the pipe?
For a pressurized water supply line, you cannot patch a leaking glued joint from the outside using tape or surface glue because internal pressure will blow it out. You must cut out the faulty joint and replace it. However, for low-pressure or non-pressure drainpipes, temporary emergency wraps like rubber repair tape or silicone wrap can buy you time until you can properly cut and cement the joint.
What is the difference between standard couplings and slip couplings?
A standard PVC coupling features an internal ridge (stop) in the exact middle that prevents the pipe from sliding all the way through, ensuring equal pipe depth on both sides. A slip coupling (repair coupling) has no internal stop ridge, meaning it can slide completely over a cut pipe and then be slid back into position to bridge a gap where pipes cannot be pulled apart.
Why does my newly glued PVC joint still leak slightly?
If a fresh joint weeps water, it usually means the pipe wasn’t cleaned properly of grease, primer was skipped, or a dry spot was left unglued during assembly. When tackling how to fix a leaking pvc pipe joint again, you must cut out that section, let the pipe dry completely, and reglue it using a fresh coupling.