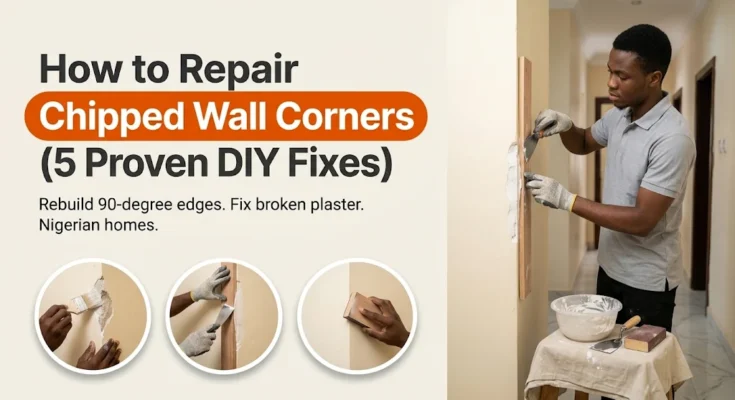
Moving a heavy deep freezer down a narrow hallway, dragging a generator cable around a pillar, or watching children race toy tricycles through the parlour almost always leaves an ugly battle scar behind: a jagged, crumbling bite knocked right out of your 90-degree plaster wall corner.
Across Nigerian homes, outside wall corners along corridors, kitchen entrances, and dining archways take more physical abuse than any other surface in the house. Once the paint and top plaster chip away, the raw sand-cement mortar underneath begins shedding grit onto the floor every time someone brushes past. Knowing how to repair chipped wall corners yourself lets you rebuild a crisp, razor-straight 90-degree edge in under an hour without paying a mason or POP installer for a full day’s labour.
Many homeowners try to fix a broken wall edge by scooping up wet filler on a scraper and smearing it freehand over the missing chunk—only to watch the soft paste slump downward into a lumpy, rounded blob that looks worse than the original dent. The secret to mastering how to repair chipped wall corners is clamping a flat wooden board flush against one side of the wall to act as a rigid mould while you sculpt the other side flat.
Once you understand how to repair chipped wall corners using the right filling compound, a simple straight-edge wooden batten, and thin layers that cure rock-hard without shrinking, your hallway pillars and room dividers will look newly plastered.
Step 1: Assess the Damage Before Learning How to Repair Chipped Wall Corners
Not every damaged corner requires the same filler. Before heading to the building materials market to buy supplies for how to repair chipped wall corners, examine how deep the chunk goes into the wall.
| Corner Damage Level | Depth of Missing Edge | Typical Household Cause | Best DIY Repair Method |
| Shallow paint & skim nick | 1 mm to 3 mm deep | Bumped chair, broom handle, or luggage | Method 1: Two-pass POP or acrylic wall filler |
| Medium plaster chunk | 4 mm to 15 mm deep | Moving wardrobes, freezers, or iron beds | Method 2: Wooden straight-edge mould & POP cement |
| Deep crushed block corner | 15 mm to 40 mm+ deep | Generator knock, gate impact, or structural chip | Method 3: Bonding grip coat + sharp sand-cement mortar |
| Repeatedly breaking corner | Full vertical edge damage | Narrow high-traffic corridor or doorway | Method 4: Install PVC or galvanized metal corner bead |
| Post-repair prevention | Intact or newly painted edge | Kids’ play area or commercial hallway | Method 5: Clear acrylic or wood-trim corner guards |
Matching the depth of the break to the right compound is the first rule in how to repair chipped wall corners:
- Shallow POP or putty chips (Under 4 mm): Modern Nigerian flats finished with smooth white Plaster of Paris (POP) screeding or acrylic wall satin develop shallow white craters when bumped. Learning how to repair chipped wall corners of this size only requires ready-mixed acrylic wall putty or POP powder.
- Medium to deep sand-cement chunks (Over 10 mm): If the knock exposed dark grey sandcrete blockwork or rough brown mortar, soft acrylic putty will shrink and crack if packed in thick. Knowing how to repair chipped wall corners with deep missing chunks means building the core out with a strong cement-and-sand mix (or POP mixed with white cement) before skimming the final millimetre smooth.
- Flat wall holes vs. 90-degree corners: If your wall also has craters in the flat middle section away from the corner edge, combine your work on how to repair chipped wall corners with our step-by-step guide on How to Patch a Hole in a Wall with Cement or Plaster.
Important Safety Warnings Before You Begin
Scraping fractured masonry, mixing alkaline cement or POP powder, and sanding high hallway corners involve fine airborne dust. Follow these safety precautions before starting how to repair chipped wall corners:
- Wear a dust mask and safety glasses: Chipping loose mortar and sanding cured POP corners releases fine silica and gypsum dust that irritates your eyes and lungs.
- Put on rubber or nitrile work gloves: Wet cement and POP putty draw natural moisture out of bare skin rapidly, leaving dry, cracked fingertips if you mould corners bare-handed while practicing how to repair chipped wall corners.
- Check for hidden electrical conduit pipes: In many Nigerian houses, electricians run PVC conduit pipes vertically near doorway corners and pillars; never hammer steel nails deep into a corner edge near a light switch.
- Protect your floor tiles with cardboard or nylon: Dropped blobs of wet POP or cement harden fast on ceramic tiles; lay a stitched cement bag or drop cloth directly beneath the pillar before beginning how to repair chipped wall corners.
Tools Needed for How to Repair Chipped Wall Corners
You can buy everything required for how to repair chipped wall corners at any local hardware store, paint depot, or building materials shop for a few thousand Naira:
- 4-inch and 6-inch metal putty knives (scrapers): Flexible stainless-steel blades let you press filler tightly into the break and slice flush along the corner line.
- A straight wooden batten or aluminium spirit level (60 cm to 100 cm long): Clamping or holding a dead-straight wooden strip against one side of the corner is the professional secret to how to repair chipped wall corners with a sharp 90-degree edge.
- Filler compound:
- For shallow/medium chips: Ready-mixed acrylic wall filler, POP powder, or gypsum joint compound (₦2,000 to ₦4,500).
- For deep masonry chunks: Ordinary Portland cement mixed with fine plastered sand (1:3 ratio) or white cement mixed with POP powder.
- PVA bonding glue (such as Topbond) and an old paintbrush: Brushing diluted PVA glue into the dusty raw break acts as a chemical primer so your new patch never falls out.
- Spray bottle or bowl of clean water and sponge: For dampening dry sandcrete blocks before applying mortar.
- 120-grit and 180-grit sandpaper wrapped around a flat wooden block: Essential in how to repair chipped wall corners so you sand the planes flat without rounding over the crisp corner tip.
- Painter’s masking tape, acrylic wall primer, and matching wall paint: To blend the finished repair invisibly into your existing room colour.
Step 2: Prep and Prime the Broken Edge First
Whether a chip is tiny or huge, fresh filler will never stick to dusty, loose, or flaky plaster. If you skip preparation when learning how to repair chipped wall corners, the new patch will pop out in one solid piece the very next time someone’s shoulder brushes the hallway.
- Knock away all loose, hollow crumbs: Run the edge of your metal putty knife firmly up and down the broken corner. Any fractured flakes of paint or sandy mortar that wiggle under the blade must be pried off until you reach solid, uncracked masonry.
- Undercut or roughen slick edges slightly: If the inside of the chip feels glassy smooth, scratch a few shallow criss-cross lines into the recess with the tip of a screwdriver or masonry nail to give your filler mechanical teeth to grip during how to repair chipped wall corners.
- Brush out all dry dust: Use a dry paintbrush to sweep every grain of sand out of the cavity.
- Brush on a diluted PVA bonding coat (Crucial Step!): Mix 1 part white PVA wood/building glue (Topbond) with 3 parts clean water in a small cup. Paint this milky sealer generously over the raw exposed cement inside the chip and let it turn slightly tacky for 10 minutes. Sealing the porous block stops the dry wall from sucking the water out of your filler too fast—the number one secret to a permanent bond in how to repair chipped wall corners.
Method 1: How to Repair Chipped Wall Corners (Shallow Nicks Under 4 mm)
When a broom handle, suitcase, or chair leaves a shallow dime-sized nick along a painted POP wall corner, you do not need wooden moulds or heavy cement. Here is how to repair chipped wall corners with minor surface dents in twenty minutes:
- Scoop a small amount of acrylic wall putty onto your 4-inch knife: Ready-mixed acrylic filler (or thickly mixed POP paste) works best for shallow corner dings.
- Press firmly into the nick from the left wall face: Hold your putty knife flat against the left side of the wall corner and pull the blade inward away from the corner tip, packing the dent slightly fuller than the surrounding wall.
- Slice excess paste off the right wall face: Immediately place your clean putty knife flat against the right side of the wall and draw it upward along the corner ridge to shear off the overhanging ribbon of paste.
- Let dry 1 hour and apply a second thin skim: All water-based fillers shrink slightly as they dry. When mastering how to repair chipped wall corners, applying two thin coats rather than one thick glob prevents shrinkage cracks.
- Sand with a flat block—never bare fingers: Once dry, wrap 180-grit sandpaper around a flat block of wood and stroke lightly down the left face, then down the right face. Never wrap sandpaper around your soft fingertips when finishing how to repair chipped wall corners, or your fingers will dig hollows into the filler and round off the sharp corner line!
Method 2: How to Repair Chipped Wall Corners Using a Straight-Edge Board
What if a missing chunk of plaster is 5 cm to 20 cm long and 10 mm deep, leaving a gap where there is no corner line left to guide your putty knife? Trying to sculpt a mid-air corner freehand is nearly impossible. Using a flat wooden board or aluminium spirit level as a temporary shuttering mould is the professional mason’s trick for how to repair chipped wall corners.
For a deeper architectural overview of how lime, gypsum, and cement plasters are layered and ruled straight across building corners, see Wikipedia’s reference on Plasterwork.
Follow this two-side moulding technique when executing how to repair chipped wall corners on medium-sized breaks:
1. Clamp or Tape Your Straight-Edge Guide to Side A
- Select a dead-straight board or spirit level: Grab a planed wooden batten, a long metal ruler, or a 60 cm aluminium spirit level.
- Wrap the edge in nylon or masking tape: Cover the face of the wooden board with a strip of smooth packing tape or polythene nylon so wet POP or cement cannot stick to the wood.
- Hold or tape the board flush against the LEFT wall (Side A): Place the flat face of the board tight against the undamaged plaster above and below the chip on the left wall so its front edge projects out to the exact original 90-degree corner line. Secure it tightly with strips of painter’s tape (or have a helper hold it rock-steady) while you work through how to repair chipped wall corners.
2. Pack and Rule the Right Wall (Side B) Flush
- Mix a stiff batch of POP + white cement filler: For medium depth chips in Nigerian homes, mix 3 parts POP powder with 1 part white cement (or use quick-setting gypsum joint compound) and clean water to a thick peanut-butter paste.
- Pack the paste against the wooden guide: Working from the exposed right wall (Side B), press the stiff paste firmly into the primed cavity until it pushes solidly against the taped wooden board on Side A.
- Strike the right wall completely flat: Hold your 6-inch putty knife flat against the undamaged plaster above and below the chip on Side B, and draw it downward using the wooden board’s edge as a rail.
- Slide the board off carefully after 15 minutes: Once the POP/cement mix firms up into a stiff cheese-like texture (about 15 to 20 minutes), gently slide the wooden guide sideways off the corner—never yank it straight outward! You will reveal a crisp, vertical 90-degree corner profile.
3. Skim Side A and Sand Razor-Sharp
- Fill any tiny pinholes on Side A: Now that the corner ridge is rebuilt, use your 4-inch putty knife to skim a paper-thin layer of filler across the left wall face (Side A) to blend any faint seam left by the board.
- Block-sand both planes after 2 hours: Once bone dry, stroke your 180-grit sanding block vertically down Side A and Side B until the rebuilt corner matches the rest of the pillar seamlessly—completing the cleanest method for how to repair chipped wall corners.
Method 3: How to Repair Chipped Wall Corners with Deep Crushed Blockwork
When a heavy iron gate, vehicle bumper, or generator frame smashes a deep 2-centimetre to 4-centimetre chunk out of a verandah pillar or corridor wall, POP putty alone is too soft. Here is how to repair chipped wall corners when raw sandcrete block is exposed:
- Mist the raw block with water and brush on PVA slurry: Spray the chipped blockwork with clean water so it is damp, then brush on a thick slurry of pure Portland cement mixed with diluted PVA glue.
- Tack two temporary wooden shuttering boards (or build in layers): Mix 1 part Portland cement to 3 parts sharp plastering sand with minimal water so the mortar holds its shape when squeezed in your fist.
- Pack the base mortar to within 2 mm of the final corner: Press the stiff cement mortar into the deep pocket using a mason’s trowel and wooden straight-edge, leaving it just 2 millimetres shy of the painted surface so you have room for a smooth topcoat. (If long structural cracks radiate away from the corner impact, stabilize them at the same time using our tutorial on How to Fix Cracks in Plaster Walls Permanently.)
- Apply the final POP or acrylic topcoat next day: Let the grey cement core cure overnight, then apply a smooth 2-millimetre finishing skim of white POP or acrylic wall filler using Method 2 to complete how to repair chipped wall corners.
Method 4: Install a Metal or PVC Corner Bead for High-Traffic Edges
If a particular doorway or narrow kitchen corridor gets banged by water jerrycans, gas cylinders, or furniture every single month, plain plaster will eventually chip again. Reinforcing the edge with an embedded angle corner bead is the ultimate commercial solution for how to repair chipped wall corners permanently.
- Buy a PVC or galvanized mesh corner bead: Available at Nigerian building markets and POP supply shops for ₦1,500 to ₦3,000 per 2.4-metre strip, these perforated 90-degree angle strips armour the tip of the corner.
- Cut a strip slightly longer than the damaged zone: Use tin snips or heavy scissors to cut a length of PVC corner bead that extends 10 cm above and below the chipped section.
- Bed the bead into fresh joint compound: Spread a 3-millimetre layer of POP or acrylic joint compound along both sides of the corner, press the perforated corner bead squarely over the 90-degree point, and check with a spirit level that it sits plumb.
- Feather two wide coats over the perforated wings: Use your 6-inch scraper to smooth filler over the mesh wings on both walls, let dry, sand smooth with 180-grit paper, and prime—giving you an impact-proof edge when mastering how to repair chipped wall corners.
Method 5: Prime, Touch Up Paint, and Protect the Rebuilt Corner
A raw white filler patch on a cream, peach, or grey wall will stand out like a bandage until it is sealed and painted properly. Finish your work on how to repair chipped wall corners with these blending steps:
- Wipe away sanding dust and spot-prime: Brush off all white powder and dab one coat of white acrylic wall primer over the sanded patch. Never paint emulsion directly over unprimed POP filler, or the porous patch will suck up the paint and leave a dull “flashing” spot. (If moisture near a bathroom or floor skirting caused the corner plaster to bubble and crumble in the first place, treat the damp source first using How to Fix Peeling Wall Paint in Damp Rooms.)
- Feather your matching wall paint with a mini roller: Once the primer dries in 45 minutes, apply two thin coats of matching wall paint using a small foam roller to replicate the surrounding “orange peel” wall texture. If your entire room is due for a colour refresh, follow our complete room guide on How to Repaint a Room Like a Pro, or clean up surrounding handprints first with How to Clean Dirty Painted Walls Without Ruining the Paint.
- Add clear or wooden L-corner guards in busy corridors: For narrow passageways where heavy loads pass regularly, stick a clear polycarbonate L-profile guard or a varnished wooden angle moulding over the lower 1.2 metres of the corner using construction adhesive.
Common Mistakes to Avoid When Fixing Wall Corners
Steer clear of these four amateur mistakes when working through how to repair chipped wall corners:
- Packing a 2-centimetre deep hole in one single wet pass: Thick blobs of acrylic putty or POP sag downward under gravity and crack down the middle as they dry. Always build deep corners in 5 mm to 8 mm stages when practicing how to repair chipped wall corners.
- Sanding the corner tip directly: Running sandpaper directly across the sharp 90-degree apex flattens the point into a blunt curve; always sand the left wall face and the right wall face separately using a flat block.
- Skipping the PVA glue bonding wash: Applying wet mortar or POP straight onto bone-dry, dusty sandcrete blockwork causes the patch to dry out before curing chemically, leaving a hollow patch that pops off when tapped.
- Using flexible silicone caulk on outside wall corners: Silicone rubber cannot be sanded flat and peels like rubber skin when bumped; only use sandable acrylic filler, POP, or cement mortar for how to repair chipped wall corners.
Frequently Asked Questions (FAQs)
What is the strongest filler for fixing chipped plaster wall corners in Nigeria?
When deciding how to repair chipped wall corners for maximum strength, mix white cement with POP powder (1:3 ratio) for medium indoor chips, or use Portland cement and sharp sand mortar (1:3) brushed over a PVA glue bonding coat for deep verandah and hallway pillar breaks. Plain ready-mixed acrylic putty should only be used for shallow 1 mm to 3 mm surface skimming.
How do I keep wet wall filler from sagging while rebuilding a vertical corner?
The secret to how to repair chipped wall corners without sagging is twofold: first, mix your POP or cement filler to a stiff “peanut-butter” consistency rather than a runny paste; second, tape or hold a flat wooden straight-edge board covered in nylon against one wall face to support the paste until it sets firm.
How long should I wait before painting a repaired wall corner?
Wait 2 to 3 hours before sanding and priming a shallow acrylic putty or POP corner repair, and wait a full 24 hours before priming and painting over a deep grey sand-cement mortar corner patch so trapped moisture does not blister your new paint.
Final Thoughts
Taking forty-five minutes to brush on a diluted PVA bonding coat, clamp a straight wooden board flush along one wall face, and rule fresh POP or cement mortar across the break proves just how straightforward it is to master how to repair chipped wall corners. Instead of staring at crumbled grey pillars and jagged hallway edges every day, your walls will stand crisp, straight, and freshly finished throughout your home.