
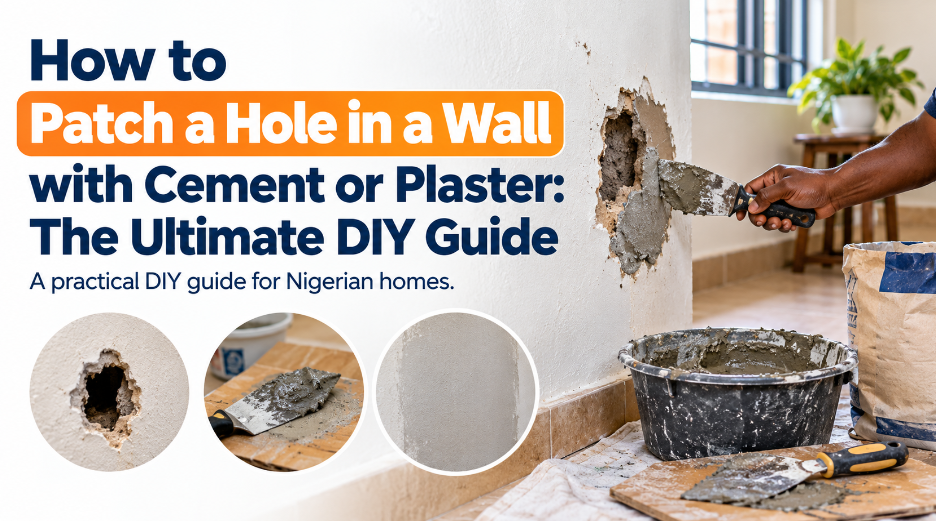
Wall holes—whether caused by an aggressive doorknob swing, shifting foundation settling, removed heavy masonry anchors, or accidental impact—can completely ruin the aesthetic flow of an otherwise pristine room. If you need to patch a hole in a wall with cement or structural plaster, standard drywall spackle simply will not hold up. For solid construction like poured concrete, brick masonry, or traditional hard-coat plaster over lath, you need materials engineered specifically for masonry to ensure a permanent, professional repair.
Standard lightweight spackle is designed exclusively for paper-faced drywall sheets; when applied to deep masonry cavities, it shrinks, cracks, loses adhesion, and eventually crumbles right out. To achieve a structurally sound fix that withstands everyday wear and tear, you must use patching cement, hydraulic cement, or specialized structural plaster.
By targeting high-intent search queries like “how to patch a hole in a concrete wall,” “repairing deep wall holes with plaster,” and “fixing masonry wall damage,” this comprehensive guide provides a masterclass in restoring your walls to absolute perfection.
Understanding Your Wall Substrate Before You Begin
Before mixing any compound, you must understand what lies beneath your paint. Not all walls are created equal, and using the wrong patching material can cause further degradation.
- Poured Concrete & Concrete Block: Extremely dense, highly alkaline, and prone to moisture transmission if exterior walls are involved. Requires heavy-duty patching cement or epoxy-based mortars.
- Brick Masonry: Often exposed or plastered over. Requires breathable lime-based or cementitious patches to match thermal expansion rates.
- Traditional Plaster (Hard-coat over Brick/Lath): Brittle and prone to cracking. Requires setting-type plasters (like Plaster of Paris or Durabond) rather than drying-type compounds.
Knowing your substrate ensures your repair matches the density and flexibility of the surrounding structure, preventing future hairline fractures.
Comprehensive Tools and Materials Checklist
Professional results require professional-grade preparation. Gather these tools and materials before you begin working to ensure a smooth, uninterrupted workflow:
- Patching Compound: High-strength patching cement, hydraulic cement, or setting-type plaster (Plaster of Paris).
- Mixing Equipment: Clean rubber or plastic mixing bowl/bucket, margin trowel, and flexible putty knife.
- Surface Prep Tools: Wire brush, coarse 60-grit sandpaper, utility knife, and a vacuum cleaner or compressed air can.
- Moisture Control: Spray bottle filled with clean tap water or a clean masonry sponge.
- Reinforcement (For Large Holes): Galvanized wire mesh, fiberglass mesh tape, or concrete screws (tapcons) to anchor deep fills.
- Finishing & Smoothing: Fine-grit sandpaper (120-grit and 220-grit), sanding block, and damp wiping cloths.
- Sealing & Painting: High-adhesion masonry primer/sealer, interior wall paint matching your room, and a small trim roller or paintbrush.
- Safety Gear: Dust mask (respirator recommended when sanding cement/plaster) and safety glasses.
Step 1: Deep Cleaning, Excavation, and Undercutting
The number one reason DIY wall patches fail is poor surface adhesion. Dust, loose aggregate, and old, flaking paint act as a barrier, preventing your new cement or plaster from bonding to the structural core of the wall.
Undercutting the Edges
Do not patch a hole straight-in. Using a utility knife, chisel, or scraper, carefully undercut the edges of the hole so that the opening is wider at the back than it is at the surface (creating a reverse dovetail shape). This mechanical keying ensures that once the cement or plaster cures, it cannot physically pop out of the wall, even under pressure.
Cleaning Out Debris
Scrape the interior cavity vigorously with a wire brush to remove every particle of loose dust, crumbling brick, or weak plaster. Vacuum out the cavity thoroughly. If dust remains, your patch will delaminate within weeks.
Managing Suction (The Critical Mistake)
Dry masonry and aged plaster act like a dry sponge. If you apply wet cement or plaster directly to a dry hole, the surrounding wall will suck all the moisture out of your mix instantly. This starves the chemical curing process, resulting in a weak, powdery, and severely cracked patch.
- The Fix: Take your spray bottle and mist the interior of the hole generously until the masonry is damp to the touch but not dripping wet.
Step 2: Reinforcing Deep or Large Wall Cavities
If the hole in your wall is deeper than 1 inch or spans wider than 3 inches, filling it in one massive blob of cement or plaster is a recipe for disaster. Thick masses of cement generate internal heat and shrinkage stresses as they cure, leading to deep structural cracking.
Mechanical Anchoring
- For Concrete/Brick: Drive two or three short masonry screws partially into the back of the hole, leaving the heads exposed. The cement will grip around these screw heads, locking the patch permanently into the wall frame.
- For Lath and Plaster: If you are patching a hole where wooden laths are exposed, slip small pieces of galvanized wire mesh or fiberglass mesh tape behind the remaining edges to bridge the gap and support the weight of the plaster.
Step 3: Mixing Your Cement or Plaster Compound
Whether you are using a pre-bagged concrete patch, hydraulic cement, or setting plaster, consistency is everything.
- Water First, Powder Second: Pour a small amount of clean water into your mixing container first, then slowly add your powder. This prevents dry pockets from forming at the bottom of the bucket.
- The Peanut Butter Consistency: Mix thoroughly with your margin trowel until the compound achieves the texture of thick, smooth peanut butter. It should hold its shape rigidly on your trowel without sliding off when tilted at a 45-degree angle.
- Workable Window Warning: Setting plasters and hydraulic cements harden through a chemical reaction rather than air-drying. Most mixes give you a strict working window of 10 to 15 minutes. Never try to mix more than you can apply in that timeframe, and never attempt to “re-temper” (add water to) plaster that has already begun to set up in your bucket.
Step 4: Layered Application and Packing
Applying the compound requires patience and proper technique.
Layer 1: The Scratch Coat
Push a golf-ball-sized amount of your mix deep into the back of the hole using your putty knife or gloved fingers. Press firmly to ensure it flows around all edges, screws, or wire mesh. Fill the hole until it is about 70% full, leaving room for a finishing top layer.
- Pro Tip: While this first layer is still wet, take the tip of your trowel or a nail and scratch a cross-hatch pattern across its surface. This rough texture gives the top layer something mechanical to grip. Allow this layer to set firm (usually 20 to 45 minutes depending on humidity).
Layer 2: The Flush Finish Coat
Mix a fresh batch of smoother, finer plaster or topping cement. Mist your hardened first layer lightly with water, then press the final layer into place. Overfill the hole very slightly (by about 1 millimeter) above the surrounding wall level, as all cementitious and plaster compounds experience microscopic shrinkage as they fully cure.
Step 5: Shaving, Curing, and Sanding
Patience during the curing phase separates amateur repairs from professional results.
The Razor-Edge Shave
Do not wait 24 hours to level your patch. About 30 to 60 minutes after applying your final layer (when the patch has gone firm and matte, but can still be indented slightly with a fingernail), take the flat, rigid edge of your metal putty knife and shave the excess material flush with the wall. Scraping it at this semi-hard stage saves you hours of grueling sanding later.
Curing Time
Allow the patch to cure completely undisturbed for at least 24 to 48 hours. Cement needs moisture and time to undergo hydration; do not rush this process with artificial heat guns or fans, which cause premature surface drying.
Precision Sanding
Once fully cured and bone dry, take your 120-grit sandpaper wrapped around a flat sanding block and feather the edges of the patch so they blend seamlessly into the existing wall plane. Finish with an ultra-fine 220-grit paper to polish the surface until it feels glass-smooth to the touch. Wipe away all fine dust with a slightly damp microfiber cloth.
Step 6: Priming and Painting (Achieving an Invisible Repair)
If you paint directly over a fresh cement or plaster patch without priming, you will experience flashing—a glaring, dull spot where the porous patch absorbs paint differently than the rest of the painted wall.
- Apply Masonry Primer: Paint the patch with a high-adhesion interior primer or PVA sealer. Let it dry completely according to manufacturer guidelines.
- Spot-Prime or Roll: If your wall paint is old, even a primed patch can sometimes stand out. Feather your primer slightly past the edges of the repair onto the surrounding wall.
- Final Paint Coat: Apply your matching wall paint using a small roller or brush, blending the edges outward.
For more tips on achieving a professional look across your home, check out our guide on how to choose the right paint finish for each room to ensure your sheen matches perfectly.
Common Troubleshooting Mistakes to Avoid: How to Patch a Hole in a Wall with Cement
- Mistake 1: Using drywall tape on deep masonry. Fiberglass mesh tape is for drywall joints; in deep concrete patches, it lacks structural rigidity. Use physical depth and undercutting instead.
- Mistake 2: Mixing too much product. Wasting half a bucket of fast-setting plaster is a rite of passage for beginners. Mix in small, manageable batches.
- Mistake 3: Skipping the primer. Skipping primer leads to uneven paint absorption, making your repair look like a blotchy bandage on the wall.
By following this comprehensive on How to Patch a Hole in a Wall with Cement, step-by-step methodology, your wall repair will remain rock-solid, crack-free, and virtually invisible for decades to come.
