Staring at faded parlour walls darkened by years of Harmattan dust, generator exhaust haze, and oily handprints around every light switch can make even a well-furnished flat feel tired and cramped. Whenever festive holidays approach or a new tenant moves in, most people immediately call a local roadside painter—only to spend days scraping dried emulsion splatters off the floor tiles and looking at streaky roller lap marks every time the ceiling bulb is switched on. Knowing how to repaint a room yourself saves you tens of thousands of Naira in labour fees and delivers a crisp, hotel-grade finish because you won’t rush the surface preparation.
Across Nigerian homes, interior walls are built from plastered sandcrete blocks that drink up cheap paint unevenly if they aren’t cleaned, filled, and primed properly. Professional results have very little to do with how fast you move a roller up and down the wall. Instead, 70 percent of a flawless paint job happens before you even pry open the paint bucket.
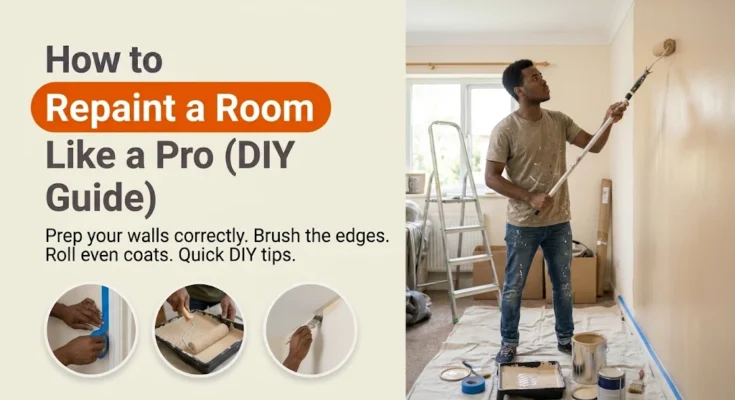
Once you understand how to repaint a room using proper masking, smart wall prep, angled brush “cutting in,” and the overlapping W-pattern roller technique, you can transform any bedroom or living room over a single weekend without leaving a single drip behind.
Step 1: Choose the Right Paint Finish Before You Repaint a Room
Walk into any paint depot or building materials market in Nigeria and you will see 20-litre drums and 4-litre gallons of emulsion, texcoat, matte, and satin paints across every price bracket. Choosing the wrong sheen for your room can leave you with walls that trap grease stains or highlight every bump in the plaster.
| Paint Finish | Typical Cost (20L Drum) | Sheen & Washability | Best Rooms in a Nigerian Home |
| Standard Acrylic Emulsion | ₦18,000 – ₦38,000 | Flat matte; hides rough plaster well but absorbs stains | Ceilings, low-traffic guest bedrooms, and store rooms |
| Premium Matte / Vinyl Matte | ₦45,000 – ₦75,000 | Rich, non-reflective velvet finish; wipeable | Main parlours, master bedrooms, and dining areas |
| Acrylic Satin / Silk | ₦55,000 – ₦95,000 | Soft low-gloss sheen; 100% washable and moisture-resistant | Hallways, children’s rooms, kitchens, and bathrooms |
| Exterior Texcoat (Textured) | ₦35,000 – ₦65,000 | Gritty sand texture; weather-resistant | Exterior compound walls and open verandas only |
Keep this simple rule of thumb in mind when planning how to repaint a room:
- Estimate how much paint you need: A standard 12 ft × 12 ft (3.6 m × 3.6 m) Nigerian bedroom has roughly 35 to 40 square metres of wall area. One 20-litre drum of quality acrylic emulsion (or two 4-litre gallons of high-opacity satin paint) is usually enough to apply two full coats on the walls, while a separate 4-litre gallon of brilliant white emulsion handles the ceiling.
- Avoid sandy Texcoat inside bedrooms: While textured paint hides crooked bricklaying on fence walls, using it inside a bedroom traps Harmattan dust permanently and scrapes skin whenever someone brushes against the wall.
Important Safety and Ventilation Precautions
Even water-based acrylic paints release volatile fumes (VOCs) and fine sanding dust during preparation. Follow these precautions before starting:
- Open all windows and run a fan: Keep sliding windows or louvres wide open so fresh cross-breeze dries the paint evenly and clears out chemical odours.
- Kill the power to wall switches and sockets: Before unscrewing plastic switch faceplates or rolling wet water-based paint near electrical outlets, flip off that room’s circuit breaker at your distribution board.
- Wear a dust mask and safety glasses during sanding: Pole-sanding high walls showers fine POP and plaster dust directly toward your face.
- Use a stable stepladder instead of stacking plastic chairs: Never balance on a wobbly plastic stool on slippery floor tiles to reach the ceiling cornice; use a rigid A-frame ladder or a sturdy wooden workbench.
Tools and Materials Needed to Repaint a Room
Gathering the right tools before opening your paint drum makes learning how to repaint a room ten times cleaner and faster:
- 9-inch medium-nap paint roller and frame: Choose a 10 mm to 12 mm (⅜-inch to ½-inch) woven microfibre or polyester roller sleeve so it holds plenty of paint without spraying tiny droplets everywhere.
- Roller extension pole (or a threaded broom handle): Lets you roll from floor to ceiling standing firmly on the ground without straining your back.
- 2-inch or 2.5-inch angled nylon paintbrush: Essential for “cutting in” straight, razor-sharp lines along ceiling corners, window frames, and skirting tiles.
- Plastic paint tray and a 5-litre decanting bucket: Pouring paint from a heavy 20-litre drum into a smaller bucket prevents messy spills.
- Painter’s masking tape (1.5-inch or 2-inch paper tape): For taping over floor tile skirtings, aluminium window frames, and wooden door architraves.
- Drop cloths: Old bedsheets, stitched empty cement bags, or thick polythene nylon sheets to cover your floor and furniture.
- Wall prep supplies: Acrylic wall filler (or POP putty), a 4-inch metal scraper, 180-grit sandpaper wrapped around a wooden sanding block, and a 4-litre tin of acrylic wall primer.
Step 2: Clear the Room and Mask Every Edge
Professional painters spend their first hour protecting surfaces they do not want painted. Skipping masking tape guarantees you will spend two hours on your knees scraping dried emulsion spots off your floor tiles afterward.
- Move furniture to the centre and cover it: Push the bed, wardrobe, and chairs into the middle of the room and drape a large nylon sheet or old bedsheet tightly over the pile.
- Loosen switch plates and wall brackets: Unscrew the two small screws on your light switches and wall sockets just enough to pull the plastic covers 5 mm away from the wall, then wrap them in paper masking tape (or remove the covers completely after switching off the circuit breaker).
- Run masking tape along the floor skirting and door frames: Press painter’s paper tape firmly along the top edge of your ceramic floor skirting tiles, wooden door frames, and aluminium window edges. Run a putty knife or your thumb firmly along the edge of the tape so wet paint cannot bleed underneath.
- Tape down your floor drop cloths: Spread old bedsheets or thick nylon sheets along the base of the walls. Canvas or cotton sheets are best because they absorb drips immediately rather than letting you step in a wet puddle and track footprints across the house.
Step 3: Repair, Sand, and Spot-Prime the Walls
Rolling fresh paint over dirty, cracked, or flaking plaster is the fastest way to ruin a paint job. Before moving to the rolling stage of how to repaint a room, inspect all four walls under bright light:
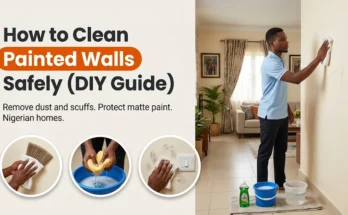
- Wash away grease and cobwebs: Sweep the ceiling corners with a clean cobweb brush. Wipe kitchen walls and the areas around light switches with a sponge wrung out in warm water and a few drops of dish soap to remove hand grease, then wipe with clean water.
- Scrape any bubbling or flaking paint: If dampness near the bathroom or window sill has caused blisters, follow the complete scraping and sealing process in our guide on How to Fix Peeling Wall Paint in Damp Rooms.
- Fill nail holes, dents, and plaster cracks: Deep holes from old TV brackets or air-conditioner pipes should be plugged using our tutorial on How to Patch a Hole in a Wall with Cement or Plaster, while long settling lines need the mesh-tape repair shown in How to Fix Cracks in Plaster Walls Permanently.
- Scuff-sand the entire wall lightly: Once your filler patches dry, sand them flush with 180-grit sandpaper. If the room was previously painted with shiny oil gloss or silk paint, scuff the entire wall lightly with 180-grit sandpaper to dull the shine so your new water-based paint can grip.
- Prime bare patches (or dark colours): Dust off the walls completely. Brush a coat of white acrylic primer over every filled patch—and across the entire wall if you are painting a light cream or white colour over an old dark blue, red, or green wall.
Step 4: How to Repaint a Room by Painting the Ceiling First
Always work from the top of the room downward: Ceiling first, walls second, and doors/trim last. If you paint your walls before the ceiling, overhead roller splatters will freckle your brand-new walls.
- Cut in around the ceiling cornice: Dip your 2-inch paintbrush one-third of the way into white ceiling emulsion, tap off the excess against the side of the bucket, and paint a 3-inch band around the perimeter where the ceiling meets the walls.
- Roll across the shortest width of the ceiling: Attach your roller frame to an extension pole and roll in straight, overlapping lanes parallel to the main window so natural sunlight hides any faint roller lines.
Step 5: “Cut In” the Wall Edges One Wall at a Time
Aroller cannot reach tight into corners or flush against window frames without bumping the adjacent surface. Using a brush to paint a 2-inch to 3-inch border around the edges of a wall is called cutting in.
The secret to mastering how to repaint a room without leaving an ugly “picture frame” halo around the edges of your walls is to cut in only one wall at a time, and immediately roll that wall while the brushed border is still wet!
- Load your 2-inch angled brush properly: Dip the bristles just 4 cm into the paint and tap (don’t wipe) both flat sides against the inside of your hand bucket.
- Draw a clean line along the ceiling and corners: Place the brush about 1 cm away from the corner line, press down slightly so the bristles fan out right up to the corner seam, and pull down in one steady stroke.
- Feather out the brushed edge: Brush outward over the inner border of your cut-in band so there is no thick ridge of paint waiting to show through under the roller.
Step 6: Roll the Walls Using the “W” Technique
Once the four borders of your first wall are freshly brushed and still wet, switch immediately to your 9-inch roller. For a deeper look at how roller nap lengths and sleeve materials affect paint transfer, see Wikipedia’s reference on Paint roller.
Here is how to repaint a room with a roller so the finish dries uniform and streak-free:
- Dampen the roller sleeve slightly: Before dipping a bone-dry roller into paint for the first time, mist it lightly with water or wipe it with a damp rag; this primes the fibres so they absorb paint evenly.
- Load the roller in the tray without submerging it: Roll the sleeve down into the paint well and back up the ribbed ramp three or four times until the sleeve is plump and evenly coated all the way around, but not dripping.
- Roll a 3 ft × 3 ft “W” on the wall: Start about half a foot away from the corner (never jam the roller right into the corner) and roll a large letter W roughly one metre wide and one metre high.
- Fill in the W without lifting the roller: Roll horizontally and diagonally across the W to spread the paint across that square section, then reload your roller and repeat on the section directly below until you reach the floor skirting.
- Perform a final top-to-bottom “lay-off” stroke: Before moving to the next column of the wall, run your unloaded roller lightly from the top of the painted section straight down to the bottom in overlapping vertical passes. This aligns all the microscopic paint texture in one direction so the wall reflects light evenly.
Step 7: Apply the Second Coat and Peel Tape While Wet
Even the thickest premium acrylic paint looks slightly patchy after the first coat dries. A professional two-coat application is mandatory when learning how to repaint a room properly:
- Wrap your wet brush and roller between coats: Do not wash your roller sleeve between Coat 1 and Coat 2! Simply wrap your wet roller and brush tightly inside a clean polythene nylon bag and tie it shut; they will stay soft and fresh for up to 24 hours.
- Wait 2 to 4 hours for the first coat to dry: Let the first coat dry completely until it looks uniform in sheen and feels warm and dry to the back of your hand.
- Cut in and roll the second coat: Repeat the exact cutting-in and W-rolling sequence across all four walls for your second coat.
- Peel off the masking tape while the second coat is still slightly wet: Do not wait until the next morning to pull off your masking tape! If the paint dries rock-hard over the tape seam, peeling the tape can rip dry ribbons of paint off your wall. Pull the tape back slowly at a 45-degree angle about 30 to 45 minutes after finishing the last wall.
- Clean up any accidental tile drips: If a few drops of emulsion bypassed your drop cloth, wipe them up immediately with a damp cloth, or follow the dried-paint removal tips in our guide on How to Clean and Seal Floor Tiles.
Common Mistakes to Avoid When Repainting a Room
Steer clear of these five classic amateur traps when figuring out how to repaint a room:
- Over-diluting emulsion paint with too much water: Many painters add half a bucket of water to a drum of paint to stretch it further; adding more than 10% clean water breaks down the acrylic binder, leaving a chalky coating that rubs off onto clothes.
- Pressing hard on a dry roller: Squeezing the last drop of paint out of a dry roller leaves shiny “roller burn” tracks on the wall. Reload your roller as soon as it stops making a soft, tacky sound against the plaster.
- Cutting in the entire room before rolling: If your brushed edges dry for an hour before you roll the centre of the wall, you will end up with a double-thick dark border around all four sides of the wall.
- Painting directly over dusty POP screeding: Always wipe away sanding dust and seal raw plaster or putty with primer first.
Frequently Asked Questions (FAQs)
How long does it take to repaint a standard bedroom by yourself?
When you know how to repaint a room systematically, a single person can complete a standard 12 ft × 12 ft room in one weekend (or one full day): roughly 2 to 3 hours for furniture clearing, masking, and filling cracks; 1 hour for the ceiling; 1.5 hours for the first wall coat; a 3-hour drying break; and 1.5 hours for the second coat and cleanup.
Do I need to apply primer if the wall is already painted?
If the existing wall paint is clean, matte, in good condition, and a similar light colour, you do not need a full coat of primer—you only need to spot-prime any bare filler patches. However, you must prime the entire wall if you are painting over a dark colour, covering oil-based gloss paint, or sealing chalky, peeling plaster.
How soon can I sleep in a room after painting it with acrylic emulsion?
With modern water-based acrylic emulsion or low-VOC satin paint and open windows, the walls dry to the touch in 2 hours and the odour clears within 6 to 8 hours, meaning you can move your bed back and sleep in the room the same night if you finish painting by early afternoon. (If you used solvent-based oil gloss on doors or skirting, wait at least 48 hours for the turpentine fumes to clear.)
Final Thoughts
Taking the time to mask your edges, repair surface blemishes, cut in one wall at a time, and roll in smooth overlapping W-strokes proves just how rewarding it is to master how to repaint a room. With crisp corner lines and rich, even colour across every wall, your home will look newly built without costing you a single Naira in hiring fees.