Stepping through your front door after a long day only to trip over a chaotic pile of sandals, trainers, and work shoes scattered across the hallway floor is an instant frustration. In many Nigerian homes, managing footwear clutter near the entryway is a constant daily battle.
When you look into buying a ready-made shoe cabinet at a local furniture showroom, you often find overpriced particle board that swells and falls apart the first time damp rainy-season mud gets tracked inside. Knowing how to build a simple wooden shoe rack gives you a sturdy, custom-fitted solution built from solid timber that handles heavy daily use without breaking a sweat.
Building a functional shoe rack doesn’t require advanced carpentry skills or expensive machinery. With just a standard hand saw, a cordless power drill, a sanding block, and two or three affordable planks from your neighborhood timber market, you can construct a clean, tiered entryway shoe organizer in a single weekend.
In this comprehensive, beginner-friendly guide, we will walk you through designing an open-slat shoe rack for proper airflow, calculating exact board dimensions, cutting and pre-drilling your pieces, assembling the frame securely, and applying a moisture-resistant finish.
Important Safety and Workshop Warnings
Before you start measuring and cutting timber while learning how to build a simple wooden shoe rack, keep these basic workshop safety rules in mind:
- Protect Your Eyes and Lungs: Cutting boards and sanding raw timber throws fine sawdust into the air. Always wear a protective dust mask and safety glasses.
- Secure Your Sawing Surface: Never cut wood while balancing it precariously on your knee or an unstable plastic chair. Clamp your boards firmly to a stable workbench or saw horses.
- Respect Power Tools: If you are using a circular saw or power drill, keep loose clothing, long sleeves, and hair tied back safely away from spinning bits and blades.
Tools and Materials Needed
You can source all your timber and hardware from a local timber market (plank shed) or hardware store when planning how to build a simple wooden shoe rack:
Timber & Hardware
- Solid Hardwood or Softwood Boards: 3 boards measuring 1 inch thick by 10 inches wide by 8 feet long (standard 1×10 planks of mahogany, gmelina, or treated pine).
- Fasteners: 2-inch (50 mm) wood screws (for structural joints) and 1.5-inch finishing screws.
- Wood Glue: PVA carpenter’s wood glue (such as Topbond or Titebond).
Tools
- Measuring tape and a carpenter’s square
- Hand saw or circular saw (plus a clamped straight-edge guide)
- Power drill and drill bits (including a countersink bit)
- Sanding block with 80-grit, 120-grit, and 220-grit sandpaper
- Wood filler or putty (to hide screw heads)
- Wood stain, varnish, or protective polyurethane topcoat and a brush
Step 1: Design and Cut List Calculations
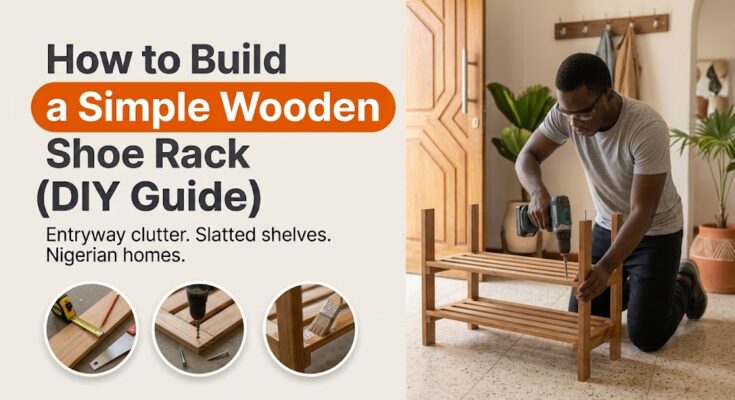
For this entryway project focusing on how to build a simple wooden shoe rack, we will build a compact, 3-tier open shelving unit standing 30 inches (2.5 feet) tall, 32 inches wide, and 12 inches deep, providing plenty of space to store 9 to 12 pairs of shoes neatly.
The Cut List (From your 3 standard 8-foot boards):
- Vertical Side Panels (Left & Right): Cut 2 boards to 30 inches long and 11 inches wide.
- Shelf Slats / Tiers: Cut 6 to 9 boards to 30.5 inches long (allowing 3 slatted boards per tier for proper ventilation).
- Top Bench / Display Board: Cut 1 solid board to 32 inches long (optional, if you want a flat top surface to sit bags or keys).
Step 2: Measuring and Cutting the Timber
Precise, square cuts are the secret difference between a professional-looking piece of furniture and a wobbly rack when figuring out how to build a simple wooden shoe rack:
- Measure Twice, Mark Once: Use your carpenter’s square to draw a crisp, perpendicular pencil line across the face and edges of the board where you need to cut.
- Make Straight Cuts: Clamp your board firmly to your workbench. If using a hand saw, keep your blade tracking right on the waste side of your pencil line, maintaining a steady cutting angle. If using a circular saw, clamp a straight wooden guide board parallel to your cut line so the saw plate glides straight without wandering.
- Sand the End-Grains: Lightly hand-sand all freshly cut board ends with 80-grit sandpaper on a block to remove any rough splinters.
Step 3: Dry-Fitting and Pre-Drilling Screw Holes
Before introducing any wood glue while executing how to build a simple wooden shoe rack, assemble your components “dry” to verify that everything fits squarely together:
- Mark Shelf Heights: On the inner faces of your two 30-inch vertical side panels, measure and mark horizontal pencil lines for your three shelf tiers (e.g., bottom shelf 4 inches off the floor, middle shelf at 14 inches, and top shelf at 24 inches).
- Check for Square: Use your carpenter’s square inside the corners to ensure your layout lines are level and parallel.
- Pre-Drill Pilot Holes: Wood splits very easily when screws are driven directly near the ends of boards. Pre-drill pilot holes through the outside of the vertical panels directly into the ends of each shelf slat, using a countersink bit so the screw heads sink flush below the surface.
Step 4: Gluing and Assembling the Racks
Now you are ready to lock the primary structure together as you progress through how to build a simple wooden shoe rack:
- Apply PVA Wood Glue: Apply a bead of PVA carpenter’s wood glue along the ends of your slat boards and position them against the interior pencil marks on the first vertical side panel.
- Drive the Screws: Drive your 2-inch wood screws through the pre-drilled exterior panel holes into the shelf slat ends.
- Attach the Second Side: Position the second vertical side panel over the other ends of the shelf slats, apply glue, and drive its screws home.
- Attach the Top Surface: Secure your solid top display board across the very top of the vertical side panels to complete the rigid frame.
Step 5: Filling, Sanding, and Finishing
A great finish protects raw timber from mud and moisture as you complete how to build a simple wooden shoe rack:
- Fill Screw Holes: Dab a small amount of wood filler or tinted wood putty over your recessed screw heads using a putty knife. Let it dry, then sand flush.
- Smooth Sanding Pass: Give the entire shoe rack a thorough sanding sweep. Start with 120-grit paper to remove any handling marks or glue squeezes, and finish with 220-grit paper until the wood feels silky smooth. Wipe away all dust.
- Stain and Protect: Because entryway shoe racks encounter dirty shoe soles and damp rainy-season mud, protecting the wood is essential. Brush on two or three coats of clear polyurethane varnish or waterproof wood lacquer, allowing proper drying time between coats.
Common Mistakes to Avoid
- Skipping Slats for Solid Boards: Using solid, unvented boards for shoe shelves traps moisture and dirt from wet footwear. Open slats allow mud to dry and drop through safely.
- Skipping Pilot Holes: Driving thick wood screws straight into the edge of a board without pre-drilling will split the timber.
- Placing the Bottom Tier Flat on the Floor: Always raise the bottom shoe tier at least 3 to 4 inches off the floor so you can easily sweep and mop underneath during house cleaning.
Frequently Asked Questions (FAQs)
Why should a shoe rack have slatted shelves instead of solid wood?
Slatted shelves provide vital air circulation around damp or sweaty shoes, preventing mold growth and unpleasant odors from building up inside your entryway.
What is the best wood to use for a shoe rack in Nigeria?
Seasoned gmelina, treated pine, or durable mahogany planks work wonderfully. They handle everyday wear and tear and can be easily wiped clean with a damp cloth.
Final Thoughts
Mastering how to build a simple wooden shoe rack is a rewarding weekend project that instantly clears up entryway clutter. By measuring accurately, pre-drilling your joints, and finishing with a moisture-resistant varnish, you will create a durable, custom piece of furniture that keeps your footwear organized for years.