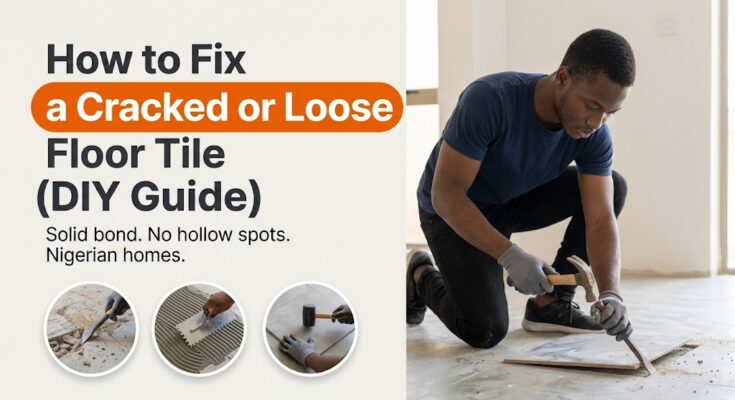
There are few more distinct—or irritating—sounds in a Nigerian home than stepping across your parlour or kitchen floor and hearing a hollow clack-clack beneath your shoes. Whether it is a kitchen tile that wobbles slightly every time you walk past the sink or a parlour tile cracked straight across from a heavy pot slipping out of your hands, dealing with a damaged floor is a headache. But learning how to fix a cracked or loose floor tile yourself is one of those deeply satisfying weekend projects that saves you from hiring a tiler to rip up half the room.
Many homeowners assume that a single broken or loose tile means calling in a professional tiler to tear up half the floor. Yet understanding how to fix a cracked or loose floor tile yourself is a straightforward weekend DIY project. If you catch a loose tile before it shatters under pressure, you can often pop it up cleanly, scrape away the old brittle mortar, and relay it so it matches the surrounding floor perfectly.
In this comprehensive guide, we will walk you through the entire restoration process: how to diagnose whether a tile is merely loose or structurally damaged, how to remove it without chipping neighboring tiles, how to mix the right bonding mortar for Nigerian cement standards, and how to grout and seal your repair so nobody can tell which tile was replaced.
Important Safety and Workshop Warnings
Before you start hammering away at your floor while figuring out how to fix a cracked or loose floor tile, keep these precautions in mind:
- Protect Your Eyes: Raking out old mortar and chipping up cracked ceramic throws sharp, razor-thin shards of glaze and dry dust. Always wear safety glasses or protective goggles.
- Protect Your Hands: Broken edges on porcelain and ceramic tiles are extremely sharp. Wear heavy utility gloves when lifting debris.
- Watch Out for Concealed Water Pipes or Electrical Conduits: In modern Nigerian buildings, water supply lines or electrical conduits sometimes run shallowly beneath floor screed. Never drive heavy chisels deep into concrete subfloors.
- Keep Dust Off Finished Surfaces: Sweep up dry dust frequently so grit doesn’t scratch your polished porcelain tiles.
Tools and Materials Needed
Gather these items before starting your project on how to fix a cracked or loose floor tile. Most are readily available in local hardware markets and building material shops:
- Safety glasses and heavy work gloves
- Stiff hand brush and scraper
- Narrow bolster chisel or cold chisel and a small claw hammer
- Notched trowel (6 mm square notch)
- Rubber grout float or a small putty knife
- Tile adhesive (polymer-modified adhesive) or high-grade Portland cement mixed with clean sharp sand
- Matching tile grout (colour-matched to your existing floor joints)
- Tile spacers (1.5 mm or 2 mm)
- Clean sponges and soft cotton cleaning rags
Step 1: Diagnose the Damage (Loose vs. Cracked)
Before buying replacement materials when researching how to fix a cracked or loose floor tile, figure out what you are dealing with:
- The Hollow Tap Test: Tap gently across your floor with a coin or the wooden handle of a screwdriver. A properly bonded tile makes a high-pitched, solid thud. A loose tile produces a distinct, resonant hollow echo.
- If the Tile Is Loose but Not Cracked: You can carefully lift the tile, clean the bottom, and relay it using fresh adhesive without buying a replacement piece.
- If the Tile Is Cracked Across: You must find a spare tile from the box your tiler left behind during construction. If you don’t have a spare, take a clean fragment of the broken tile to a major building material market to match the size, thickness, and glaze pattern.
Step 2: Remove the Damaged Tile Without Hitting Neighbors
Removing a single tile without chipping the surrounding ones is a vital technique when learning how to fix a cracked or loose floor tile:
- Scrape Out the Surrounding Grout First: Do not start hammering on the tile while it is locked tightly inside hard cement grout joints. Use the sharp corner of a utility knife, a grout saw, or a narrow scraper to dig out all the old grout surrounding the target tile. Clearing the joints creates a safety buffer that stops blows from transferring to adjacent tiles.
- If the Tile Is Already Cracked: Start chipping away from the existing crack toward the centre using a narrow bolster chisel held at a shallow 30-degree angle. Tap lightly with your hammer—never swing it like a nail-driver. The pieces will pop upward and break free.
- If the Tile Is Loose but Intact: Tap gently along one edge with your chisel until an edge lifts. Slide the chisel underneath and pry upward slowly. With luck, the entire tile will pop off in one piece, leaving the old mortar bed exposed on the floor.
Step 3: Clean Out the Old Mortar Bed
You cannot lay a new tile directly over lumpy, uneven old mortar when executing how to fix a cracked or loose floor tile; the new tile will sit higher than the rest of the floor (creating a dangerous tripping hazard called a “lippage”).
- Chisel Down the Subfloor: Use your bolster chisel and hammer to chip away all the old, crumbly mortar or cement bed down to the solid concrete subfloor.
- Scrape and Vacuum Clean: Sweep away every trace of dust and concrete crumbs. Wipe the exposed subfloor with a damp sponge. The subfloor must be spotless and slightly damp so it doesn’t suck the moisture out of your fresh adhesive too quickly.
Step 4: Mix and Apply Fresh Tile Adhesive
- Mix the Adhesive: In a clean plastic bucket, mix your polymer-modified tile adhesive (or a stiff mix of 1 part cement to 3 parts clean sifted sand) with clean water until it forms a thick, smooth paste that holds its shape on a trowel without sagging.
- Butter the Subfloor: Use the flat edge of your notched trowel to press a thin layer of adhesive firmly onto the concrete subfloor, then comb through it with the notched side to create uniform parallel ridges.
- Back-Butter the Tile: For maximum bond strength—especially in heavy traffic areas like a Nigerian kitchen or hallway—spread a paper-thin skim of adhesive across the flat back of the tile you are laying.
Step 5: Lay, Level, and Align the Tile
- Press Into Position: Lower the tile squarely into the adhesive bed. Twist it slightly perpendicular to the trowel ridges to collapse them and eliminate air pockets underneath.
- Check Floor Level: Lay a spirit level or a straight piece of timber across your new tile and the surrounding old tiles. Tap the new tile gently with a rubber mallet (or the wooden handle of your hammer wrapped in a cloth) until it sits dead-even with the rest of the floor. If it sits too low, lift it up and add a little more adhesive.
- Insert Tile Spacers: Push plastic tile spacers into the gaps on all four sides to maintain an even grout line matching the rest of your room.
- Clean Excess Adhesive: Wipe away any adhesive that squeezed up into the grout joints using a damp sponge before it cures. Leave the floor untouched for 24 hours.
Step 6: Grout and Seal the Repair
Once the adhesive has cured overnight, the final step in how to fix a cracked or loose floor tile blends your repair smoothly into the floor:
- Remove Spacers and Mix Grout: Pull out the plastic tile spacers. Mix your colour-matched tile grout with water to a toothpaste consistency.
- Press Into the Joints: Use a rubber grout float (or a small flexible putty knife) to pack the grout firmly into the empty joints diagonally across the tiles.
- Clean and Buff: Wait 15 to 20 minutes until the grout starts to firm up (haze over), then wipe the tile faces gently with a damp (not dripping wet) sponge to clean away excess residue. Let it dry completely, then buff the haze off with a dry microfiber cloth. (To protect your entire floor from future staining, follow our comprehensive guide on How to Clean and Seal Floor Tiles).
Common Mistakes to Avoid
- Skipping the Grout Removal Around Edges: Striking a tile without clearing its grout joints first almost always chips the glaze of the neighboring tiles.
- Leaving Air Pockets Underneath: Failing to comb adhesive ridges or back-butter the tile leaves empty voids; when someone steps on that tile later, it cracks right down the middle.
- Walking on the Repair Too Soon: Let the adhesive cure for a full 24 hours before stepping on the newly relaid tile.
Frequently Asked Questions (FAQs)
Can I relay a cracked tile using super glue or epoxy?
No. Epoxy or super glue can hold a broken ceramic ornament together, but they cannot support the weight of a human foot on a floor. The moment someone steps on a glued tile, it will snap instantly. You must replace a cracked tile entirely.
Why do floor tiles sound hollow and pop loose in Nigerian homes?
Hollow tiles usually result from poor installation practices—such as placing dollops of cement at the four corners instead of combing an even bed across the entire tile—or structural shifting caused by seasonal soil movement during wet and dry seasons.
Final Thoughts
Mastering how to fix a cracked or loose floor tile doesn’t require calling an expensive artisan. By working carefully, clearing out old mortar, combing fresh adhesive, and leveling your replacement tile evenly, you can eliminate hollow spots and restore your floor’s solid finish in a single afternoon.