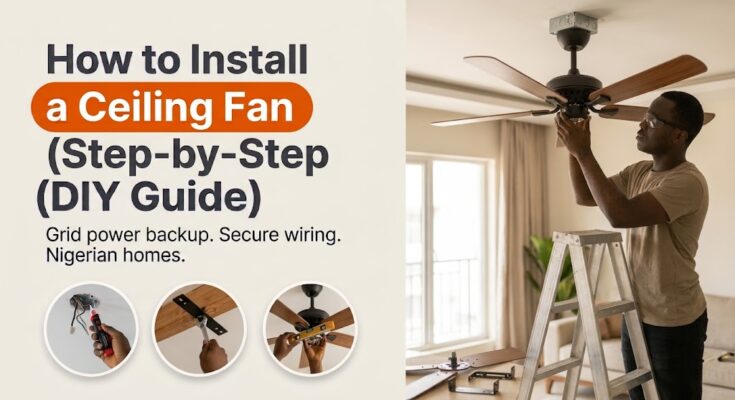
There is nothing quite like the suffocating heat of a still, humid afternoon in Nigeria when the grid power drops and the air refuses to move. While a standing fan helps, a properly installed ceiling fan circulates air across the entire room, making living spaces and bedrooms vastly more comfortable.
When you look into hiring an electrician, you might face steep service fees or long wait times. Knowing how to install a ceiling fan yourself empowers you to handle the upgrade safely, ensuring your fan is securely bolted to concrete or wooden roof joists without wobbling.
Many DIYers feel intimidated by electrical wiring, but replacing or installing a ceiling fan is straightforward if you follow strict safety protocols. When learning how to install a ceiling fan, the most critical part of the job isn’t the wiring—it is ensuring that the electrical junction box in your ceiling is anchored to a heavy-duty support brace capable of holding the dynamic weight and vibration of a spinning fan.
In this comprehensive, beginner-friendly guide covering how to install a ceiling fan, we will walk you through turning off power safely, inspecting your ceiling junction box, mounting the fan bracket, connecting the electrical wires, attaching the blades, and balancing the unit for silent operation.
Important Electrical Safety and Workshop Warnings
Electricity demands absolute caution. Before touching a single wire or climbing a ladder while practicing how to install a ceiling fan, review these essential safety rules:
- Kill the Power at the Main Breaker: Never rely on just flipping the wall switch off. Go to your distribution box (breaker panel) and switch off the exact circuit breaker controlling the room. Use a non-contact voltage tester to confirm zero electricity is flowing through the wires before touching them.
- Use a Sturdy Ladder: Never stand on a plastic chair, stool, or table. Use a stable, rated A-frame ladder placed on a flat, dry floor.
- Support the Weight: A ceiling fan vibrates constantly. Never mount a fan directly to ordinary drywall or ceiling plastic panels; it must be bolted directly into a ceiling joist or a heavy-duty rated fan brace.
Tools and Materials Needed
Gather your tools and components before climbing up the ladder to execute how to install a ceiling fan:
Materials & Hardware
- Ceiling fan kit (complete with motor, blades, downrod, and mounting bracket)
- Heavy-duty electrical junction box rated for ceiling fans
- Wire connectors (wire nuts) and electrical tape
- Screws and toggle bolts (if securing to concrete slab or wooden joists)
Tools
- Non-contact voltage tester
- Standard and Phillips-head screwdrivers
- Wire strippers and diagonal cutting pliers
- Adjustable wrench
- Sturdy A-frame ladder
- Level
Step 1: Turn Off Power and Test the Wires
Before removing any old light fixture or opening the ceiling cavity as part of how to install a ceiling fan:
- Switch Off the Breaker: Locate your home distribution board and switch off the breaker for that room.
- Verify with a Tester: Touch your non-contact voltage tester against the wires hanging from the ceiling box. If the pen beeps or glows, power is still live—do not proceed until the tester remains completely silent.
Step 2: Inspect or Install the Ceiling Fan Junction Box
Standard light fixture boxes are only built to hold lightweight plastic lamp shades. Ceiling fans weigh much more and generate constant torque and vibration.
- Check the Box: Remove your old light fixture and look inside the ceiling box. If it is screwed directly to a wooden roof joist or an iron bar brace spanning between joists, you are ready for how to install a ceiling fan.
- Concrete Ceilings: In many Nigerian homes built with concrete slab ceilings, heavy metal anchor hooks or recessed knockout boxes are cast directly into the concrete. Ensure the anchor bolt is rock-solid and can support heavy pulling force before hanging any hardware.
Step 3: Assemble the Fan Motor and Hanging Bracket
- Attach the Mounting Bracket: Screw the heavy metal hanging bracket securely to your ceiling junction box using the provided machine screws and lock washers as you progress through how to install a ceiling fan. Ensure it is tightly fastened.
- Pre-Assemble the Downrod: Feed the fan’s electrical wires up through the downrod canopy and downrod pipe. Attach the downrod to the top of the motor housing, securing the clevis pin and cotter pin tightly according to your fan manual.
- Hang the Motor: Lift the motor assembly up and rest the downrod’s hanging ball into the socket of the ceiling mounting bracket. Twist the motor slightly until it locks into its seated groove so it cannot slip.
Step 4: Make the Electrical Connections
With the fan safely hanging from the bracket during your process of how to install a ceiling fan, connect your household wiring to the fan leads using wire nuts:
- Green or Bare Copper (Ground): Connect the house ground wire to the ground wires coming from the mounting bracket and downrod.
- White (Neutral): Connect the neutral house wire to the white wire from the fan.
- Black or Red (Live/Hot): Connect the live supply wire from your wall switch to the black wire from the fan.
Wrap each wire nut connection securely with electrical tape for extra safety, then push all wires neatly up into the junction box cavity. Slide the decorative canopy cover up against the ceiling and secure it.
Step 5: Attach the Blades and Balance the Fan
- Mount the Blades: Screw the individual fan blades to the motor flywheel or blade irons using the provided lock washers and screws. Do not overtighten them initially; snug them up evenly.
- Test Run: Restore power at your main breaker and turn on the wall switch to test your work on how to install a ceiling fan. Test all speed settings.
- Check for Wobble: If the fan wobbles, use the balancing kit included in your box (usually a small plastic clip and adhesive balancing weights) to clip onto the blades until smooth operation is achieved.
Common Mistakes to Avoid
- Skipping the Circuit Breaker Test: Relying solely on the wall switch often leaves the hot wire live if the switch was wired incorrectly by a previous installer. Always test with a voltage detector.
- Using Undersized Junction Boxes: Hanging a heavy fan from a weak plastic light box will cause the unit to tear free from the ceiling over time.
- Overtightening Blade Screws: Forcing screws too tightly into wood or composite fan blades can strip the threads or crack the material.
Frequently Asked Questions (FAQs) on How to Install a Ceiling Fan
Can I install a ceiling fan on a POP (Plaster of Paris) ceiling?
POP ceilings are decorative and cannot support the weight or vibration of a ceiling fan. When figuring out how to install a ceiling fan, the fan’s mounting bracket must pass through an opening in the POP ceiling and anchor directly into the structural concrete slab or wooden roof joist above.
Why does my newly installed ceiling fan wobble?
A wobble is usually caused by uneven blade weights, loose blade screws, or a downrod ball that isn’t seated properly in the mounting bracket slot. Check all screws and ensure the blades are tightened equally.
Final Thoughts
Mastering how to install a ceiling fan is a practical DIY skill that dramatically improves indoor comfort during hot, humid seasons. By verifying power disconnection with a tester, anchoring your mounting bracket to solid structural framing, and wiring correctly, you can complete this upgrade safely in a single afternoon.