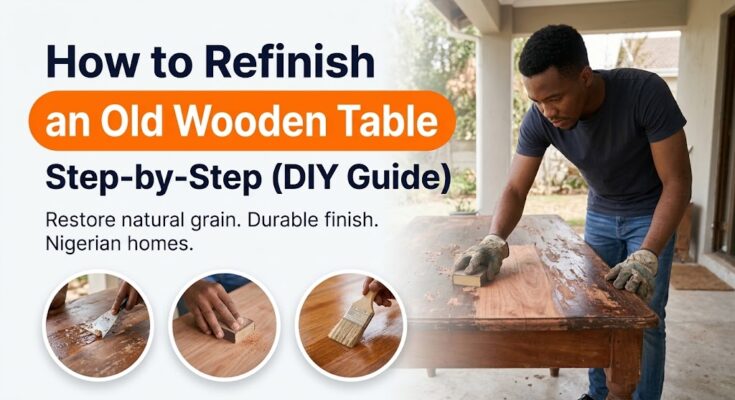
Few pieces of household furniture take as much daily punishment as a wooden table. Between hot serving pots, spilled drinks, kids’ homework, and humid weather, even the toughest local mahogany or teak tabletop eventually develops cloudy heat rings, peeling varnish, and deep surface scratches. Instead of hiding the timber under a plastic tablecloth, knowing how to refinish an old wooden table yourself lets you strip away years of damage and bring back the rich, natural wood grain.
In many Nigerian homes, when a wooden table starts looking dull, sticky, or peeling at the edges, the immediate reaction is either to cover it with a heavy plastic tablecloth or pay a carpenter to haul it away for a costly respray. Learning how to refinish an old wooden table yourself is one of the most rewarding door How to Build a Simple Wooden Bookshelf: Beginner DIY Guideprojects you can tackle. It costs a fraction of buying new furniture, allows you to preserve solid timber frames that modern presswood cannot match, and leaves you with a stunning, durable finish.
In this comprehensive DIY guide, we will walk you through the entire restoration process: how to safely strip old varnish without gouging the wood, how to sand down to the raw grain, how to choose and apply wood stains suited for local timber, and how to apply a moisture-resistant protective topcoat.
Important Safety and Workspace Warnings
When figuring out how to refinish an old wooden table, remember that the process involves chemical paint strippers, fine wood dust, and volatile solvents. Follow these safety precautions before you begin:
- Work Outdoors or in a Well-Ventilated Area: Chemical paint strippers and wood finishes release strong fumes. Set up your workspace on a verandah, open garage, or shaded outdoor concrete slab with a cross-breeze.
- Wear Heavy-Duty Gloves and Eye Protection: Paint strippers contain harsh chemicals (like methylene chloride or caustic soda) that will burn your skin instantly on contact. Always wear heavy rubber gloves and safety glasses.
- Protect Your Lungs: When sanding dried finish and old wood fibers, wear an N95 dust mask. Inhaling fine wood dust irritates your airways.
- Manage Waste Safely: Do not pour chemical strippers down household drains or gutters. Collect stripped sludge into a disposable container and discard it responsibly.
Tools and Materials Needed
Before starting your project on how to refinish an old wooden table, gather these items. Most are readily available in large hardware markets and timber shops across Nigeria:
- Chemical Paint Stripper (Gel or liquid wood stripper) or a heat gun
- Scraper or Putty Knife (flexible metal blade with smooth edges to avoid digging into the wood)
- Sandpaper sheets or sanding blocks: 80-grit (for heavy stripping), 120-grit (for smoothing), and 220-grit (for final fine sanding)
- Wood Stain or Tint: Oil-based or spirit-based wood stain (popular local shades include mahogany, walnut, teak, or natural clear)
- Protective Topcoat: Clear polyurethane varnish, wood lacquer, or clear sanding sealer
- Brushes and Clean Rags: Natural-bristle brushes for varnish, lint-free cotton rags for wiping stain
- Fine steel wool (Grade 0000) for smoothing between topcoat layers
- Methylated spirit or turpentine for cleanup
Step 1: Strip Off the Old Varnish or Paint
You cannot apply fresh stain or varnish over old, cracked, or peeling finishes when learning how to refinish an old wooden table. The new product will not adhere properly and will blotch or peel within weeks. You must get down to the bare, raw wood.
- Clean the Table: Wipe down the table surface with a damp cloth and mild detergent to remove surface grease, dust, and grime, then let it dry completely.
- Apply the Chemical Stripper: Pour a generous amount of liquid or gel paint stripper onto a small section of the table top (work in manageable 2-foot by 2-foot sections so the stripper doesn’t dry out too fast). Use an old paintbrush to brush it on thick in one direction—do not scrub it back and forth like paint.
- Wait for the Finish to Bubble: Let the stripper sit for 15 to 30 minutes. You will watch the old varnish wrinkle, bubble, and lift away from the wood surface.
- Scrape Away the Sludge: Hold your metal putty knife at a shallow 45-degree angle and gently push it forward across the wood. The old finish will slide off like soft butter. Crucial Rule: Never dig the sharp corners of the metal scraper into the wood, or you will leave deep gouges that require hours of extra sanding to erase.
- Clean the Residue: Wipe away remaining sludge with a rag soaked in turpentine or methylated spirit (or wash down with water if the stripper instructions permit). Let the wood dry completely for at least 12 to 24 hours before touching sandpaper.
(Alternative Method: If you are using a heat gun instead of chemical stripper, hold the nozzle 4 to 6 inches away from the wood, sweep it slowly back and forth until the finish bubbles, and follow immediately behind with your scraper. Keep the heat moving constantly to avoid scorching the timber.)
Step 2: Sanding the Wood Down to Perfection
Sanding is the secret difference between amateur furniture and a factory-quality finish when tackling how to refinish an old wooden table.
- Start with 80-Grit Sandpaper: Once the stripped wood is 100% dry, wrap your 80-grit sandpaper around a wooden block (or use a palm sander if you have one). Sand strictly in the direction of the wood grain—never in circles or across the grain, as circular scratches will show up magnified under your stain. This grit removes remaining stubborn patches and old stain embedded in the pores.
- Move to 120-Grit Sandpaper: Wipe away the dust with a dry cloth or brush, then switch to 120-grit paper. This smooths out the rough scratches left by the coarse paper and prepares the wood fibers to absorb stain evenly.
- Finish with 220-Grit Sandpaper: Give the entire table (top, apron, and legs) a final smoothing pass with 220-grit sandpaper. The wood should feel as smooth as silk under your palm.
- Vacuum and Wipe Clean: Vacuum every inch of the table, then wipe it down with a tack cloth or a clean cloth lightly dampened with turpentine to capture every microscopic particle of dust.
Step 3: Staining the Wood (Optional)
If your table is made of beautiful hardwood (like mahogany or Iroko) and you love its natural color, you can skip wood stain and apply a clear finish directly. However, if you want to deepen the color, hide minor color variations, or transform plain wood into a rich walnut or dark mahogany finish as part of how to refinish an old wooden table, now is the time to stain.
- Test on a Hidden Area: Always test your wood stain on the underside of the table or a hidden corner of the apron first to see how the wood absorbs it.
- Apply the Stain: Dip a clean cotton rag or foam brush into the stain and wipe it evenly across the wood in the direction of the grain.
- Wipe Off the Excess: Do not let stain pool on the surface. After 3 to 5 minutes, take a clean, dry lint-free cloth and firmly wipe away all excess stain. The longer you leave the stain on before wiping, the darker the color will get.
- Drying Time: Allow the stain to dry completely according to the manufacturer’s instructions (usually 4 to 8 hours).
Step 4: Applying the Protective Topcoat
The topcoat is your table’s armor against hot plates, spilled tea, water rings, and daily scratches. Applying this correctly completes your guide on how to refinish an old wooden table.
- Apply the First Coat: Use a clean, high-quality natural-bristle brush to apply a thin, even coat of polyurethane varnish or wood lacquer along the direction of the wood grain. Avoid laying it on too thick, or it will run and sag.
- Let It Cure and Sand Lightly: Allow the first coat to dry for 6 to 12 hours. You will notice the surface feels slightly prickly or rough—this is normal, as wood fibers swell and harden when wet. Take your Grade 0000 fine steel wool or a 320-grit sandpaper and lightly buff the dried surface just enough to knock down the bumps. Wipe away the dust.
- Apply the Second and Third Coats: Apply a second thin coat of varnish. For dining tables that get heavy daily use, apply a third coat for ultimate durability, sanding lightly with steel wool between every single coat.
- Final Curing: Let the final coat cure untouched for at least 48 to 72 hours in a dust-free environment before placing heavy items or food on the table.
Common Mistakes to Avoid When Refinishing Tables
- Sanding Against the Grain: Circular sanding leaves ugly swirl marks that show up clearly once varnish is applied. Always sand parallel to the wood grain lines.
- Skipping the Drying Time: Applying stain or varnish over damp wood traps moisture inside, causing cloudy white patches or peeling bubbles later.
- Shaking the Varnish Tin: Shaking introduces air bubbles into the varnish, which dry into bumpy pinholes on your table top. Always stir varnish gently instead of shaking it.
Frequently Asked Questions (FAQs)
Can I refinish a table that has a laminated or presswood top?
No. Solid wood tables have thick timber that can be sanded down repeatedly. Laminated tables, formica, or low-quality presswood (chipboard) have only a thin printed paper or plastic film on top. If you sand through a laminate surface, you expose raw cardboard or sawdust composite underneath, which cannot be stained or repaired.
How do I remove white heat rings left by hot cups on an old table?
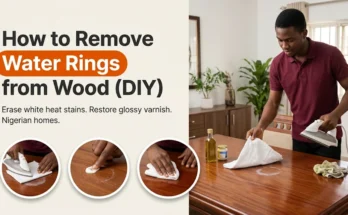
If you aren’t doing a full refinish yet, minor white heat rings in the top layer of wax can often be removed by mixing equal parts white toothpaste and baking soda, rubbing it gently into the ring with a soft cloth along the grain, and wiping clean.
Should I use oil or varnish for a dining table?
For a Nigerian dining table that experiences regular spills, hot food pots, and cleaning with damp cloths, polyurethane varnish or lacquer provides the strongest waterproof protection. Natural oils (like teak oil) look gorgeous and feel natural, but they require frequent reapplication every few months.
Final Thoughts
Mastering how to refinish an old wooden table takes a bit of elbow grease, patience, and time, but the reward is entirely worth it. By stripping away years of wear and tear, sanding down to the raw grain, and sealing it with a professional finish, you transform a tired, discarded piece of furniture into the stunning centerpiece of your room—built to last for many more generations.