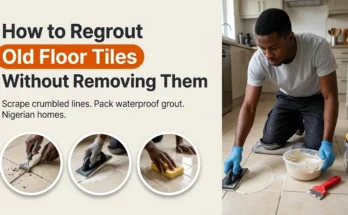
Tiled floors are the practical backbone of almost every Nigerian home—keeping parlours, bedrooms, kitchens, and verandahs cool underfoot during hot afternoons while standing up to heavy daily foot traffic. Yet even high-grade porcelain or vitrified ceramic slabs start looking tired once grime settles deep into the joints, which is why mastering how to clean and seal floor tiles properly makes all the difference after the tilers pack up and leave.
Within a year or two of moving into a newly tiled flat, most homeowners notice that mopping with ordinary soapy water no longer restores that crisp, newly laid shine. White or light-grey grout lines turn dark brown in the walkways, bathroom corners develop chalky white borehole crusts or orange iron stains, and red laterite mud tracked in during the rains leaves dull tracks from the front door.
In nearly every case, the baked ceramic or porcelain tile face itself is completely unharmed. The real problem is that unsealed cement grout lines between the tiles act like hard sponges, soaking up dirty mop water, palm-oil splatters, and fine Harmattan dust. Worse still, scrubbing the floor with unlabelled acidic “toilet washes” sold by street hawkers eats away the cement joints and permanently dulls the factory glaze.
Below, we walk through how to identify your exact floor tile, how to lift deep stains out of sunken grout lines using safe household chemistry, how to run a 60-second water-drop test, and how to lock out future dirt with a penetrating grout sealer.
Identify Your Floor Tile Before Buying Any Sealer
Not every tiled floor in a Nigerian house absorbs liquids the same way. Brushing a surface-coating sealer over a glossy ceramic bedroom tile will leave an ugly, peeling plastic film across the room, while leaving cement grout or unglazed verandah clay tiles bare guarantees permanent stains.
Check your floor against this breakdown first:
| Tile Type | Typical Rooms in Nigerian Homes | Is the Tile Face Porous? | What Actually Needs Sealing? |
| Glazed Ceramic Tiles | Bedrooms, kitchens, bathroom walls, standard parlours | No (baked glass glaze is waterproof) | Seal the cement grout lines only (never coat the tile face) |
| Polished Vitrified / Porcelain (60×60 cm) | Main living rooms, dining areas, passages | Very Low (micro-pores opened during factory polishing) | Seal the grout lines; only use a Nano-porcelain sealer if raw/unwaxed |
| Matte / Textured Non-Slip Tiles | Bathroom floors, laundry areas, entrance steps | No (glazed matte top, though texture traps surface dirt) | Seal the cement grout lines only |
| Unglazed Terracotta, Quarry, or Cement Tiles | Verandahs, outdoor walkways, sit-outs | Yes (raw clay/cement body drinks up water and mud) | Seal both the tile surface and the grout lines |
| Natural Stone (Marble, Granite, Travertine) | Entrance foyers, staircases, luxury parlours | Yes (stains easily from oils and acids) | Seal both stone and grout with a dedicated stone impregnator |
The 60-Second Water-Drop Test
If you aren’t sure whether your tiles or grout joints are porous, drip half a teaspoon of clean water onto the centre of a dry tile and another few drops right onto the cement grout line. Wait 60 seconds:
- Water stays beaded up on top like rain on a waxed car: That surface is non-porous (or already sealed) and needs zero sealer.
- Water soaks right in and turns the cement joint dark: The pores are wide open and absorbing dirty mop water every week—sealing it will save you hours of scrubbing.
Safety Rules: What Never to Put on Tiled Floors
- Ban raw acidic “toilet washes” from your tiled floors: Unlabelled bottles of diluted hydrochloric (muriatic) acid strip the factory shine off polished porcelain, dissolve the sand-and-cement grout between your tiles until water leaks under the slab, and pit chrome floor drains black.
- Never mix chlorine bleach (Jik/Hypo) with vinegar or acidic descalers: Combining bleach with any acid releases toxic chlorine gas that can overwhelm you quickly in a small bathroom with tiny louvre windows.
- Throw away metal wire sponges and steel brushes: Scrubbing a stubborn floor spot with an iron pot-scrubber cuts microscopic scratches into the glaze that trap dark dirt permanently. Use stiff nylon brushes only.
- Fit protective pads under chair and table legs: Before dragging heavy wooden furniture back across a freshly sealed floor, fit felt or nylon glides under the feet as explained in our guide on How to Fix a Wobbly Chair Leg.
Tools and Supplies Needed
Everything required is available at local supermarkets, paint depots, and building-material markets:
For Deep Cleaning
- Soft indoor broom and dustpan
- Two plastic buckets (one for warm wash water, one strictly for clean rinse water)
- Microfiber flat mop or clean cotton string mop
- Stiff-bristled nylon hand brush or an old hard toothbrush (for scrubbing narrow grout channels)
- Mild liquid dish soap (or pH-neutral tile cleaner—avoid heavy powdered laundry detergents)
- Baking soda (sodium bicarbonate) and white household vinegar (or 3% hydrogen peroxide from a pharmacy)
- Old bath towels or microfiber cloths
For Sealing Grout Lines
- Penetrating (Impregnating) Grout & Tile Sealer (available at major tile showrooms and building supply stores—avoid cheap glossy surface varnishes)
- Small foam brush, narrow artist’s paintbrush, or roller applicator bottle
Part 1: Deep-Clean the Tiles and Lift Embedded Grout Dirt
Never brush sealer over dirty or damp grout—you will simply lock the black stains and trapped moisture under a permanent waterproof barrier.
Step 1: Sweep Away All Loose Grit and Harmattan Sand
Sweep the entire room thoroughly before bringing water near the floor. Fine quartz sand blown in during Harmattan or tracked in from an unpaved compound acts like liquid sandpaper under a mop, dulling glossy porcelain slabs. (If rainwater washes mud onto your verandah every storm, diverting the runoff outside first—as covered in What Is Landscaping? A Beginner’s Guide—will keep your entrance tiles clean year-round).
Step 2: Mop With the Two-Bucket Method (And Cut the Soap!)
Fill Bucket 1 with warm water and just one teaspoon of liquid dish soap. Fill Bucket 2 with plain, clean water.
Why so little soap? Dumping half a cup of powdered washing detergent into a single bucket of water is the number one reason Nigerian tiled floors look cloudy and turn sticky within days. Excess soap dries into an invisible film on the tile face that grabs dust from every shoe that walks past. Mop a small 2 m × 2 m section, wring the dirty brown water out in your plain rinse bucket first, and only then dip the clean mop back into your wash solution.
Step 3: Draw Deep Dirt Out of Grout Lines with Baking Soda Paste
Because cement grout sits 1 to 2 millimetres lower than the tile surface, an ordinary mop glides right across the top while pushing dirty water down into the sunken grooves.
- Mix a thick paste: In a small plastic bowl, stir 3 parts baking soda with 1 part water (or 3% hydrogen peroxide for darkened bathroom grout) until it feels like toothpaste.
- Press into the joints: Use a gloved finger or the back of an old spoon to smear the paste along the stained grout lines.
- Activate on ceramic/porcelain floors (Skip on natural marble): Mist or dab a little white household vinegar onto the baking soda paste. The gentle fizzing action breaks up soap scum and muddy sediment trapped inside the cement pores.
- Let dwell for 15 minutes, then scrub lengthwise: Wait 15 minutes, then scrub back and forth along the grout line (not across the tile faces) using a stiff nylon brush or old toothbrush.
Step 4: Remove Stubborn Local Stains (Borehole Rust, Cement Haze & Palm Oil)
- Reddish-Brown Borehole Iron & White Scale (Bathrooms): Borehole water with high iron or mineral content leaves rusty orange rings or chalky white scale wherever a tap drips. First, stop the constant dripping using our guide on [suspicious link removed]. Next, lay paper towels soaked in undiluted white vinegar over the scale on ceramic tiles for 20 minutes, scrub with a nylon brush, and rinse well. (If black mildew spots have crept up the damp bathroom walls too, follow our walkthrough on How to Remove Mold from Bathroom Walls Safely).
- Cloudy White Cement Haze After Masonry Work: If you recently finished wall work—such as How to Patch a Hole in a Wall with Cement or Plaster—and notice a powdery white film that reappears every time the floor dries, plain water won’t touch it. Scrape off any raised mortar drops gently with a wooden stick or plastic card, wash the floor with a 1:4 mix of white vinegar and warm water (or a dedicated buffered cement-film remover), and rinse immediately with fresh water.
- Kitchen Palm Oil and Greasy Grout: Hot red oil and frying splatters turn kitchen grout dark and tacky. Sprinkle dry baking soda directly over the greasy joint, add a few drops of degreasing dish liquid and warm water, let it sit for 10 minutes, scrub with a nylon brush, and wipe clean with a hot damp rag.
Step 5: Rinse Twice and Dry for a Full 24 Hours
Wipe up all loosened grout paste with a wet cloth, then mop the entire room twice with fresh buckets of plain water so zero baking soda residue dries on the tiles.
Switch on the ceiling fan, open the windows, and wait a full 24 hours before sealing. If water is still sitting inside the microscopic pores of the cement grout, penetrating sealer cannot soak in and can cure with a cloudy white haze.
Part 2: Seal the Grout Lines Against Future Stains
Once the grout is clean and bone-dry, sealing takes less than an hour for an average room and keeps dirty mop water sitting right on top of the joint where it wipes away effortlessly.
Penetrating Sealer vs. Topical Coating: Buy the Right Tin
When shopping at a tile depot, read the tin carefully:
- Penetrating (Impregnating) Sealer — BUY THIS: A thin liquid that soaks deep into the porous cement grout and chemically repels water and oil from the inside without changing the colour of the grout or leaving a slippery film.
- Topical (Film-Forming) Sealer — AVOID ON GLAZED TILES: Acts like clear gloss varnish on top of rough outdoor terracotta or slate. If brushed onto indoor ceramic or porcelain tiles, it peels off in patches and makes wet bathroom floors dangerously slick.
Step-by-Step Sealing Process
- Test a hidden corner behind a door first: Brush a few drops of sealer onto an out-of-sight grout line, wait 10 minutes, and wipe it dry to make sure it doesn’t alter the shade of your grout.
- Trace the grout joints carefully: Using a narrow foam brush or a squeeze bottle with a small roller tip, apply a light, even wet stripe of penetrating sealer directly along the cement grout lines. Do not flood the floor.
- Let the cement drink it in for 5 to 10 minutes: Watch the grout line—dry porous cement will absorb the first pass quickly. If a spot sucks the liquid dry within two minutes, brush a second light pass right over it.
- Buff off every drop of excess sealer from the tile faces BEFORE it dries (Crucial Step!): Do not walk away and let excess sealer dry on top of your glazed ceramic or porcelain tiles! Within 5 to 10 minutes of applying the sealer to a section, take a clean, dry microfiber towel and buff the surrounding tile faces completely dry. If penetrating sealer dries on top of non-porous porcelain, it leaves a sticky, hazy halo along the edges of the joint.
- Allow 24 hours before mopping: You can usually walk across the floor in clean socks after 3 to 4 hours, but keep all water, mops, and bathroom splashes off the sealed joints for at least 24 hours while the chemical barrier cures.
- Confirm with a quick water drop: The next day, drip a bead of water onto a sealed grout line—it should sit on top in a tight round droplet instead of darkening the cement.
Routine Care to Keep Sealed Floors Spotless
- Sweep or dust-mop daily so gritty sand doesn’t grind away the sealer along heavy walkways.
- Mop with warm water and just a few drops of pH-neutral dish soap—skip bleach, powdered detergent, and acidic cleaners so your sealer lasts a full 12 to 24 months before needing a quick touch-up coat.
- Inspect grout lines for crumbling sections: If you spot a section where the cement grout has cracked and fallen out completely—or a tile sounds hollow when tapped—water will seep underneath the slab even with sealer. We cover how to rake out and regrout missing joints in our upcoming guide on How to Fix a Cracked or Loose Floor Tile.