Learning how to build a simple raised garden bed is the most practical way to grow fresh scent leaf (efinrin or nchuanwu), fluted pumpkin (ugu), tomatoes, and peppers right in your compound without fighting rock-hard ground. Anyone who has tried digging a vegetable patch directly into backyard soil in Nigeria knows the frustration. In many neighborhoods, the ground is either compacted red laterite clay that bakes like brick in the dry season, loose sandy soil that drains nutrients away overnight, or completely covered in concrete interlocking stones left behind by the builders.
Even when you manage to dig up a flat plot at ground level, the first heavy downpour of the rainy season often floods the beds, washes away your expensive manure, and splashes mud all over your crops. On top of that, bending all the way down to the ground to pull weeds under the hot afternoon sun gets exhausting fast. By building a bottomless timber frame that sits ten to twelve inches above the ground and filling it with your own custom blend of dark loamy soil and compost, you take complete control of your drainage, soil quality, and root depth.
Drawing on hands-on backyard carpentry and local gardening experience, this guide walks you through how to build a simple raised garden bed from scratch in a single afternoon. You will learn which local timber species resist termites and rot, how to brace the corners so heavy wet soil never pushes the planks apart, and how to layer your bed for bumper harvests all year round.
Why Knowing How to Build a Simple Raised Garden Bed Pays Off
Before picking up a saw, it helps to understand why raised beds outperform traditional ground ridges in tropical compounds. If you have already read our introductory guide on what is landscaping, you know that organizing your outdoor space into clean structural zones stops erosion and makes a compound much easier to maintain.
Understanding how to build a simple raised garden bed solves four major backyard headaches at once:
- Superior rainwater drainage: Raising the soil profile ten inches above ground level prevents root rot during peak July and September downpours because excess water drains freely out the bottom.
- Zero soil compaction: Because you never step inside a narrow 3-foot or 4-foot frame, the soil stays loose and airy, letting pepper and tomato roots spread deep without resistance.
- Barrier against crawling pests: A solid timber wall makes it much harder for snails, ground beetles, and wandering neighborhood chickens to scratch up your young seedlings.
- Works over poor ground or concrete: You can place a raised bed directly over gravelly yard corners, hard clay, or even interlocking paving stones if you add a gravel drainage layer at the base.
Choosing the Best Local Timber (And Avoiding Termites)
The biggest mistake beginners make when figuring out how to build a simple raised garden bed in Nigeria is buying the cheapest white softwood planks (obeche or untreated pine) at the timber market. Once untreated softwood stays in constant contact with damp soil and tropical rain, subterranean termites and fungal rot will chew through the boards in less than six months.
At the same time, you must avoid coating the inside of a vegetable bed with used black engine oil, kerosene, or toxic chemical wood preservatives like Solignum. While builders routinely paint roofing timber and fence posts with black oil to stop termites, those petroleum chemicals leach straight into damp garden soil and get absorbed by the roots of the vegetables your family eats.
Instead, ask your local timber dealer for naturally dense, rot-resistant Nigerian hardwoods such as Iroko, Mahogany, Opepe, or Ekki (often sold as 2-by-10-inch or 2-by-12-inch rough-sawn planks). Dense hardwood fibers naturally resist moisture and insects for years without toxic chemicals. For extra protection, you will line the inner wooden walls with heavy-duty black polythene sheet (damp-proof membrane) before adding soil so the wet earth never sits directly against the bare timber.
Tools and Materials Needed
To build a standard 4-foot wide by 6-foot long rectangular bed (a size that lets you easily reach the center from either side without stepping on the soil), gather these supplies:
- Side planks: Two pieces of 2-by-10-inch or 2-by-12-inch hardwood planks cut to 6 feet long.
- End planks: Two pieces of 2-by-10-inch or 2-by-12-inch hardwood planks cut to 4 feet long.
- Corner & center anchor posts: Six pieces of 3-by-3-inch or 4-by-4-inch hardwood posts cut to 16 inches long (sharpened to a point at one end if driving into soil, or cut flat if sitting on concrete).
- Galvanized or stainless decking screws: Three-inch exterior-grade wood screws (avoid plain iron nails, which rust quickly and pull loose when wet soil expands).
- Black polythene sheet: Thick builder’s damp-proof membrane (DPM) to staple along the inside face of the planks.
- Cardboard or weed fabric: Flattened, unpainted brown carton boxes to line the bottom of the bed and smoother stubborn weeds.
- Basic tools: A cordless drill with a pilot bit and driver bit, a handsaw, a measuring tape, a carpenter’s square, a heavy hammer or mallet, a spirit level, and a heavy-duty stapler.
Step 1: Pick a Sunny, Accessible Spot in Your Compound
Vegetables and fruiting crops need at least six hours of direct sunlight every day to produce strong stems and heavy yields. Walk around your yard in the morning and afternoon to see where tall perimeter fence walls or neighboring two-story buildings cast shadows.
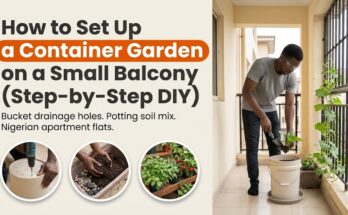
Pick a flat spot that gets full morning sun and sits close to an outdoor tap so you aren’t hauling heavy 20-liter buckets of water across the entire compound during the dry season. Make sure you leave at least two feet of walking clearance around all four sides of the bed so you can push a wheelbarrow past and kneel comfortably while weeding. If you don’t have any ground space in your yard at all, you can adapt these growing principles to pots by checking our upcoming guide on how to set up a container garden on a small balcony.
Step 2: How to Build a Simple Raised Garden Bed Frame
Once your timber is cut to length at the sawmill or at home, lay all the pieces out on a flat surface such as your driveway or veranda. Building the rectangular box on flat ground first is much easier than trying to hold heavy planks together over uneven grass.
Follow this assembly sequence to lock the frame together tightly:
- Pre-drill your screw holes: Hardwood splits if you drive thick screws straight near the ends; drill three evenly spaced pilot holes through the ends of each 6-foot plank.
- Clamp and screw the corners: Butt the end of a 6-foot plank flush against the outside edge of a 4-foot plank to form an L-shape, check that the corner sits at a 90-degree angle with your square, and drive three 3-inch galvanized screws in tight.
- Complete the rectangle: Repeat the process for the remaining corners until all four planks form a solid 4-by-6-foot rectangular box.
- Reinforce with corner posts: Place a 3-by-3-inch hardwood post tightly inside each of the four interior corners and two in the middle of the 6-foot sides, allowing 4 to 6 inches of post to stick out the bottom if you plan to anchor the bed into dirt.
- Fasten the posts from the outside: Drive two screws through each outer plank straight into the interior corner posts so the frame cannot twist or bow outward under soil pressure.
Taking twenty extra minutes to add those interior corner and center posts is the real secret when learning how to build a simple raised garden bed that lasts. Wet soil is surprisingly heavy—a 4-by-6-foot bed holds nearly a ton of earth after a rainstorm—and simple butt-jointed planks nailed together without corner posts will push apart within one season.
Step 3: Level the Ground and Anchor the Box
Clear your chosen garden spot of stones, plastic debris, and tall elephant grass using a hoe or machete. You do not need to dig deep trenches, just scrape the surface flat so the bottom edges of your wooden frame sit evenly on the ground without gaps.
With a helper holding the opposite end, carry your assembled timber frame over to the cleared spot and set it down in position. If your corner posts extend four inches below the frame, mark where the four legs touch the earth, lift the frame aside, and dig four shallow guide holes for the legs. Drop the frame back in and use a heavy wooden mallet or sledgehammer (with a scrap block of wood placed on top of the post to prevent splitting) to tap the corner posts firmly into the ground until the bottom edges of the planks rest flush on the soil.
Place a spirit level across the top edges of both the long and short sides. If one corner sits slightly high, dig a bit of soil out from underneath that side until the frame sits completely level. A level bed ensures rainwater and liquid fertilizer soak evenly across the entire root zone rather than pooling at one low end.
Step 4: Line the Inner Walls and Base
Before shoveling in a single headpan of dirt, protect your woodwork and block underground weeds from invading your new bed.
- Staple the moisture barrier: Cut strips of thick black polythene sheet (DPM) to match the height of your side planks and staple them firmly along the inside wooden walls ONLY—never cover the open bottom of the bed, or water won’t drain!
- Lay the cardboard weed blocker: Cover the bare ground inside the frame with two overlapping layers of plain brown cardboard cartons (with all plastic packing tape removed) and soak them thoroughly with a watering can.
- Add a coarse drainage layer: Spread a two-inch layer of dry palm kernel shells, coarse gravel, or broken twigs and dry leaves over the wet cardboard to keep the base porous and invite beneficial earthworms up from the native soil below.
If your raised bed is sitting on top of concrete paving stones rather than bare earth, drill a row of half-inch drainage holes along the very bottom edge of the wooden planks every twelve inches, and lay three inches of washed gravel at the base so excess water can escape without staining your compound floor. You can include checking these drainage holes as part of a monthly home maintenance checklist for Nigerian homes.
Step 5: Mix the Ideal Tropical Soil Blend
Never fill a raised garden bed with 100% pure clay dug from a roadside pit; it will compact into a solid, airless block after the first three rainfalls. When mastering how to build a simple raised garden bed, the soil recipe inside the box matters just as much as the carpentry outside.
For healthy, fast-growing vegetables in Nigeria’s climate, mix this proven three-part blend using a shovel on a clean tarpaulin or concrete floor before shoveling it into the bed:
- 50% Dark loamy topsoil: Rich black soil sourced from an uncultivated bush patch or reputable garden center, sifted free of large stones and plastic.
- 30% Fully cured compost or poultry manure: Well-rotted cow dung or poultry droppings that have been aged and sun-dried for at least six to eight weeks (never use fresh, hot poultry manure straight from a farm, or the ammonia will burn your seedlings immediately).
- 20% Coarse sharp river sand: Washed river sand (not salty ocean sand or dusty plaster sand) to keep the soil loose, crumbly, and fast-draining during heavy wet-season storms.
Fill the frame to within two inches of the top rim, water the bed thoroughly, and let it settle for three to four days before planting your seeds or transplanting seedlings. If you enjoy outdoor woodwork and want to tackle another rewarding project with your leftover timber and tools, check our tutorial on how to refinish an old wooden table for your veranda or patio.
Common Mistakes to Avoid
Even handy DIYers run into a few preventable snags when learning how to build a simple raised garden bed:
- Making the bed too wide: If you build a bed wider than 4 feet, you won’t be able to reach the middle from the sides, forcing you to step inside the box and crush your loose soil.
- Sealing the bottom with plastic: Wrapping polythene across the floor of the bed turns it into a muddy bathtub during the rainy season, drowning plant roots in days.
- Using fresh sawdust or fresh manure: Raw sawmill sawdust and un-aged chicken droppings lock up nitrogen and scorch tender roots; always let organic matter decompose first.
- Skipping center braces on long beds: Any plank longer than 5 feet will bow outward in the middle once wet soil presses against it unless you drive a 3-by-3 stake into the ground mid-span.
Frequently Asked Questions (FAQs)
How deep should a simple raised garden bed be for Nigerian vegetables?
A depth of 10 to 12 inches (one standard wide plank high) is ideal for almost all leafy greens and fruiting vegetables, including ugu, spinach, okra, tomatoes, scent leaf, and scotch bonnet peppers (ata rodo). If you want to grow deep root crops like carrots, sweet potatoes, or dwarf cassava, stack two 8-inch planks to create a 16-inch deep frame.
How long will a wooden raised garden bed last in a humid tropical climate?
When you know how to build a simple raised garden bed using dense local hardwoods like Iroko or Opepe, fasten the corners with galvanized screws, and staple a black polythene liner along the inside walls so wet soil doesn’t sit against the wood, your frame will easily last five to eight years before needing plank replacements.
Can I build a raised garden bed using hollow sandcrete blocks instead of wood?
Yes, laying a single or double course of 6-inch hollow sandcrete blocks dry (or with a weak mortar bed) is a durable, termite-proof alternative if timber prices are high in your area. Just be sure to fill the hollow cores of the blocks with soil and plant shallow herbs like mint or spring onions inside the block holes so the sun doesn’t overheat the concrete walls during the dry season.
Taking an afternoon to master how to build a simple raised garden bed transforms unused corners of your yard into a clean, productive kitchen garden. By choosing dense untreated hardwood, bracing your corners against heavy rainfall, lining the inner walls, and filling the frame with a porous blend of topsoil, cured manure, and river sand, you will enjoy fresh, homegrown harvests without breaking your back.