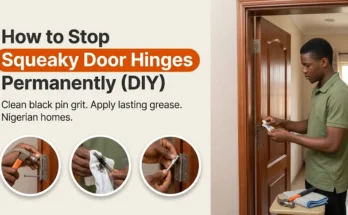
Few household nuisances test your patience quite like a bedroom or bathroom door that refuses to shut without a loud shoulder shove—or one that wedges itself so tightly inside the frame that you have to yank the handle with both hands just to get out of the room. If your home is fitted with solid timber doors, knowing how to fix a sticking door with a basic screwdriver and a strip of cardboard will save your lock cylinder, protect your floor tiles from ugly scrape marks, and spare you an unnecessary carpenter bill.
Across Nigeria, interior and exterior wooden doors bind against their frames for two distinct reasons: heavy hinge sag and seasonal weather expansion. Solid hardwood doors milled from mahogany, iroko, teak, or heavy flush-panel timber pull down hard on their top hinges every time they swing open. Gradually, those short top screws work loose inside the wooden sub-frame, allowing the nose of the door to droop diagonally until the top outer corner crashes into the jamb.
The second culprit hits between May and October. During weeks of heavy downpours, humid air causes unsealed timber edges to drink in moisture and swell by two to four millimetres. Many impatient homeowners immediately call a roadside carpenter to plane a thick strip of wood off the edge of the door—only to regret it in December when the dry Harmattan wind shrinks the timber back down, leaving a wide gap that lets mosquitoes, hallway light, and dust right into the bedroom.
Let’s diagnose why your door is rubbing first so you apply the exact right repair without ruining the door’s dry-season fit.
Pinpoint Where and Why the Door Is Binding
Never take a hand plane or coarse sandpaper to a door edge before checking the hinges. Stand inside the room, pull the door slowly toward you until it touches the exact point of resistance, and run these four checks:
- Inspect the “reveal” gap around all four edges: Look closely at the thin shadow line between the closed door and the wooden frame. A well-hung door has an even 2 mm to 3 mm gap all the way around. If the gap at the top hinge corner has stretched wide open while the top latch corner is pinched completely shut, your door hasn’t swollen at all—it is sagging on a loose top hinge.
- Lift the open door by the handles: Swing the door halfway open, grip both handles firmly, and lift straight up while watching the top metal hinge leaf. If you see the brass or steel plate shift against the wood or see the screw heads wobble, loose hardware is your problem.
- Run the Paper or School-Chalk Rub Test: When a door closes 95% of the way before jamming tight, slide a single sheet of A4 paper through the gap around the top, latch edge, and bottom. Wherever the paper gets pinched fast is your high spot. You can also rub white school chalk along the outer edge of the door and shut it once—the chalk will transfer directly onto the frame where the wood is binding.
- Consider the calendar and the room: Did the door swing effortlessly in January and only start rubbing in July? Or is it a bathroom door that gets splashed with shower and mop water every morning? If the hinge gaps are still straight and parallel, moisture swelling or thick layers of old gloss paint are to blame.
Quick Diagnostic Table: Match the Symptom to the Right Fix
| Where the Door Rubs | What You See on the Frame | True Cause | Best Repair Method |
| Top outer corner (above the lock) | Wide gap at top hinge; bottom corner may also scuff the floor tiles | Loose top hinge screws or sagging wooden sub-frame | Method 1: Tighten hinge screws & drive a 75 mm anchor screw |
| Bottom latch edge or top corner (screws already tight) | Screws won’t turn any further; one hinge leaf sits too deep in the wood | Over-chiselled hinge recess (mortise) or worn hinge knuckle | Method 2: Slip a cardboard shim behind the hinge leaf |
| Middle latch edge (rainy season only) | Hinge gaps are straight; door squeaks lightly as it shuts | Temporary rainy-season humidity swelling | Method 3: Rub dry candle wax or bar soap along the edge |
| Side or bottom edge year-round | Thick ridges of old paint or permanent water swelling | Paint buildup or unsealed bottom edge soaking up mop water | Method 4: Sand/plane the high spot & seal the bare timber |
| Door swings freely, but won’t click shut | You have to lean on the door or lift the handle for the latch bolt to catch | Metal strike plate on the frame sits out of alignment | Method 5: File or reposition the metal strike plate opening |
Safety Precautions Before You Start
A standard interior flush door weighs 15 kg to 25 kg, while a solid Nigerian hardwood panel door can easily exceed 40 kg. Keep yourself and your home safe:
- Always wedge the bottom corner before loosening hinge screws: Never back screws out of a top hinge while a heavy door hangs unsupported in mid-air. Swing the door open and tap a wooden wedge, a folded bath towel, or a thick magazine under the bottom outer corner to carry the weight.
- Keep fingers clear of the hinge crease: Never rest your hand inside the hinge jamb while a helper is lifting or testing the door.
- Wear safety glasses and a dust mask when sanding or filing: Sanding old oil paint and filing brass strike plates throws sharp dust into the air—protect your eyes just as we recommend in our guide on 3 Ingenious Ways to Cut Glass Without a Glass Cutter.
- Inspect the door edge for old nails before planing: Before pushing a sharp steel plane along the edge of a door, check carefully for sunken finishing nails, staples, or brass lock screws that will chip your blade Instantly.
Method 1: Tighten the Top Hinge & Use the Long-Screw Trick (Solves 70% of Sticking Doors)
Seven out of ten sticking doors never need a single stroke of sandpaper. Because the top hinge bears the entire outward leverage of the door, its screws are always the first to pull loose. Drawing that top hinge plate back flush against the frame pulls the sagging nose of the door upward and backward in minutes.
Tools and Supplies Needed
- Heavy manual Phillips or flathead screwdriver
- Wooden door wedge or folded magazine
- Bamboo skewers or wooden toothpicks + PVA wood glue (for stripped holes)
- One 65 mm to 75 mm (2.5-to-3-inch) wood screw (or masonry rawlplug screw if your thin wooden frame sits directly against plastered block)
Step-by-Step Repair
- Relieve the downward pull on the hinge: Open the door and push a wooden wedge underneath the outer bottom corner (directly below the door handle) until the sagging corner lifts by a millimetre or two.
- Tighten every screw on the top and middle hinges: Use a manual screwdriver to crank down all screws on both leaves of the top and middle hinges. If they bite solidly, pull the floor wedge out and test the door.
- Plug any spinning screw holes: If one or two screws in the top hinge spin endlessly without tightening, back them out, coat three or four bamboo skewer strips or wooden toothpicks in PVA wood glue, and pack them tightly into the chewed-out hole (the same structural repair covered in our guide on How to Fix a Wobbly Chair Leg). Snip the ends flush, wait 20 minutes, and drive the screw right back in.
- Drive one long anchoring screw through the top hinge: Heavy iroko or mahogany doors often pull the thin surface door frame (casing) slightly away from the backing timber. Remove one of the short 25 mm screws from the centre of the top frame hinge leaf and replace it with a 75 mm (3-inch) screw. Driving that long screw deep into the structural sub-frame pulls the entire top corner of the door back into alignment.
Method 2: Slip a Cardboard Shim Behind the Hinge Leaf
What if every screw in your hinges is rock-solid, yet the door still clips the frame at the top or bottom corner? That happens when the carpenter who hung the door chiselled one of the rectangular hinge recesses (mortises) a millimetre too deep into the frame, or when an old hinge knuckle has worn thin.
By tucking a thin strip of stiff cardboard (a shim) behind the right hinge leaf, you can pivot the door’s angle without shaving any wood.
Which Hinge Should You Shim?
- Door rubs near the TOP outer corner: Slip a cardboard shim behind the BOTTOM hinge leaf on the frame (pushing the bottom hinge outward pivots the top latch corner inward away from the rub spot).
- Door rubs near the BOTTOM outer corner: Slip a cardboard shim behind the TOP hinge leaf on the frame (pushing the top out slightly tilts the bottom corner back toward the hinge side).
Step-by-Step Shimming Instructions
- Cut a cardboard spacer: Cut a rectangle from the stiff flap of a cornflakes box, medicine carton, or business card so it matches the exact width and height of your metal hinge leaf.
- Loosen—do not remove—the hinge screws: Wedge the bottom of the open door, then use your screwdriver to back the screws on the frame leaf out by just 3 millimetres so the metal plate lifts slightly off the wood.
- Notch and slide the shim behind the plate: Cut small V-notches along one long edge of your cardboard strip so it slides neatly behind the metal hinge leaf and straddles the screw shafts.
- Tighten the screws down firmly: Crank the screws tight, pull out the floor wedge, and swing the door shut. If it still kisses the frame slightly, add one more layer of cereal-box cardboard.
Method 3: Ease Rainy-Season Rubbing with Candle Wax or Dry Bar Soap
When a bedroom door only squeaks and rubs along the middle latch edge during peak August rains—and its hinge gaps are still completely straight—do not plane the wood. As soon as Harmattan arrives, that swollen wood will shrink right back.
Instead, take a dry white paraffin household candle or a completely dry bar of toilet soap and rub it firmly up and down the sticking spot on both the door edge and the frame. The hard wax fills the microscopic pores of the paint, stops moisture absorption, and lets the door glide shut smoothly without removing a single shaving of timber.
Method 4: Sand or Plane Permanent High Spots (And Seal the Bare Wood!)
If your door binds in the exact same spot twelve months a year—or if a bathroom door bottom has swollen permanently from floor water—you will need to remove 1 to 2 millimetres of material from the high spot.
Tools and Supplies Needed
- Pencil or white chalk
- Wooden sanding block + 80-grit and 120-grit sandpaper (or a sharp carpenter’s hand plane for heavy removal)
- Small tin of oil-based wood primer/gloss paint or clear polyurethane varnish + paintbrush
Step-by-Step Repair
- Mark the exact rub line: Close the door against the frame and draw a pencil line along the exact section that binds. You almost never need to sand the entire height of the door—only the 15 cm to 25 cm high spot.
- Sand or plane strictly along the grain: Keep the door on its hinges (wedged underneath so it doesn’t swing) if you are sanding the side or top edge. Wrap 80-grit sandpaper around a flat wooden block and sand back and forth along the length of the edge until you remove the high ridge, then smooth it out with 120-grit paper. (If the very bottom edge of the door is scraping across your floor tiles, lift the door off its hinge pins, lay it across two chairs, and plane 2 mm off the bottom edge, beveling slightly inward so the sharp corner doesn’t splinter).
- Seal the newly exposed wood immediately (Crucial Step!): This is the step most carpenters skip! When you sand or plane a door edge, you strip away the paint and expose raw, thirsty timber. If you leave that bare strip unpainted, it will suck up rainy-season humidity twice as fast and stick again next month. Brush on two coats of oil-based gloss paint or clear polyurethane varnish over the sanded edge—including the hidden bottom and top edges of the door—and let it dry before closing.
Method 5: Adjust a Misaligned Metal Strike Plate
Sometimes a door swings into the frame without touching any wood at all, yet the spring-loaded latch tongue refuses to click into the metal plate (the strike plate) on the frame unless you lift the handle or lean your weight against the door.
- Run the Lipstick or Chalk Test on the latch tongue: Rub a bit of coloured chalk, marker, or lipstick onto the angled tip of the metal latch bolt on the edge of the door. Close the door firmly once and open it.
- Read the mark on the strike plate: Look at the metal plate screwed into the door frame. The chalk mark will show you whether the latch bolt is hitting too low, too high, or too far forward to drop into the rectangular hole.
- File the metal opening instead of moving the plate: If the latch is missing the hole by just 1 to 2 millimetres, unscrew the metal strike plate (or leave it in place) and use a small half-round metal file to file the top, bottom, or front lip of the rectangular opening wider until the latch clicks in cleanly. You can also use needle-nose pliers to bend the little curved metal tab inside the strike plate slightly outward or inward to eliminate door rattle.
Frequently Asked Questions
How can I stop the bottom of my bathroom wooden door from rotting?
Bathroom doors take constant splash damage from showers and wet floor mops. Take the door off its hinges on a dry morning, sand the rough bottom edge smooth, apply two thick coats of oil-based marine varnish or gloss enamel paint to the hidden bottom face, and stick an aluminum kick-plate or PVC door sweep along the bottom 10 centimeters.
What is the ideal gap around a wooden door in Nigeria?
Aim for a 2 mm to 3 mm gap along the hinge side, latch side, and top edge—roughly the thickness of a ₦100 coin or a single layer of corrugated carton—and a 5 mm to 8 mm clearance gap above the floor tiles so the door swings clear of rugs and mats.