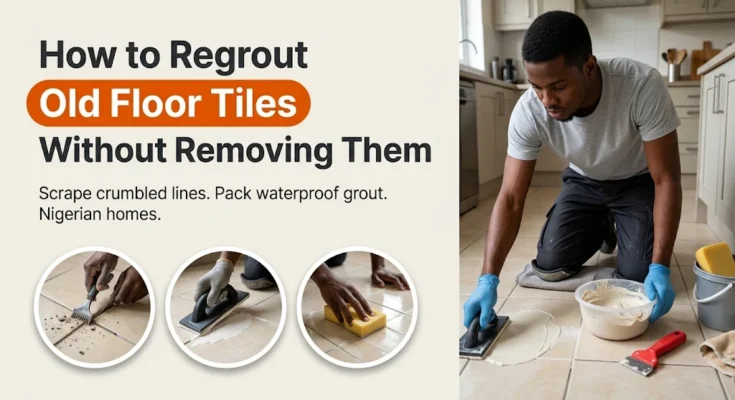
Looking down at your bathroom, kitchen, or parlour floor only to see black, sunken, crumbling lines between otherwise spotless ceramic tiles can make an entire room feel neglected. Across Nigerian homes, builders often fill tile joints with plain white cement rather than polymer-modified tile grout.
Over a few years of heavy mopping, borehole water minerals, and red Harmattan dust, that weak filler cracks, washes out, and traps smelly stagnant water underneath your floor. Learning how to regrout floor tiles without breaking or lifting a single tile lets you scrape out those decayed joints and pack in fresh, waterproof grout in a single afternoon.
Many homeowners assume that dark, hollowed-out tile lines mean the entire floor has to be chiselled up and retiled from scratch. In reality, as long as your ceramic or vitrified porcelain tiles are still bonded solidly to the cement screed below, replacing the top three to four millimetres of joint compound restores both the waterproof seal and the showroom brightness of the room.
Once you understand how to regrout floor tiles using a simple manual grout rake, a bag of water-resistant tile grout, and a rubber spreader, you can transform dingy kitchens, wet bathrooms, and high-traffic hallways for a fraction of a tiler’s labour fee.
Step 1: Check Joint Condition Before You Regrout Floor Tiles
Before buying materials, kneel down and inspect the lines between your tiles with the tip of a house key or flathead screwdriver. The depth and texture of the existing filler tell you which preparation method is required.
| Joint Problem | Visual Sign | Root Cause | Repair Action |
| Deep hollow gaps | Missing cement | Washed out white cement | Rake 3 mm deep and pack fresh grout |
| Cracked chalky lines | Hairline splits | Floor settling or dry mix | Scrape loose grit and regrout |
| Black slimy joints | Dark mildew stains | Trapped shower moisture | Kill mold with vinegar then regrout |
| Rock-hard grey lines | Rough mortar flush | Sand-cement mortar used | Chisel down 3 mm with carbide blade |
Evaluating your floor against the four conditions above ensures a lasting bond when planning how to regrout floor tiles. If you tap across the tiles and hear a hollow, drum-like rattle—or see a corner lifting when stepped on—secure the loose slab first using our tutorial on How to Fix a Cracked or Loose Floor Tile before packing new grout around it.
Furthermore, choose the right replacement compound at the building materials market. Standard unsanded cementitious grout works best for narrow 1 mm to 3 mm joints on glazed ceramic bathroom and parlour tiles, while sanded grout or waterproof latex-modified grout prevents shrinkage cracks in wider 4 mm to 6 mm corridor joints.
Important Safety Warnings Before Scraping Old Grout
Raking out hardened cement joints throws sharp mineral chips and fine silica dust into the air. Follow these precautions before starting your project:
- Wear safety glasses: Chipping dry cement between hard porcelain edges can flick sharp grit directly toward your eyes, just as we caution in 3 Ingenious Ways to Cut Glass Without a Glass Cutter.
- Put on a dust mask: Breathing fine cement and dried mildew dust inside an enclosed bathroom irritates your lungs and sinuses quickly.
- Wear thick rubber gloves: Wet tile grout is highly alkaline and will dry out, crack, and burn bare skin on your fingers if handled without protection.
- Control blade pressure near tile edges: Never pry sideways against the glazed lip of a ceramic tile with a steel screwdriver, or the coloured glaze will chip instantly.
Tools Needed for How to Regrout Floor Tiles
You can pick up every tool and material required for how to regrout floor tiles at any Nigerian tile depot, plumbing shop, or hardware market:
- Manual grout rake or grout saw: A handheld tool (₦1,500 to ₦3,000) fitted with a gritty tungsten-carbide blade designed togrind out old cement without scratching tile glaze.
- Heavy-duty utility knife: Useful as a backup tool for slicing soft, crumbling white cement out of narrow 2 mm bathroom joints.
- Waterproof tile grout powder: One 2 kg to 5 kg bag of premixed polymer tile grout (₦2,500 to ₦5,500) in white, ivory, grey, or terracotta to match your floor.
- Liquid acrylic grout additive (optional): Mixing liquid latex bond or diluted PVA glue into the water boosts waterproofing in shower stalls.
- Rubber grout float (or rubber flip-flop sole): A flat rubber-faced trowel (₦2,000) forces paste deep into the joints; in a pinch, a clean piece of firm rubber bathroom slipper cut into a rectangle works remarkably well.
- Two plastic buckets and a large foam sponge: Essential for rinsing away surface grout paste in stages without flooding the fresh joints.
- Stiff nylon scrubbing brush and dry microfibre cloths: Needed for sweeping out raked dust and buffing away the final dry white haze.
Step 2: How to Regrout Floor Tiles by Removing Old Grout
Fresh tile grout cannot stick if it is smeared as a paper-thin skin over dirty, soapy old cement—it will flake right off the next time you mop the room. The most important rule in how to regrout floor tiles is carving out a clean channel at least 3 millimetres (⅛ inch) deep so the new compound has solid sidewalls to grip.
1. Soften and Kill Bathroom Mildew First
If you are working in a wet shower area where black mold lives inside the cracked lines, treat the joints first using the vinegar wash in our guide on How to Remove Mold from Bathroom Walls Safely. Letting the joints dry afterward prevents live spores from getting trapped under your new grout.
2. Rake Out the Old Cement to a 3 mm Depth
- Seat the grout saw in the middle of a joint: Hold your manual grout rake straight upright in the centre of a tile line so the carbide grit teeth sit squarely on the old cement rather than rubbing the glazed tile shoulders.
- Pull back and forth with steady strokes: Draw the blade along the joint using short, controlled 15-centimetre passes until the crusty top layer breaks apart into powder.
- Work carefully around four-way tile intersections: Stop your stroke just before reaching a cross-joint and rake inward from the corner so the tool does not slip across the neighbouring tile face.
- Carve out stubborn spots with a utility blade: Where narrow 2 mm joints resist the wide saw, angle a sharp utility knife slightly and score down both edges of the joint to pop the loose cement ribbon out.
3. Brush, Vacuum, and Wash the Empty Channels
Once every failing line is raked down 3 millimetres deep, sweep the floor thoroughly with a stiff nylon brush to dislodge sandy grit stuck in the troughs. Wipe the open joints once with a damp sponge wrung out in clean water, then let the floor dry for 1 hour so standing water does not weaken your fresh grout mix.
Step 3: Mix the New Tile Grout to a Peanut-Butter Paste
Mixing tile grout with too much water is the number one reason DIY jobs crumble within weeks. For a deeper look at how hydraulic cement, polymer binders, and fine aggregates cure inside masonry joints, see Wikipedia’s reference on Grout.
Follow this exact ratio method when preparing your paste for how to regrout floor tiles:
- Pour cool clean water into a small plastic bowl first: Start with roughly 250 ml (1 cup) of water in the bottom of a clean mixing container—adding water first stops dry powder from sticking to the bottom corners.
- Add grout powder gradually while stirring: Scoop in about 3 to 4 parts dry grout powder to 1 part water, stirring slowly with a metal putty knife or flat wooden stick until zero dry lumps remain.
- Check for a stiff “peanut butter” consistency: Turn your putty knife sideways; the mixed grout should cling firmly to the blade without dripping off. If it pours like pancake batter, stir in a little more dry powder.
- Let the paste “slake” (rest) for 5 minutes: Leave the mixed bowl undisturbed for 5 minutes so the chemical polymers activate fully, then give it one brisk 30-second stir before applying it to the floor.
Step 4: How to Regrout Floor Tiles and Pack Every Joint
Because cement grout begins stiffening within 20 to 30 minutes in warm Nigerian weather, work across manageable 1-square-metre sections at a time. Here is how to regrout floor tiles like a seasoned tiler:
- Scoop a generous mound of grout onto the floor: Drop two or three large spoonfuls of paste directly over the empty tile joints.
- Spread diagonally at a 45-degree angle: Hold your rubber grout float tilted at a 45-degree angle to the floor and push the paste firmly across the joints diagonally (never pull the float parallel to the joint lines, or the corner of the tool will scoop the wet grout right back out of the gap).
- Press hard in two directions: Go over each intersection from both left-to-right and right-to-left diagonal directions to force trapped air pockets out and pack the paste all the way to the bottom of the 3 mm channel.
- Scrape excess paste off the tile faces: Hold the rubber float almost vertical (at an 80-degree angle) and sweep it diagonally across the tiles to shear off 90 percent of the excess paste sitting on the glazed surface.
Step 5: Sponge Away Excess Paste and Buff Dry Haze
Timing your sponge cleanup is critical when learning how to regrout floor tiles. Wipe too early with a sopping wet sponge and you will dig hollows into the soft joints; wait three hours until the paste dries rock-hard and you will spend all evening scraping cement off the tile faces.
- Wait 15 to 20 minutes for the joints to firm up: Press your gloved fingertip lightly against a filled joint; when the grout feels firm like soft rubber and no longer sticks to your glove, it is ready to sponge.
- Wring your sponge out until it is barely damp: Dip a large, rounded-edge foam sponge into a bucket of clean water and squeeze out almost every drop—water dripping from the sponge will weaken and discolour the fresh grout colour.
- Wipe diagonally in gentle circular passes: Glide the damp sponge diagonally across the tiles to lift the muddy film off the glaze while shaping the grout lines into smooth, uniform seams. Rinse and wring the sponge frequently in your second bucket.
- Buff off the powdery “grout haze” after 2 hours: Once the joints dry for 2 to 3 hours, a thin, dusty white veil (called grout haze) will appear across the tiles. Buff the entire floor briskly with a dry microfibre towel until the ceramic glaze shines clearly.
- Cure and seal the new joints: Keep foot traffic light for 12 hours and avoid mopping or running shower water over the floor for a full 24 to 48 hours. Once cured, protect the porous lines from future dirt and bathroom leaks by applying a penetrating sealer as detailed in How to Clean and Seal Floor Tiles—and fix any dripping bathroom fixtures overhead using How to Fix a Leaking Tap.
Common Mistakes to Avoid When Regrouting Tiles
Steer clear of these four common shortcuts when tackling how to regrout floor tiles:
- Smearing new grout over unscraped old joints: Skimming 1 millimetre of wet grout over dirty existing lines guarantees the new layer will crack and peel up within a week.
- Using plain white cement instead of polymer tile grout: Ordinary white cement shrinks as it dries, absorbs dirty mop water like a sponge, and washes away under bathroom scrubbing.
- Flooding the floor with water during sponge cleanup: Using a dripping wet sponge washes pigment out of coloured grout and leaves weak, chalky white patches along the lines.
- Grouting expansion joints along the wall perimeter: Where the edge of your tiled floor meets the vertical plaster wall or bathtub rim, fill the gap with flexible silicone sealant rather than rigid grout so normal building movement does not crack the seam.
Frequently Asked Questions (FAQs)
Can I put new grout over old grout without removing it?
When learning how to regrout floor tiles for a durable repair, you should never apply new cement grout straight over flush old grout because the thin layer cannot bond or cure properly. Always rake out at least 2 mm to 3 mm of the old joint depth first so the fresh compound locks firmly between the tile edges.
How long after regrouting bathroom floor tiles can I take a shower?
Wait at least 24 hours (and ideally 48 hours in humid ground-floor bathrooms without windows) before letting shower water splash onto freshly regrouted floor tiles. Allowing the cement polymers to cure dry prevents soap and water pressure from eroding the new seams.
Why did my dark grey or brown tile grout dry chalky white in spots?
Patchy white blotches on coloured grout (called efflorescence or polymer leaching) happen when too much water was mixed into the powder or a dripping wet sponge was used during cleanup. Once the grout has cured for 48 hours, scrub the white spots lightly with a cloth dampened in a 1:4 mixture of white vinegar and water, rinse, let dry, and apply a coat of tile and grout sealer.
Carving out 3 millimetres of crumbled old cement, packing in stiff polymer-modified paste at a 45-degree angle, and buffing the surface clean with a barely damp sponge proves just how straightforward it is to master how to regrout floor tiles. Instead of tolerating dark, smelly gaps or paying for a costly floor demolition, your tiled rooms will look crisp, bright, and water-tight for years to come.