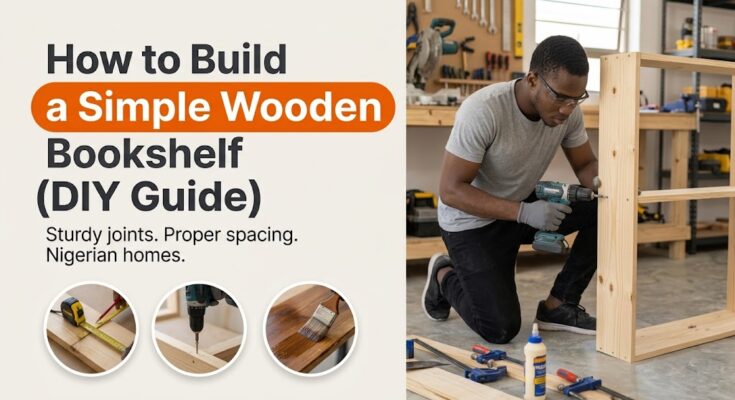
There is a unique kind of satisfaction in stepping back to look at a sturdy piece of furniture you built with your own hands—especially when it holds a heavy row of textbooks, novels, or family photo frames without sagging. When you start exploring how to build a simple wooden bookshelf, you quickly realize you don’t need an expensive commercial carpentry shop full of heavy industrial machinery. With just a straight-cutting hand saw, a drill, a sanding block, and a few boards from a local timber market, you can construct a clean, durable bookcase over a single weekend.
Many beginners make the mistake of overcomplicating their first woodworking project with complex dovetail joints, routed edges, or hidden fasteners. But when learning how to build a simple wooden bookshelf, a classic, straight-lined upright bookcase built with strong butt joints and secure screw pockets is more than strong enough to handle years of daily use.
In this comprehensive, beginner-friendly guide, we will walk you through the entire process: choosing the right local timber for Nigerian humidity, calculating exact board dimensions, cutting and sanding the wood, assembling the frame securely, and applying a rich protective finish.
Important Safety and Workspace Warnings
Before you start measuring and cutting timber while researching how to build a simple wooden bookshelf, keep these basic workshop safety rules in mind:
- Protect Your Eyes and Lungs: Cutting boards and sanding raw timber throws fine sawdust into the air. Always wear a protective dust mask and safety glasses.
- Secure Your Sawing Surface: Never cut wood while balancing it precariously on your knee or an unstable plastic chair. Clamp your boards firmly to a stable workbench or saw horses.
- Respect Power Tools: If you are using a circular saw or power drill, keep loose clothing, long sleeves, and hair tied back safely away from spinning bits and blades.
Tools and Materials Needed
You can source all your timber and hardware from a local timber market (plank shed) or hardware store when planning how to build a simple wooden bookshelf:
Timber & Hardware
- Solid Hardwood or Softwood Boards: 3 boards measuring 1 inch thick by 10 inches wide by 8 feet long (standard 1×10 planks of mahogany, gmelina, or treated pine).
- Backing Panel: One quarter-inch (6 mm) thick plywood sheet cut to match the outer dimensions of your bookshelf frame.
- Fasteners: 2-inch (50 mm) wood screws (for structural joints) and 1-inch finishing nails (for the back panel).
- Wood Glue: PVA carpenter’s wood glue (such as Topbond or Titebond).
Tools
- Measuring tape and a carpenter’s square
- Hand saw or circular saw (plus a clamped straight-edge guide)
- Power drill and drill bits (including a countersink bit)
- Sanding block with 80-grit, 120-grit, and 220-grit sandpaper
- Wood filler or putty (to hide screw heads)
- Wood stain, varnish, or protective polyurethane topcoat and a brush
Step 1: Design and Cut List Calculations
For this beginner bookshelf project focusing on how to build a simple wooden bookshelf, we will build a classic unit standing 72 inches (6 feet) tall, 30 inches wide, and 10 inches deep, featuring four storage shelves (including the fixed bottom and top boards).
The Cut List (From your 3 standard 8-foot boards):
- Vertical Sides (Left & Right): Cut 2 boards to 72 inches long.
- Top & Bottom Shelves: Cut 2 boards to 28.5 inches long.
- Internal Fixed Shelves: Cut 2 or 3 boards to 28.5 inches long (depending on how many shelf tiers you want).
- Top Trim / Toe Kick (Optional): Cut 1 board to 30 inches long for the bottom front base.
Step 2: Measuring and Cutting the Timber
Precise, square cuts are the secret difference between a professional-looking piece of furniture and a wobbly, amateur shelf when figuring out how to build a simple wooden bookshelf:
- Measure Twice, Mark Once: Use your carpenter’s square to draw a crisp, perpendicular pencil line across the face and edges of the board where you need to cut.
- Make Straight Cuts: Clamp your board firmly to your workbench. If using a hand saw, keep your blade tracking right on the waste side of your pencil line, maintaining a steady 45-degree cutting angle. If using a circular saw, clamp a straight wooden guide board parallel to your cut line so the saw plate glides straight without wandering.
- Sand the End-Grains: Lightly hand-sand all freshly cut board ends with 80-grit sandpaper on a block to remove any rough splinters.
Step 3: Dry-Fitting and Pre-Drilling Screw Holes
Before introducing any wood glue while executing how to build a simple wooden bookshelf, assemble your bookshelf components “dry” to verify that everything fits squarely together:
- Lay Out the Frame: Lay one of your 72-inch vertical side boards flat on your workspace. Place the top shelf and bottom shelf boards into position at the ends.
- Check for Square: Use your carpenter’s square inside the corners to ensure the shelves meet the vertical sides at a perfect 90-degree angle.
- Pre-Drill Pilot Holes: Wood splits very easily when screws are driven directly near the ends of boards. Mark where your screws will go through the vertical sides into the shelf edges (two screws per shelf joint). Pre-drill your pilot holes using a drill bit slightly thinner than your 2-inch wood screws, and use a countersink bit so the screw heads sink flush or slightly below the wood surface.
Step 4: Gluing and Assembling the Main Frame
Now you are ready to lock the primary structure together as you progress through how to build a simple wooden bookshelf:
- Apply PVA Wood Glue: Separate the joints, apply a generous zigzag bead of PVA carpenter’s wood glue along the end grain of the shelf boards, and reposition them against the vertical side panel.
- Drive the Screws: Clamp the joint tight or have a helper hold it square while you drive your 2-inch wood screws through the pre-drilled holes into the shelf ends.
- Attach the Other Side: Flip the entire assembly over, apply glue to the other ends of the shelves, position the second 72-inch vertical side board, and drive its screws home.
- Install Intermediate Shelves: Measure and mark your desired shelf heights on the inside of the vertical walls, pre-drill through the outside walls, apply glue, and screw your remaining middle shelves securely into place.
Step 5: Attaching the Plywood Backing Panel
The thin plywood back panel is not just for appearance when learning how to build a simple wooden bookshelf—it stops the entire bookshelf from racking or leaning sideways under heavy book loads:
- Square the Frame: Measure diagonally from the top-left corner of your assembled frame to the bottom-right corner, then measure the opposite diagonal. Adjust the frame gently until both diagonal measurements are identical; your bookshelf is now perfectly square.
- Position the Plywood: Lay your 6 mm plywood sheet over the back of the frame, aligning all outer edges flush.
- Nail It Down: Secure the plywood back to the rear edges of your vertical sides and shelves using 1-inch finishing nails spaced every 6 inches all the way around the perimeter.
Step 6: Filling, Sanding, and Finishing
A great finish elevates raw timber into high-end furniture as you complete how to build a simple wooden bookshelf:
- Fill Screw Holes: Dab a small amount of wood filler or tinted wood putty over your recessed screw heads using a putty knife. Let it dry, then sand flush.
- Smooth Sanding Pass: Give the entire bookshelf a thorough sanding sweep. Start with 120-grit paper to remove any handling marks or glue squeezes, and finish with 200-grit paper until the wood feels silky smooth under your hand. Wipe away all dust with a tack cloth.
- Stain and Protect: Brush on your preferred oil-based wood stain (such as rich mahogany or teak) if you want to alter the timber’s natural tone. Once dry, apply two or three thin coats of clear polyurethane varnish or protective wood lacquer, sanding lightly between coats with fine steel wool for a durable, moisture-resistant finish.
Common Mistakes to Avoid
- Skipping Pilot Holes: Driving thick wood screws straight into the edge of a board without pre-drilling will almost certainly split the timber.
- Forgetting to Square the Frame: If you nail the back plywood panel onto a crooked frame, your bookshelf will remain permanently twisted and won’t sit flat against a wall.
- Applying Heavy Loads Too Soon: Give your wood glue and topcoat finishes a full 24 to 48 hours to cure completely before loading the shelves with heavy books.
Frequently Asked Questions (FAQs)
What is the best type of wood for building bookshelves in Nigeria?
Solid hardwoods like mahogany, iroko, or Obeche are exceptionally durable, but seasoned gmelina and treated pine planks are lighter, easier for beginners to cut, and widely available at local timber markets. Avoid low-quality particle board (chipboard) for load-bearing shelves because it sags badly over time.
How do I prevent long wooden shelves from sagging in the middle?
If your shelves span wider than 32 inches, solid wood will naturally begin to bow under heavy book weight. To prevent sagging, keep your shelf spans under 30 inches (as outlined in our cut list), or reinforce the front edge of each shelf with a 1-inch wooden lip underneath.
Final Thoughts
Mastering how to build a simple wooden bookshelf is the ultimate gateway project into home woodworking. By measuring carefully, pre-drilling your joints, squaring the frame before attaching the back panel, and finishing with a protective coat of varnish, you will create a timeless piece of furniture that organizes your home and lasts for decades.