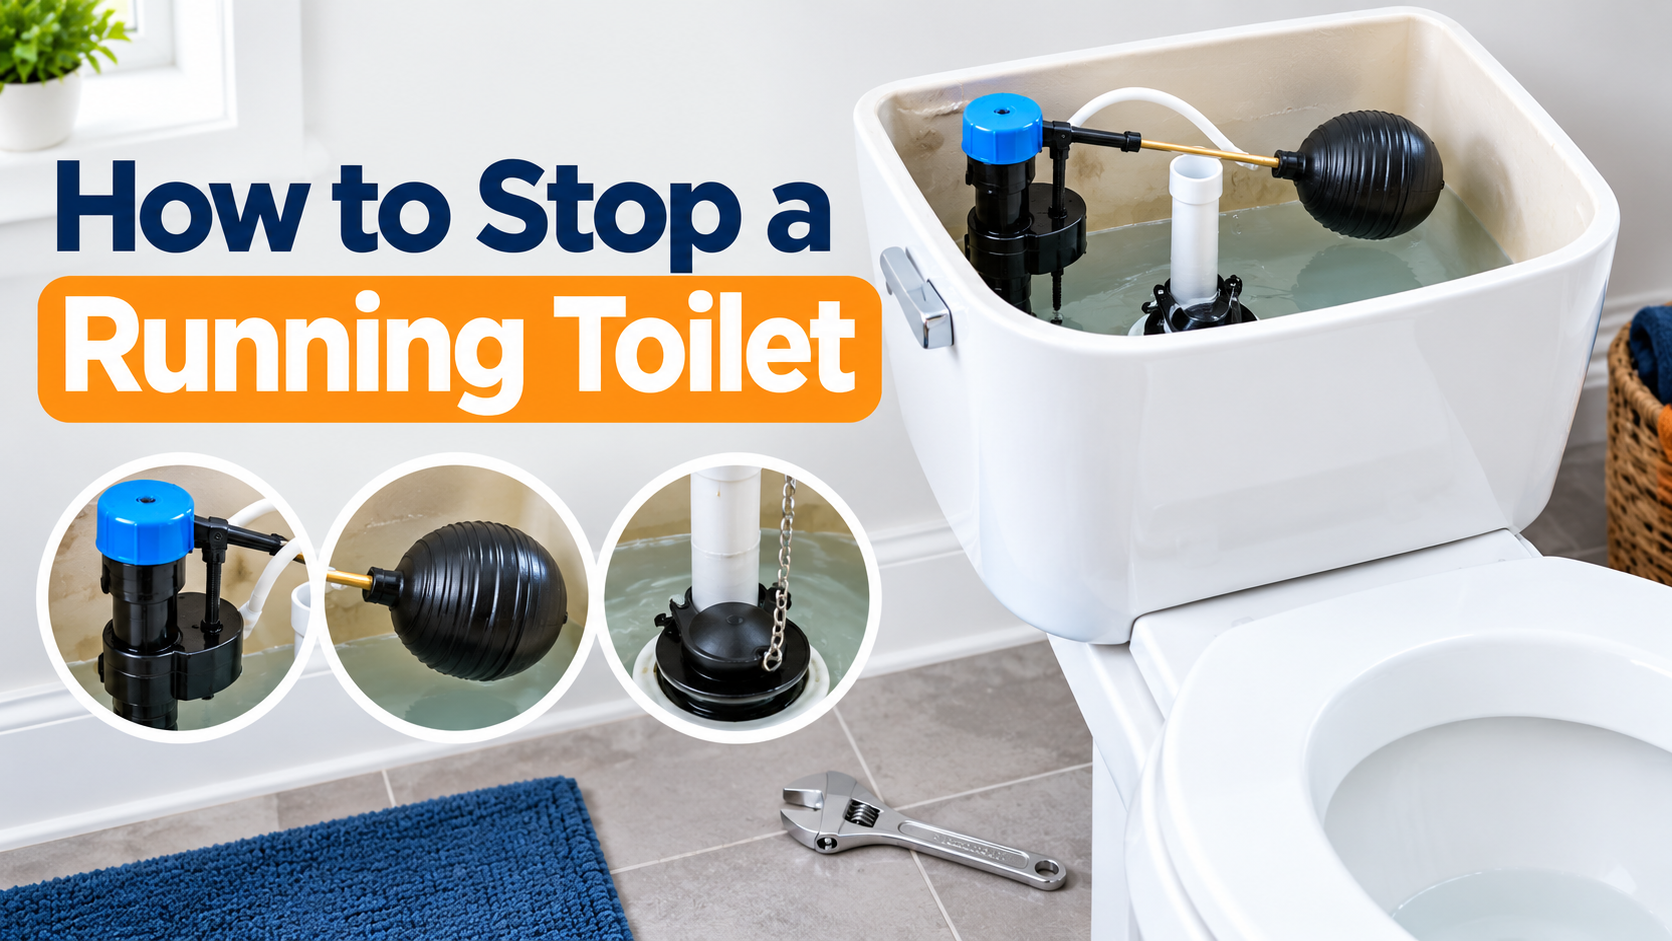
A running toilet can waste water, make annoying noises, and increase your water bill. You may hear water trickling into the bowl, notice the cistern refilling repeatedly, or find that the water never stops flowing after a flush.
The good news is that many running toilets have a simple cause. A worn flush-valve seal, a poorly adjusted float, a faulty fill valve, or an incorrectly positioned chain can prevent the cistern from working properly.
This guide explains how to identify the problem, how to stop a running toilet step by step, which tools you may need, and when it is better to call a plumber. The instructions apply to common cistern-style toilets, although the parts can differ between models.
Why Does a Toilet Keep Running?
A toilet keeps running when water continues entering the cistern or escaping from the cistern into the bowl. These are the most common causes.
- A worn flapper or flush-valve seal: The rubber seal at the bottom of the cistern may no longer close tightly, allowing water to leak into the toilet bowl. Some cisterns use a flapper, while others use a different flush-valve seal.
- A float set too high: The float may allow the water level to rise above the recommended level, causing water to flow into the overflow tube.
- A faulty fill valve: The inlet valve may fail to shut off when the cistern is full.
- A chain that is too tight or too loose: On toilets with a chain-operated flapper, a tight chain can hold the seal open, while a loose chain may become trapped underneath it.
- Dirt or mineral deposits: Debris around the flush-valve seat can prevent the seal from closing properly.
Identifying the cause before buying replacement parts can save you time and money.
How to Tell What Is Wrong
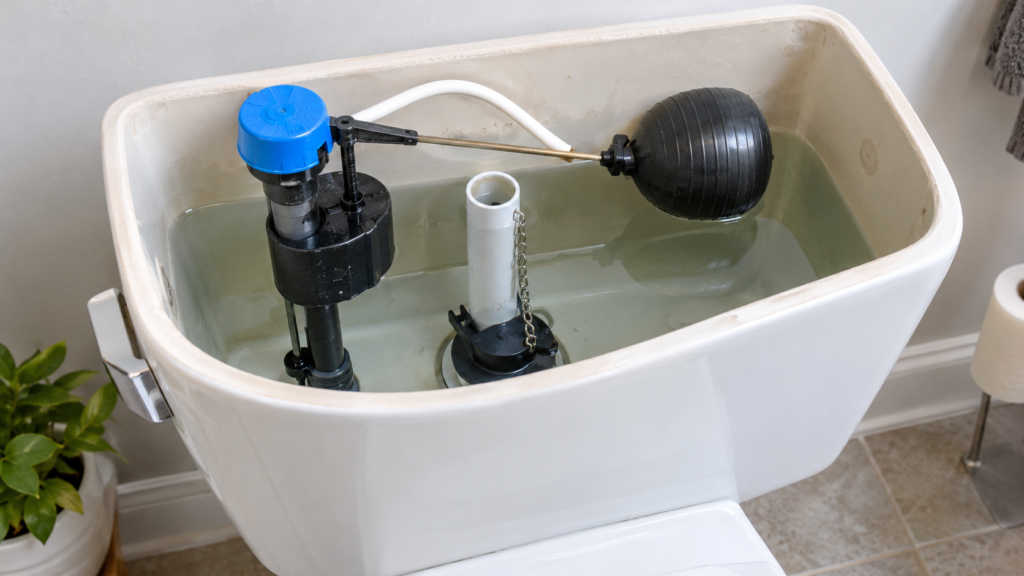
Before dismantling anything, perform these simple checks.
1. Check the water level
Carefully remove the cistern lid and place it somewhere secure. Look at the water level while the cistern is full.
If water is continuously flowing into the overflow tube, the float may be set too high or the fill valve may be faulty.
If the water level is below the overflow but the toilet continues running, the flush-valve seal may not be closing properly.
2. Perform a food-colouring test
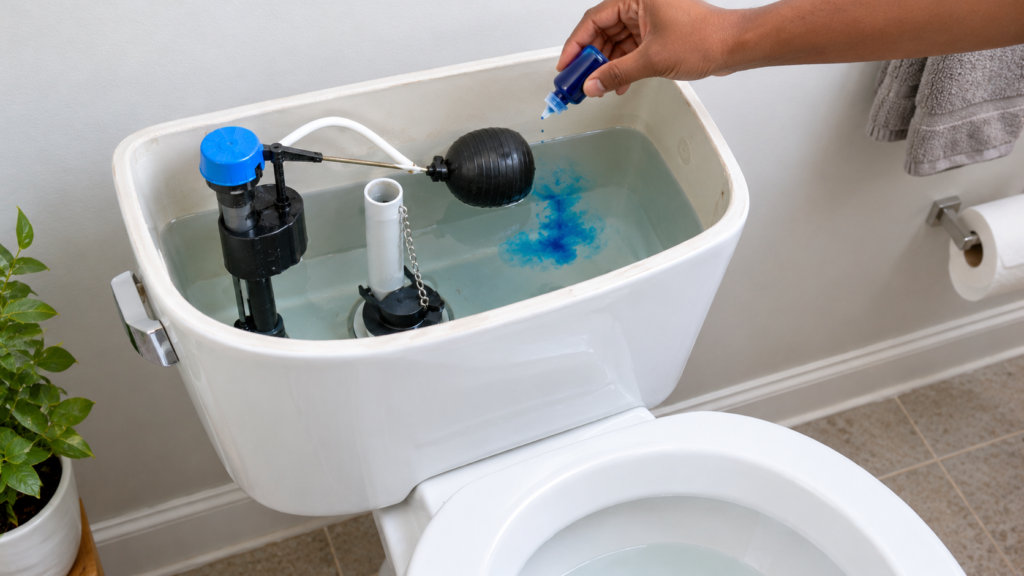
This test can help identify a leak from the cistern into the toilet bowl.
- Make sure the cistern has finished filling.
- Add a few drops of food colouring to the cistern water.
- Do not flush the toilet.
- Wait about 15 minutes.
- Check whether coloured water has appeared in the toilet bowl.
If coloured water appears, water is escaping from the cistern into the bowl. The flush-valve seal or another part of the flushing mechanism may need cleaning, adjustment, or replacement.
If no colour appears, the problem may be related to the fill valve, float adjustment, or another mechanism. Continue with the checks below.
Tools and Parts You May Need
Gather the following items before starting:
- An adjustable spanner or suitable pliers
- A bucket and an old towel
- Rubber gloves
- A sponge or small container for removing water
- A replacement flapper or flush-valve seal, if required
- A replacement fill valve, if required
- Food coloring for testing
You may not need every item. Start by identifying the faulty part rather than replacing everything at once.
When buying replacement parts, take a photograph of the cistern mechanism or bring the old part to a plumbing or hardware shop. Cistern designs vary, and the replacement must be compatible with your toilet.
How to Stop a Running Toilet Step by Step
Step 1: Turn off the water supply
Locate the isolation valve on the water supply pipe leading to the toilet. It is often behind or beside the toilet.
Turn the valve to the closed position. Do not force it if it is stuck or corroded.
Flush the toilet once to lower the water level in the cistern. Use a sponge or small container to remove any remaining water if necessary.
If you cannot safely shut off the supply, stop and seek help from a plumber.
Step 2: Check the chain or flushing linkage
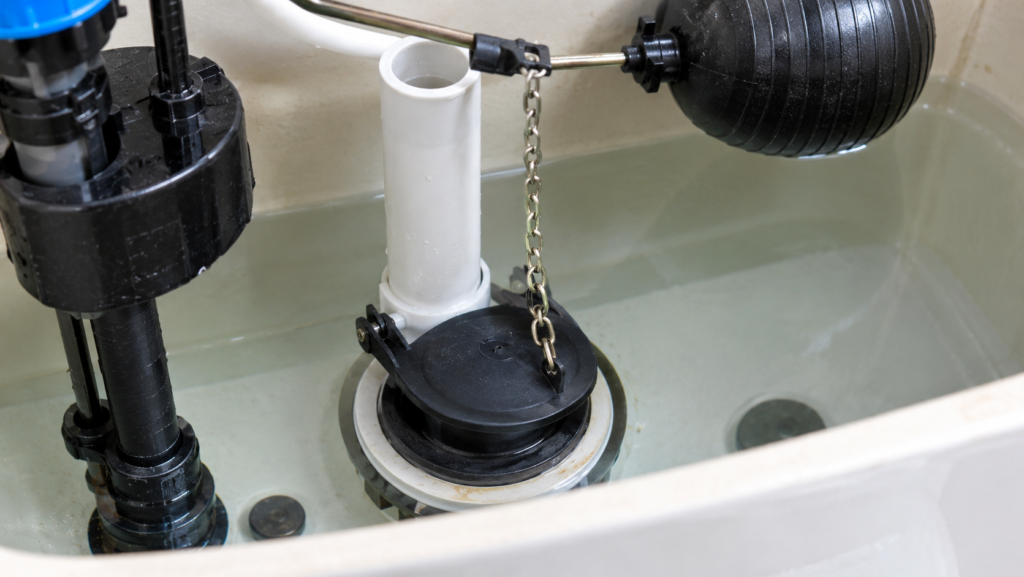
If your toilet uses a chain-operated flapper, inspect the chain connecting the flush handle to the rubber seal.
The chain should have a small amount of slack when the flapper is closed. If it is too tight, it may hold the flapper slightly open. If it is too loose, it may get caught beneath the seal.
Adjust the chain clip so the flapper can close completely after flushing.
For toilets with a push-button or canister-style flushing mechanism, check the manufacturer’s instructions instead of assuming the cistern uses a chain.
Step 3: Clean the flush-valve seat
Inspect the area where the rubber seal meets the outlet at the bottom of the cistern.
Dirt, grit, or mineral deposits can prevent the seal from sitting flat. Gently wipe the sealing surface with a soft cloth.
Avoid using sharp tools or abrasive materials that could damage the seal or valve seat.
If the seal is cracked, warped, hardened, or badly worn, cleaning alone may not solve the problem.
Step 4: Replace the worn flapper or seal
If the seal is damaged, replace it with a compatible part.
- Confirm that the water supply is off and the cistern is mostly empty.
- Remove the old flapper or seal according to the design of your flushing mechanism.
- Clean the surrounding area gently.
- Fit the replacement part according to its instructions.
- Check that the seal sits correctly and can close fully.
- Reconnect the chain or linkage, if applicable.
Some toilets use a complete flush-valve assembly rather than a separate flapper. If your toilet has this design, you may need the correct replacement seal or valve assembly.
Do not force a part that does not fit. An incompatible replacement may create another leak.
Step 5: Adjust the float
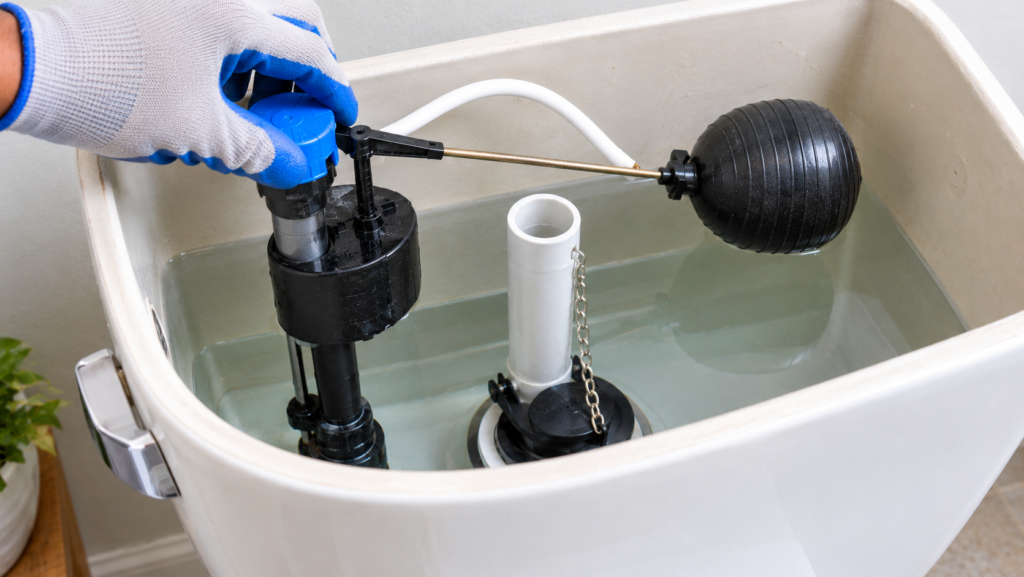
If water is flowing into the overflow tube, check the float and fill valve.
Depending on the cistern design, you may be able to adjust the float using a screw, clip, or adjustment mechanism.
Make a small adjustment to lower the water level. Use the cistern’s marked fill line if one is provided. Otherwise, follow the manufacturer’s recommended water level, keeping it below the top of the overflow tube.
Avoid setting the water level too low, as this may weaken the flush.
Step 6: Replace the fill valve if necessary
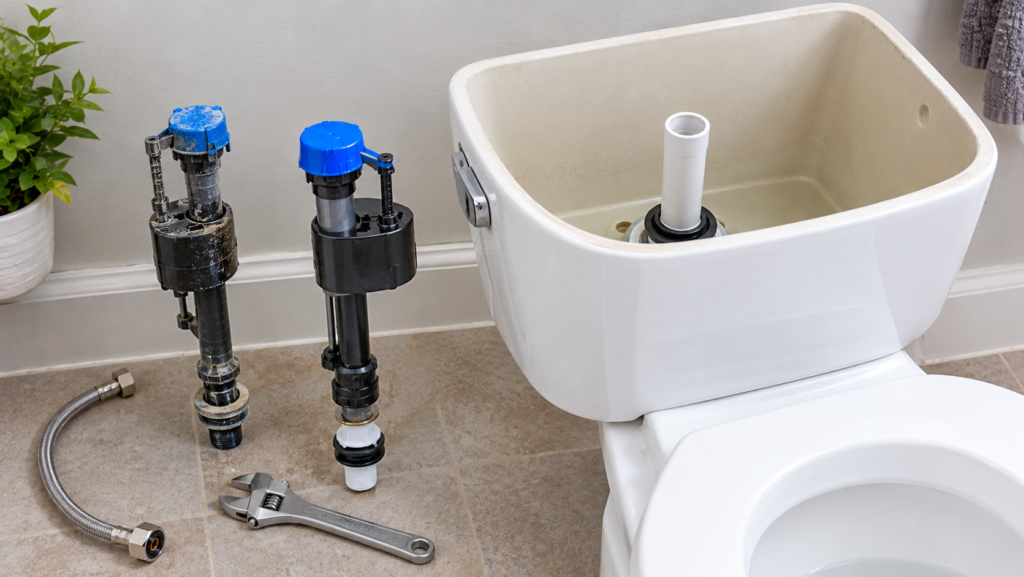
If the water continues entering the cistern after the float has been adjusted, the fill valve may be worn or faulty.
Replacing a fill valve generally involves these steps:
- Shut off the water supply.
- Flush the toilet and remove the remaining water from the cistern.
- Disconnect the water supply hose or pipe from the valve, following the valve manufacturer’s instructions.
- Remove the retaining nut and old fill valve.
- Install a compatible replacement valve and its required seals.
- Reconnect the water supply and tighten the fittings carefully.
- Turn the water on slowly and inspect the connections for leaks.
- Adjust the water level according to the manufacturer’s instructions.
Do not over tighten plastic fittings, as they can crack. If the connections are corroded, difficult to remove, or unfamiliar, ask a plumber to handle the replacement.
Step 7: Test the toilet
Once the parts are back in place, turn the water supply on slowly and allow the cistern to fill.
Watch the water level as it rises. Confirm that it stops at the correct level and does not flow continuously into the overflow tube.
Flush the toilet several times. After each flush, check that the mechanism closes properly and that the cistern stops refilling.
You can repeat the food-coloring test if you want to check whether water is still leaking into the bowl.
What If the Toilet Still Keeps Running?
If you have checked the float, adjusted the chain where applicable, and inspected the flush-valve seal, but the problem continues, consider these possibilities:
- The replacement seal is the wrong size or type.
- The flush-valve seat is damaged.
- The fill valve is faulty.
- The flushing mechanism is incorrectly installed.
- The cistern has a cracked fitting or another leak.
Avoid repeatedly replacing parts without identifying the cause. If the problem persists after the basic checks, a plumber can inspect the mechanism and recommend the appropriate repair.
Common Mistakes to Avoid
Setting the float too low: This can reduce the amount of water available for flushing and affect toilet performance.
Making the chain too tight: On chain-operated systems, this may prevent the flapper from closing completely.
Buying incompatible parts: Different cistern designs use different seals, valves, and fittings. Check compatibility before purchasing replacements.
Over tightening plastic fittings: Excessive force can damage threads, crack plastic nuts, or create leaks.
Ignoring a stuck isolation valve: Forcing a seized valve can damage the pipework. Seek professional help if it will not operate safely.
Replacing parts without testing: Check the water level and seal first so you can identify the likely cause before spending money.
How to Check Whether the Leak Has Stopped
After completing the repair, allow the cistern to refill and listen for several minutes.
The toilet should stop making continuous filling noises once the tank reaches its correct water level. Check the floor around the toilet and the supply connections for signs of water.
You can also repeat the food-colouring test to check whether water is leaking from the cistern into the bowl.
If your home has a water meter, you can check whether it moves while all water outlets are unused. However, movement can indicate a leak anywhere in the plumbing system, not necessarily the toilet. Make sure other water-using appliances are off before carrying out this check.
When Should You Call a Plumber?
Contact a plumber if:
- Water is leaking from the cistern, its base, or the supply connection.
- The isolation valve is stuck or damaged.
- The cistern or flushing mechanism is cracked.
- You cannot identify the faulty part.
- The toilet continues running after the relevant parts have been checked or replaced.
- You are not comfortable disconnecting the water supply or removing the valve assembly.
A professional can identify the cause and help prevent further damage.
How Much Does It Cost to Fix a Running Toilet?
The cost depends on the faulty part, the type of cistern, the replacement part’s quality, and local labour charges.
A simple float adjustment or cleaning may cost nothing if you already have the necessary tools. Replacing a flapper, flush-valve seal, or fill valve will involve the cost of the part, while more complicated repairs may require a plumber.
Prices vary between hardware shops and locations in Nigeria. Check the cost of a compatible part locally before buying it, and compare the total repair cost with a plumber’s quotation.
How Long Does It Take to Fix a Running Toilet?
A simple adjustment or cleaning may take around 15–30 minutes for someone familiar with the mechanism. Replacing a valve or working with an unfamiliar cistern can take longer.
Allow enough time to identify the cause, fit the correct part, refill the cistern, and test the repair. Do not rush the job just to finish within a particular time.
Final Thoughts
A running toilet is often caused by a worn flush-valve seal, an incorrectly adjusted float, or a faulty fill valve. Start by checking the water level and performing the food-colouring test. Then clean, adjust, or replace the relevant part as needed.
Use replacement parts that match your cistern, check for leaks after the repair, and call a plumber if the problem persists or you cannot safely complete the work.
Fixing the cause early can help reduce unnecessary water waste and prevent a small plumbing problem from becoming a bigger one.